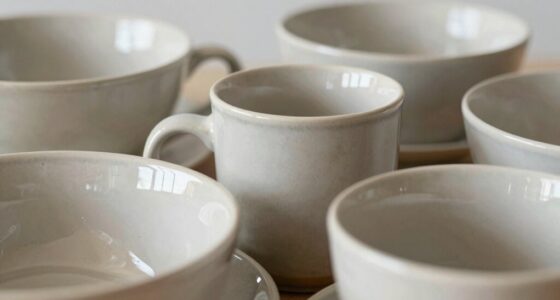

Crazing, pinholing, and crawling are common glaze issues caused by factors like thermal mismatch, gases, and application techniques. Crazing happens when the glaze and clay expand differently during cooling, creating fine cracks. Pinholing results from trapped gases, and crawling occurs if the glaze isn’t applied properly or doesn’t adhere well. Managing these defects involves adjusting formulas, firing schedules, and application methods. Keep exploring to discover effective ways to prevent and fix these surface flaws.
Key Takeaways
- Crazing results from a mismatch in thermal expansion between glaze and clay body, causing surface cracks.
- Pinholing occurs when trapped gases escape during firing, creating tiny holes or bubbles on the glaze surface.
- Crawling happens due to improper glaze application or poor adhesion, leading to uneven patches or surface failure.
- Proper firing schedules, glaze formulation, and surface preparation are essential to prevent these defects.
- Minor flaws can often be concealed or repaired with compatible glazes and strategic decorative techniques.

Coconix Tile & Stone Repair Kit | Fix Cracks, Chips, and Scratches on Bathtubs, Tile and Stone Floors, Walls, and Counters | Easy Application with Kneadable Putty
1 MILLION HAPPY CUSTOMERS: Trusted worldwide, our repair kits have helped over a million people restore their favorite…
As an affiliate, we earn on qualifying purchases.
As an affiliate, we earn on qualifying purchases.
Understanding the Nature of Crazing in Glazes
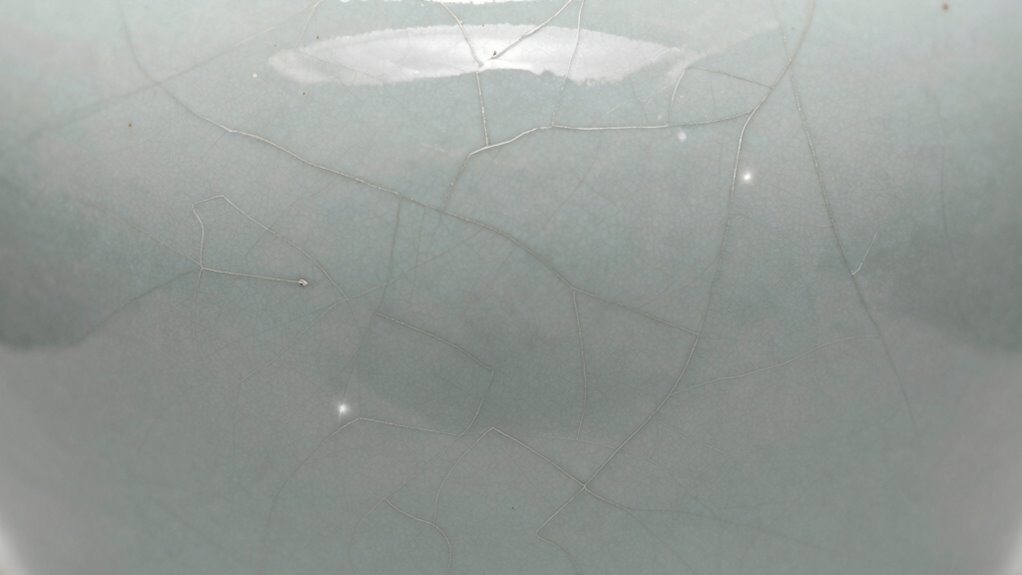
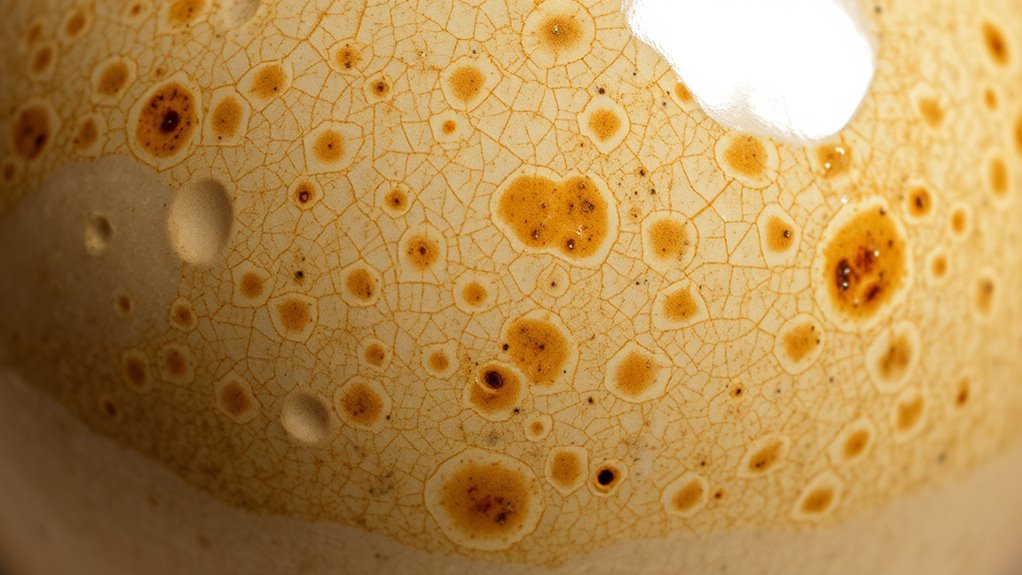
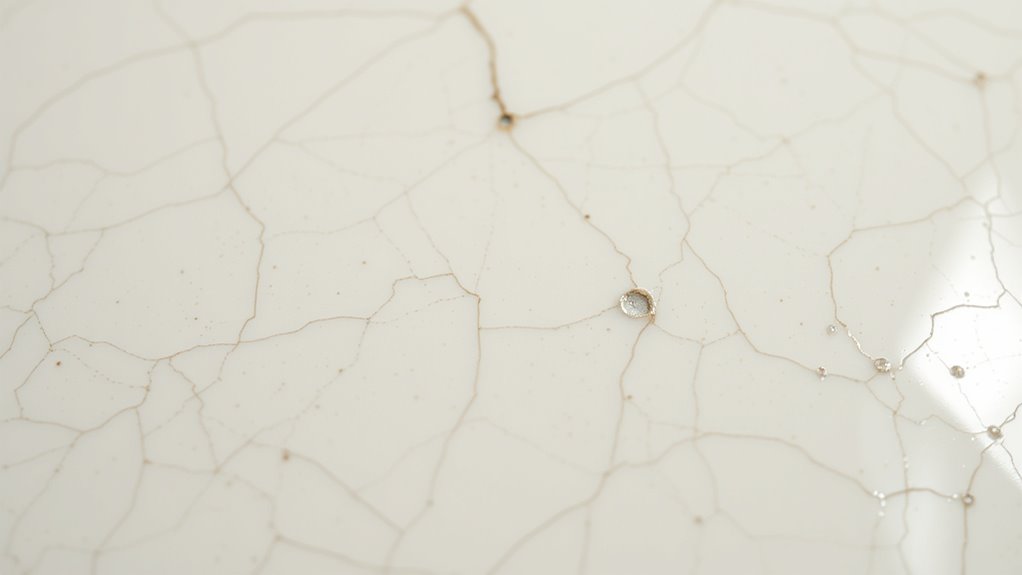
Crazing occurs when a glaze develops a network of fine cracks on the surface, often as a result of mismatched thermal expansion between the glaze and the clay body. This phenomenon, known as glaze crazing, happens because the glaze expands more or less than the clay during cooling. If the glaze’s expansion rate exceeds that of the clay, it contracts more as it cools, causing stress that leads to cracking. Conversely, if the glaze expands less, it can pull away from the surface, creating stress points. Understanding glaze expansion is essential to preventing crazing. When the expansion rates are incompatible, cracks form to relieve internal stress. Recognizing this helps you select proper glaze formulations and firing schedules to minimize glaze crazing. Additionally, firing temperature plays a crucial role in influencing the expansion properties of both the glaze and the clay body, impacting the likelihood of crazing. Being aware of thermal expansion mismatch can help potters fine-tune their processes for better results.

Pasler Underglaze Set – 2 fl oz/60 ml, Concentrated Opaque Liquid Underglaze for pottery bisque, Set of 12 Colors
Concentrated, opaque liquid colors ready to use on pottery bisque or greenware. Cover with transparent glaze for surface…
As an affiliate, we earn on qualifying purchases.
As an affiliate, we earn on qualifying purchases.
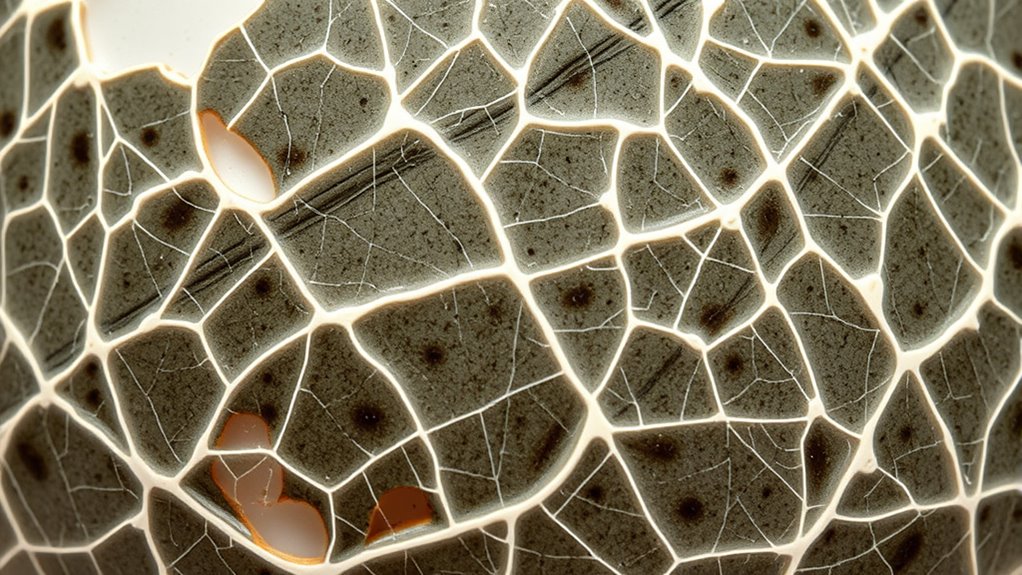
Causes and Prevention of Pinholing in Pottery

Have you ever noticed tiny holes or bubbles on the surface of your glazed pottery? These are pinholes, often caused by issues in glaze chemistry or improper glaze layering. Pinholing occurs when gases form during firing and escape through the glaze, leaving small holes. To prevent this, guarantee your glaze recipe is well-balanced, reducing volatile ingredients that release gases. Proper glaze layering also helps; applying too thick a coat traps gases beneath the surface. Additionally, mixing your glaze thoroughly prevents uneven gas release. Firing schedules matter too—gradual heating allows gases to escape safely. By understanding how glaze chemistry influences gas formation and applying consistent layering techniques, you can minimize pinholing and achieve a smooth, professional finish on your pottery. Ensuring glaze chemistry is properly balanced is key, as imbalances can increase the likelihood of gas formation and pinholing.

Digital Pyrometer F,C Pottery Ceramic Glass Annealing kiln Oven Thermometer Gauge Thermocouple Probe Sensor
Digital Pyrometer Temperature range: -50°C to 1300°C ( -58°F to 2372°F)
As an affiliate, we earn on qualifying purchases.
As an affiliate, we earn on qualifying purchases.
Identifying and Fixing Crawling in Glaze Applications

When your glaze forms uneven patches or fails to cover the surface smoothly, it’s likely experiencing crawling. To identify it, look for areas where the glaze has pulled away or reveals underlying clay. Fixing crawling involves adjusting your technique and glaze layering. Consider these steps:
- Confirm your surface is clean and free of dust or grease before applying glaze.
- Thin your glaze if it’s too viscous, which helps achieve even coverage and prevents the glaze from pulling away.
- Use consistent, smooth application techniques to promote uniform glaze layering.
- Experiment with color blending to create a seamless transition, reducing the tendency for glaze to crawl. Recognizing these signs and making adjustments will improve your glaze application and prevent crawling in future pieces.

Dandat 34 Pcs Pottery Tools Supplies Ceramic Precision Applicator Slip Trailing Bottles Ceramic Precision Tips Applicator 3 Ounce Clay Tools Set Needle Tip Squeeze Bottle for Pottery Glaze(Blue)
Pottery Tools Set: you will receive 3 ounce pottery applicator bottle, 12 plastic steel needles, 2 plastic funnels,…
As an affiliate, we earn on qualifying purchases.
As an affiliate, we earn on qualifying purchases.
The Role of Glaze Composition and Fit

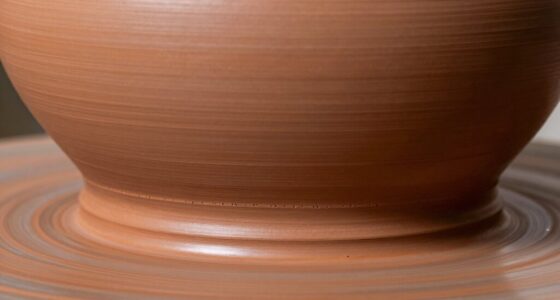
Understanding the composition of your glaze and how well it fits your pottery body is essential for achieving a smooth, durable finish. Glaze composition determines melting behavior, viscosity, and adhesion, all of which influence the final result. A well-balanced glaze fit ensures the glaze expands and contracts at similar rates as the clay body during firing, preventing issues like crazing or crawling. If your glaze is too rigid compared to the clay, it may craze; if too flexible, it may peel or crawl. Adjusting the glaze composition, such as modifying silica, flux, or alumina levels, helps achieve ideal glaze fit. When your glaze and body work harmoniously, you’re more likely to prevent defects and produce a consistent, professional-looking piece.
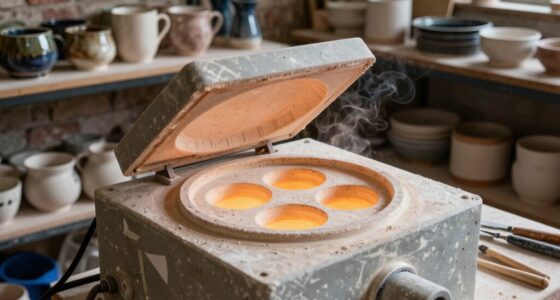
Temperature and Firing Schedules’ Impact on Glaze Defects
Your firing temperature substantially influences glaze quality, affecting how it melts and bonds to the surface. By optimizing your firing schedule, you can reduce common defects like crawling or pinholing. Adjusting your temperature and timing strategies helps achieve a smooth, durable glaze finish. Additionally, understanding how glaze materials interact at different temperatures can further improve your results.
Firing Temperature Effects
Firing temperature plays a crucial role in determining the quality of a glaze, as slight variations can lead to significant defects. If the temperature is too low, glaze melting may be incomplete, causing pinholes or crawling. Conversely, excessive heat can cause excessive melting, leading to crazing or running. The firing atmosphere also influences glaze behavior, affecting oxidation or reduction reactions that alter glaze composition. To optimize results, consider these factors:
- Precise control of peak temperature ensures proper glaze melting without over-firing.
- Slow cooling can reduce stress and prevent crazing.
- Adjusting firing atmosphere influences glaze chemistry and surface tension.
- Consistent firing schedules help maintain uniform glaze application and melting behavior.
Understanding these elements helps you avoid defects and achieve a smooth, durable glaze finish.
Schedule Optimization Strategies
Optimizing your firing schedule is key to minimizing glaze defects and ensuring a consistent, high-quality finish. Adjusting temperature ramps and soak times directly influences glaze chemistry and kiln atmosphere, reducing issues like crazing or pinholing. Slow heating allows glazes to mature evenly, preventing stress buildup. Pay attention to cooling rates, as rapid cooling can cause stresses leading to crawling. Here’s a quick guide:
| Firing Stage | Key Focus | Effect on Glaze Defects |
|---|---|---|
| Heating | Controlled ramp | Reduces crazing risk |
| Soaking | Extended soak | Ensures even glaze melt |
| Cooling | Slow cool | Prevents stresses |
| Atmosphere | Oxidation vs. reduction | Influences glaze fit |
Additionally, understanding the impact of firing atmosphere can help you fine-tune your process for better glaze adhesion and reduced defects.
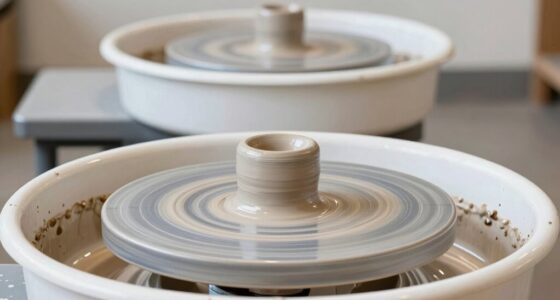
Surface Preparation and Its Effect on Glaze Quality

Surface preparation plays a crucial role in determining the final quality of a glaze. Proper surface cleaning guarantees your piece is free of dust, oils, and residues that can cause defects. When preparing, consider clay body compatibility; incompatible clays can lead to uneven absorption and glaze issues. To improve results, focus on these key steps:
- Clean thoroughly to remove surface contaminants.
- Ensure the clay body is compatible with your glaze formulation.
- Sand or burnish surfaces to create a smooth, even foundation.
- Test small samples to verify surface treatment effects.
- Incorporate AI analytics to predict and optimize surface preparation techniques based on past firing data.
These steps help achieve a consistent glaze layer, reducing defects like crawling or pinholing caused by surface irregularities or incompatibilities. Well-prepared surfaces are essential for a durable, glossy, and defect-free finish.
Troubleshooting Common Glaze Problems During Firing

When your glaze doesn’t turn out as planned, recognizing the common issues that can occur during firing is crucial. You need to identify what causes crazing, prevent pinholing, and manage crawling problems effectively. Addressing these problems promptly will help you achieve smoother, more reliable results. Understanding the role of glaze composition and firing temperature can also significantly impact the outcome in mastering R sounds in speech therapy. Additionally, controlling factors like glaze viscosity can help maintain consistency and improve firing success.
Identifying Crazing Causes
Have you ever noticed fine cracks forming on your glazed pottery after firing? Crazing often results from issues with glaze chemistry or the firing atmosphere. To identify crazing causes, consider these factors:
- Mismatch in thermal expansion: Check if your glaze’s expansion rate differs markedly from the clay body.
- Glaze formulation: Inaccurate glaze recipe or improper raw materials can lead to stress points.
- Firing temperature: Over-firing or under-firing alters glaze viscosity, increasing crazing risk.
- Firing atmosphere: Oxidizing or reduction atmospheres affect glaze melting and stress development.
Preventing Pinholing Formation
Pinholing is a common glaze defect that can detract from the appearance and integrity of your pottery, but it’s often preventable with proper firing techniques. To reduce pinholing, focus on careful glaze layering; avoid overly thick coats that trap air bubbles. Applying surface polishing before glazing helps create a smooth, even surface that minimizes trapped gases. Confirm your glaze is well-mixed and free of air pockets, as these can cause pinholes during firing. Additionally, firing at the correct temperature allows gases to escape gradually, preventing them from forming pinholes. Properly drying your piece before firing also reduces moisture that can generate steam and create pinholes. Maintaining consistent firing schedules and monitoring kiln temperature ramps can further prevent glaze defects like pinholing. By combining thoughtful glaze layering with surface polishing and controlled firing, you can considerably decrease pinholing in your pottery. Incorporating precise firing protocols ensures gases escape steadily, further minimizing defect formation.
Managing Crawling Issues
Crawling occurs when glaze beads or pulls away from the surface during firing, creating an uneven or patchy finish. To manage this issue, focus on controlling glaze layering and ensuring color consistency. Using a high-quality airless sprayer during application can help achieve more even coats, reducing the risk of crawling. 1. Apply thinner glaze coats to reduce tension and prevent the glaze from pulling away. 2. Clean bisque ware thoroughly to remove dust and oils that can cause adhesion problems. 3. Mix your glaze well to maintain uniform color and consistency, reducing the risk of crawling. 4. Adjust firing schedules if needed, as rapid temperature changes can exacerbate crawling, especially with thick glaze layers. Additionally, understanding glaze chemistry can help in selecting formulations less prone to crawling and other defects. Being aware of compatibility issues between the glaze and clay body can also prevent such defects from occurring during firing. Furthermore, controlling application techniques can significantly improve glaze adhesion and reduce crawling problems. Incorporating proper surface preparation techniques can further enhance glaze bonding and minimize defects.
Techniques for Repairing and Concealing Glaze Flaws

When addressing glaze flaws, the key is to select techniques that effectively conceal or repair the imperfections without compromising the overall appearance. Glaze layering is a useful method—you can carefully apply additional coats to hide minor flaws or uneven spots, blending them seamlessly into the existing surface. Decorative techniques, such as using contrasting glazes or textured finishes, can also draw attention away from flaws and add visual interest. Sanding lightly with fine abrasive can smooth out rough areas before applying touch-up glazes. For more prominent defects, you might consider patching with a compatible glaze, then disguising the repair with strategic decoration. Always test your approach on a sample piece first to ensure the repair integrates well with the original glaze and achieves a cohesive finish.
Best Practices for Achieving Smooth and Durable Finishes
Achieving a smooth and durable glaze finish requires careful preparation and attention to application techniques. To enhance your results, focus on proper glaze layering and effective color blending. First, ensure your bisque ware is thoroughly cleaned to prevent imperfections. Second, apply multiple thin glaze coats rather than a thick one, allowing proper drying between layers. Third, blend colors smoothly to avoid harsh lines and achieve a uniform appearance. Fourth, maintain consistent application pressure and speed to prevent pinholes and crawling. Additionally, monitor firing temperatures closely, as uneven heating can compromise durability. These practices help minimize defects and produce a sleek, resilient finish that resists crazing and other common issues.
Frequently Asked Questions
How Do Environmental Factors Influence Glaze Defects During Cooling?
Environmental factors like temperature fluctuations and humidity levels markedly impact glaze defects during cooling. You might notice crazing or crawling if the kiln cools too quickly or if humidity causes uneven drying. Sudden shifts in temperature create stresses that crack the glaze, while high humidity can weaken the glaze’s bond to the clay body. To minimize defects, control your cooling rate and keep humidity levels steady throughout the process.
Can Glaze Defects Be Completely Eliminated Through Post-Firing Treatments?
You can’t fully eliminate glaze defects through post-firing treatments, but you can use glaze reinforcement and defect masking techniques to improve their appearance. These methods help hide crazing, pinholing, or crawling, making the defects less noticeable. While they don’t remove the issues entirely, they can considerably enhance the overall finish, giving your piece a cleaner look without requiring a new firing or extensive repairs.
What Role Does Glaze Application Technique Play in Defect Formation?
Your technique substantially impacts defect formation. Precise application promotes consistency, preventing crazing, pinholing, and crawling. When you focus on technique precision, you guarantee even coverage and proper glaze thickness. Careful handling, steady strokes, and consistent layering minimize stress and surface imperfections. By mastering application consistency, you reduce the risk of defects, ensuring a flawless finish. So, your careful technique can make all the difference in avoiding glaze flaws.
Are There Specific Clay Bodies More Prone to Glaze Crazing?
Yes, certain clay bodies are more prone to glaze crazing. You should consider clay body composition, especially high percentages of fluxes and silica, which can cause the glaze to shrink more than the clay during cooling. Also, firing temperature plays a role; firing too hot or too cool can alter the glaze’s fit. Adjusting your clay mix and firing schedule helps minimize crazing issues.
How Does Atmospheric Firing Versus Electric Firing Affect Glaze Integrity?
You might be surprised how firing atmospheres impact glaze strength. Electric firing, with its consistent heat, often preserves glaze chemistry, reducing stress and crazing risks. But atmospheric firing introduces variable conditions that can alter glaze chemistry unpredictably, heightening the chance of defects. If you’re seeking flawless finishes, understanding these differences is vital. The choice of atmosphere can make or break your glaze’s integrity—are you prepared to master this delicate balance?
Conclusion
Think of glaze defects like cracks in a road—they reveal underlying issues that, if addressed, lead to a smoother journey. When you understand crazing, pinholing, and crawling, you can fix and prevent these flaws, ensuring your pottery’s surface is flawless and durable. With careful preparation, proper firing schedules, and thoughtful glaze choices, you’ll create beautiful finishes that stand the test of time—turning potential pitfalls into polished perfection.