To keep glitter from taking over your house, store it in small, eco-friendly containers with secure lids—think clear jars that let you see the shades. Label each container clearly and organize them in dedicated drawers or shelves to stay tidy. Use funnels when transferring glitter to prevent spills, and regularly review and discard old or dried-out glitter. Plastic storage options with compartments help keep everything in place. Explore more tips for mess-free organization to maintain a clean craft space.
Key Takeaways
- Use small, labeled, eco-friendly jars with secure lids to keep glitter organized and prevent spills.
- Store jars in dedicated drawers or shelves, stacking or compartmentalizing to maximize space.
- Incorporate clear containers for easy identification and quick access to different glitter types.
- Regularly review and discard old or dried glitter to reduce clutter and maintain an organized collection.
- Use funnels for transferring glitter and double-check lids are tightly sealed after each use.
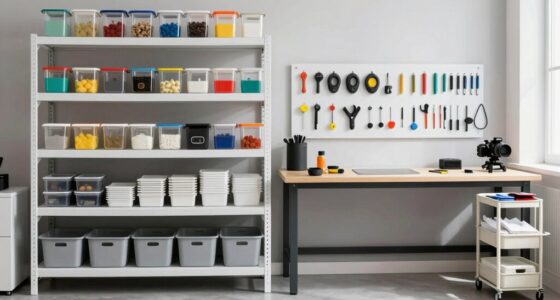
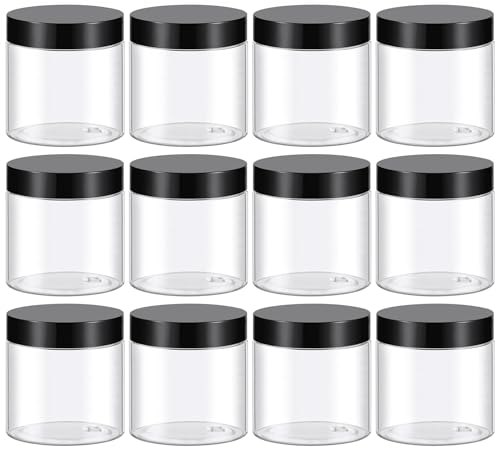
Storing glitter properly is essential to keep it from spilling, clumping, or becoming difficult to use later. When you’re dealing with tiny, shimmering particles, you need a system that keeps everything contained and easy to find. One effective way is to use eco-friendly containers that are durable and environmentally conscious. Look for small, clear jars made from recycled materials or biodegradable plastics. These containers allow you to see the glitter inside, so you don’t have to open each one to find the shade or type you need. Plus, eco-friendly options help reduce your plastic waste, aligning your storage habits with sustainability goals.
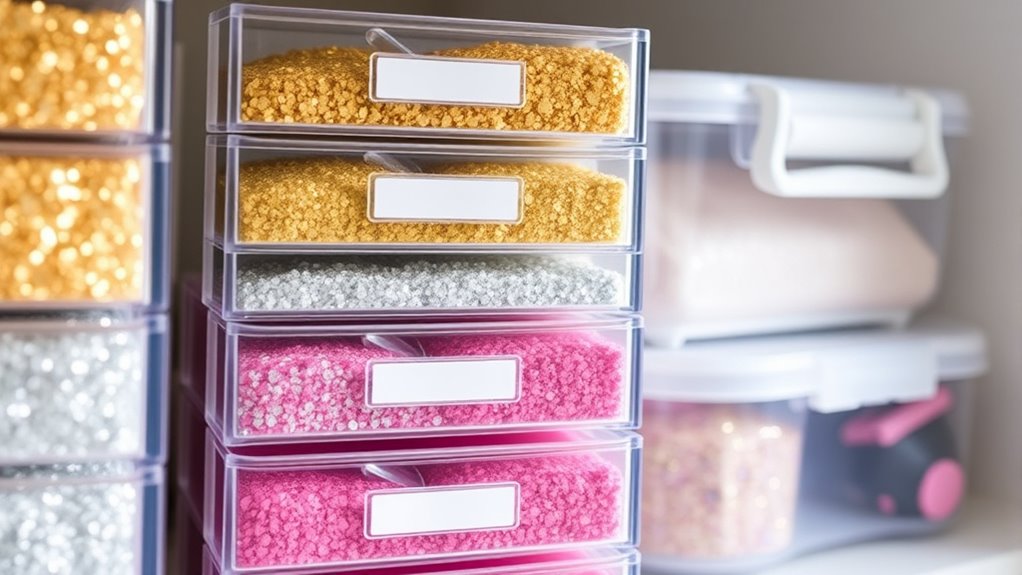
Once you’ve chosen the right containers, label organization becomes your best friend. Label each jar with the color, type, or even the project it’s designated for. Use waterproof, smudge-proof labels or write directly on the container with a permanent marker. This way, you save time hunting through multiple jars and prevent accidental spills when rummaging through clutter. Clear labels also make it straightforward to put everything back in its place after use, maintaining a tidy workspace. Additionally, consider labeling techniques that resist wear and tear over time to keep your organization intact. Incorporating storage organization strategies can further optimize your space and efficiency. Regularly reviewing your collection can help you identify which types of glitter are most useful, preventing unnecessary clutter and ensuring your storage remains efficient. Using proper storage methods can also help extend the lifespan of your glitter and keep it looking vibrant.
To keep your glitter from spilling everywhere, make sure the containers you select have tight-fitting lids. Some jars come with snap-on or screw-on tops, which provide a secure seal. When you’re finished working with the glitter, double-check that lids are securely fastened. Consider using small funnels when transferring glitter into your containers to minimize mess and waste. This is especially useful if you’re pouring glitter from larger bags or bulk containers, as it helps control the flow and reduces the risk of spilling.
Organizing your glitter collection isn’t just about having the right containers and labels—think about storage placement too. Store your jars in a dedicated drawer, box, or shelf that’s away from areas prone to moisture or temperature fluctuations. Keeping your glitter in a consistent, designated spot makes it easier to maintain organization over time. If you have a lot of different types, consider stacking your jars or using compartmentalized organizers to keep similar shades grouped together. Additionally, choosing airtight containers can help preserve the quality of your glitter and prevent it from becoming dull or clumpy over time. Using secure storage options can also help prevent accidental spills and keep your workspace safe and tidy.
Finally, periodically review your collection. Discard any dried-out or old glitter, and consolidate smaller jars if you find yourself with too many tiny containers. This ongoing maintenance ensures your storage remains efficient and clutter-free. By choosing eco-friendly containers, labeling everything clearly, sealing jars tightly, and organizing thoughtfully, you’ll keep your glitter contained, accessible, and ready for your next creative project without it taking over your house.
TUZAZO 4 Oz Plastic Container Jars with Lids BPA Free, Empty Round Clear Cosmetic Containers Plastic Slime Jars for Lotion, Cream, Ointments, Body Butter, Makeup, Travel Storage (12 Pack)
Super Value Pack: You will get 12 clear plastic containers with black lids and 12 labels.
As an affiliate, we earn on qualifying purchases.
As an affiliate, we earn on qualifying purchases.
Frequently Asked Questions
Can I Reuse Glitter Containers for Different Colors?
Yes, you can reuse glitter containers for different colors. Just make sure to clean them thoroughly to avoid color mixing. Recycling glitter containers is eco-friendly and cost-effective. Label each container clearly with its color to prevent confusion. When switching colors, remove any leftover glitter, wash the container, and then refill it with the new color. This way, you keep your glitter organized and ensure each container is used efficiently.
What’s the Best Way to Clean Glitter Spills?
To clean glitter spills effectively, start with a damp cloth or piece of tape to pick up most of the glitter, preventing further spread. Use a vacuum with a brush attachment for thorough glitter cleanup on carpets or upholstery. To prevent future spills, consider using a shallow tray or container when working with glitter, which helps with spill prevention. Regularly wiping surfaces also keeps glitter from scattering everywhere.
How Long Does Glitter Typically Last Before It Clumps?
Glitter typically lasts several months before it starts clumping, especially if stored properly. To extend its lifespan and prevent clumping, keep it in an airtight container away from moisture and heat. Regularly shake the container to maintain even distribution, and avoid exposure to humidity. Proper storage not only prolongs glitter’s usability but also keeps it tidy, so you can enjoy its sparkle without worrying about it turning into a sticky mess.
Are There Eco-Friendly Storage Options for Glitter?
Your glitter obsession doesn’t have to harm the planet! Opt for biodegradable packaging or recycled containers to store your sparkle sustainably. These eco-friendly options are like tiny warriors fighting for the environment, preventing glitter from taking over your house and the Earth. You’ll love knowing your storage choices are kind to nature while keeping your glitter perfectly contained. Embrace green solutions and make your craft space both fabulous and eco-conscious!
How Do I Prevent Glitter From Sticking to Unwanted Surfaces?
To prevent glitter from sticking to unwanted surfaces, use surface barriers like painter’s tape or craft paper around your work area. This creates a glitter containment zone, making cleanup easier. Additionally, lightly mist surfaces with a spray of water or a glue adhesive before working; the glitter will stick better and be less likely to scatter. Always wear a disposable apron or coveralls to protect your clothing and skin from stray glitter.

6 Pack Medium Clear Storage Bins with Lids, Acrylic Arts and Craft Storage Containers, Stackable Clear Plastic Craft Storage Bins with Handles for Pantry Organizers and Storage, Kitchen, Fridge,Office
【MULTI-PURPOSE PLASTIC STORAGE BINS FOR ANY ROOM】: These clear storage bins with lift-off lids are perfect for every…
As an affiliate, we earn on qualifying purchases.
As an affiliate, we earn on qualifying purchases.
Conclusion
Think of your glitter as tiny stars waiting to shine. When stored properly, they stay contained like a treasure chest, ready to sparkle on your terms. If you let them roam free, they’ll spread like wildfire, turning your home into a glittering galaxy you can’t control. So, guard your stash carefully, and let your creativity shine without the chaos—your sparkling universe is just a well-organized space away from chaos.

Yesland 20 Pack Plastic Spice Jars Bottles, 5 Oz PET Spice Containers BPA Free with Black Cap, Empty Seasoning Jars Glitter Storage Containers for Storing Spice Herbs Powders Glitter
Each spice jar holds 5 fl oz (2 oz dry capacity). Dimensions: 3.5"H x 2"Dia. Made from food-grade…
As an affiliate, we earn on qualifying purchases.
As an affiliate, we earn on qualifying purchases.

Hlotmeky Plastic Organizer Box with Dividers Bead Organizer 15 Large Grids Tackle box Organizer Clear Snackle Box Container
What You Get: Large 15 grid box (10.8*6.3*2.2inch) with environmental-friendly tough plastic construction, be your lure box, jewelry…
As an affiliate, we earn on qualifying purchases.
As an affiliate, we earn on qualifying purchases.