
To remove stabilizer without ruining your stitches, take your time and use gentle techniques suited to the stabilizer type. Carefully tear, peel, or trim away tear-away and cut-away stabilizers, working slowly to avoid stress on stitches. For water-soluble stabilizers, soak or dab with water or a gentle solvent. Using precise tools like tweezers and small scissors helps prevent damage, and staying patient guarantees your embroidery stays intact—keep going, and you’ll discover how to do it flawlessly every time.
Key Takeaways
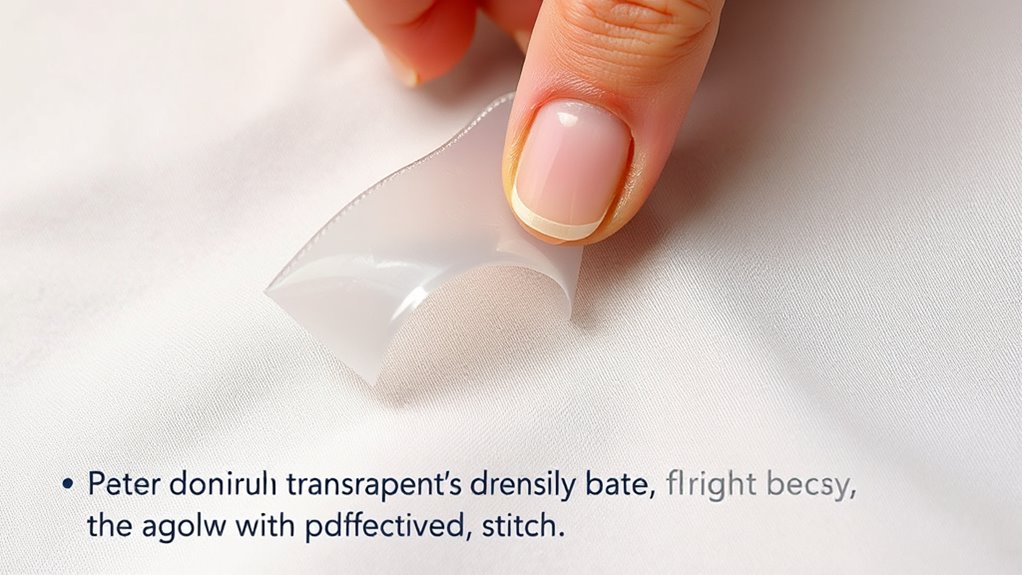
- Gently tear or peel stabilizer along the edges, working slowly to avoid stressing stitches.
- Use soft tools like tweezers or embroidery picks to lift stabilizer without pulling stitches.
- For water-soluble stabilizer, soak the fabric briefly in cool water to dissolve it safely.
- Test a small area first to ensure the stabilizer dissolves or loosens without damaging the fabric.
- Patience is key—remove stabilizer gradually, checking stitches frequently to prevent tears or puckering.
amoolo Clear Safety Glasses, ANSI Z87.1 Impact Resistant, 24 Pack, Adult
ANSI Z87.1 COMPLIED. Made of Premium Raw Polycarbonate Material from Japan, Amoolo protective glasses offer all-around eye protection...
As an affiliate, we earn on qualifying purchases.
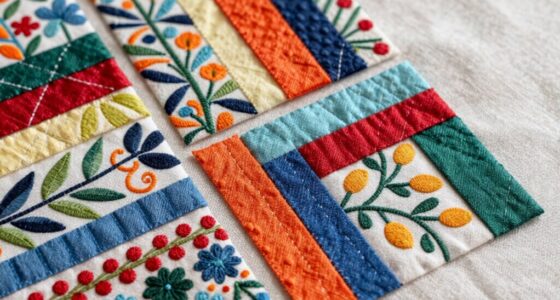
Understanding Different Types of Stabilizer

To effectively remove stabilizer, you first need to understand the different types available. Knowing the fabric compatibility is key because some stabilizers are designed for delicate fabrics, while others suit sturdier materials. There are tear-away, cut-away, and wash-away stabilizers, each serving different purposes. Tear-away stabilizers are easy to remove but may leave residues on lighter fabrics, whereas cut-away stabilizers offer more permanent support. Wash-away stabilizers dissolve completely in water, making them ideal for lace or sheer fabrics. When choosing stabilizer brands, look for reputable options known for quality and ease of removal. Selecting the right type based on your fabric and project guarantees smooth removal later without damaging your stitches or fabric, streamlining your entire sewing process. Understanding different stabilizer types is essential for achieving the best results and preserving your fabric’s integrity during removal. Additionally, considering the fabric type and project requirements can help you choose the most suitable stabilizer to prevent issues during removal. Knowing the stabilizer removal process can also make your sewing experience much more efficient and damage-free. Moreover, familiarizing yourself with the stabilizer’s composition can assist in selecting the best removal method to avoid residue or fabric damage. A thorough understanding of stabilizer characteristics can further improve your ability to select and remove stabilizer effectively.

50 Pack Clear Safety Glasses for Men Women,Scratch & Impact Resistant
50-Pack Clear Safety Glasses: Each set contains 50 pairs of clear safety glasses suitable for most face shapes....
As an affiliate, we earn on qualifying purchases.
Preparing Your Workspace for Removal

Before you start removing stabilizer, it’s essential to prepare your workspace to guarantee a smooth and mess-free process. Clear a clean, flat surface with good lighting to see your fabric clearly. Gather your tools, such as tweezers, scissors, and a damp cloth, to make removal easier. Consider the fabric types you’re working with, as delicate fabrics like silk or lace require gentle handling. Also, think about the embroidery techniques used, since some stitches are more prone to damage during stabilizer removal. Protect your workspace from potential messes by laying down a towel or paper. Organizing everything beforehand minimizes disruptions and ensures you can focus solely on carefully removing the stabilizer without risking your stitches or fabric. Free Floating techniques can also help you better manage the removal process, especially around intricate embroidery. Additionally, understanding safety precautions related to fabric and stabilizer removal can help prevent accidental damage. Incorporating knowledge of sound healing science can even promote a calm, focused mindset during delicate tasks, reducing the chance of mistakes. Creating a well-organized workspace aligned with ergonomic principles can further enhance precision and reduce fatigue during this delicate process. Moreover, maintaining a positive attitude and creative storytelling mindset can make the process more enjoyable and improve your overall craftsmanship.

Hoqiwild ANSI Z87.1 Clear Safety Glasses Bulk 120 pack, Safety Glasses for men and women, Scratch&Impact-Resistant Clear Protective Glasses for construction, lab, in-/outdoor work
【120PACK Individually Wrapped】Hoqiwild clear safety glasses are necessary choices for your work, companies, labs or clubs to protect...
As an affiliate, we earn on qualifying purchases.
Techniques for Removing Tear-Away Stabilizer
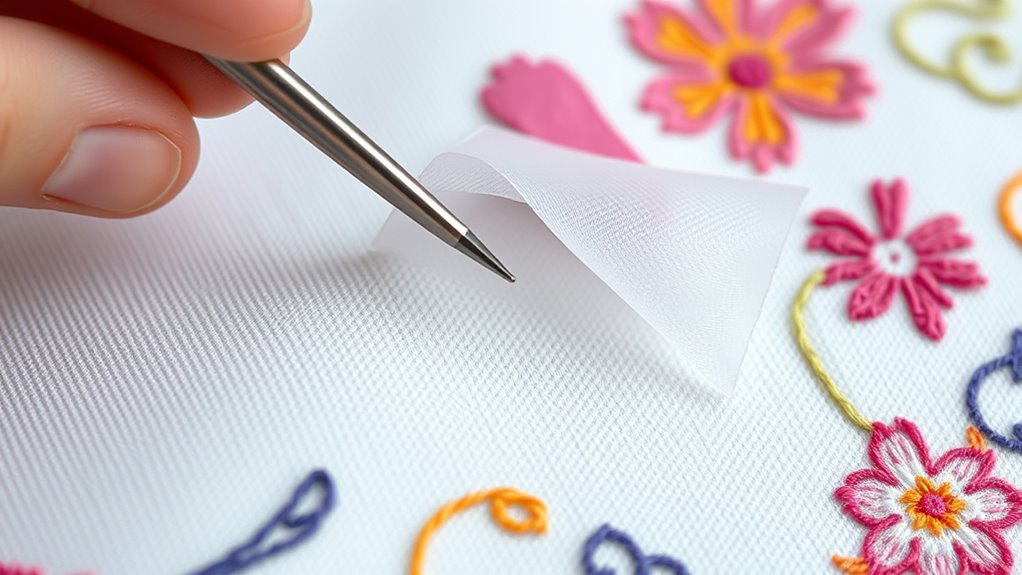
When removing tear-away stabilizer, gently start by tearing along the edges of your design, pulling small sections at a time to avoid stressing the fabric or stitches. As you work, consider stabilizer recycling by carefully collecting leftover pieces for future projects, reducing waste. Use embroidery software to preview where the stabilizer is most concentrated, guiding your tearing points for cleaner removal. If some pieces resist tearing, softly lift them with tweezers instead of force, preventing damage to your stitches. Keep your workspace organized, and work slowly to ensure stitches stay intact. Remember, patience is key—rushing can cause tearing or puckering. Proper technique ensures your design remains pristine, and recycling stabilizer helps make your embroidery process more sustainable. Additionally, familiarizing yourself with stabilizer types can help you choose the best material for your specific project, making removal easier and more efficient. Understanding fabric stability can also guide you in selecting the right stabilizer to support your stitches during removal. Moreover, adjusting stabilizer tension during hooping can facilitate easier removal without damaging your stitches. Being aware of different stabilizer adhesives can also aid in managing how securely the stabilizer adheres during embroidery, simplifying removal. Using the correct stabilizer weight can further make the removal process smoother and less stressful on your stitches.

TICONN Anti-Fog Safety Glasses for Men and Women, ANSI Z87.1 Scratch Proof Eye Goggles with Adjustable Arms and UV Protection (Clear, 1PK)
[DURABLE AND LIGHTWEIGHT] Crafted with premium polycarbonate, these safety glasses have exceptional durability and impact resistance while remaining...
As an affiliate, we earn on qualifying purchases.
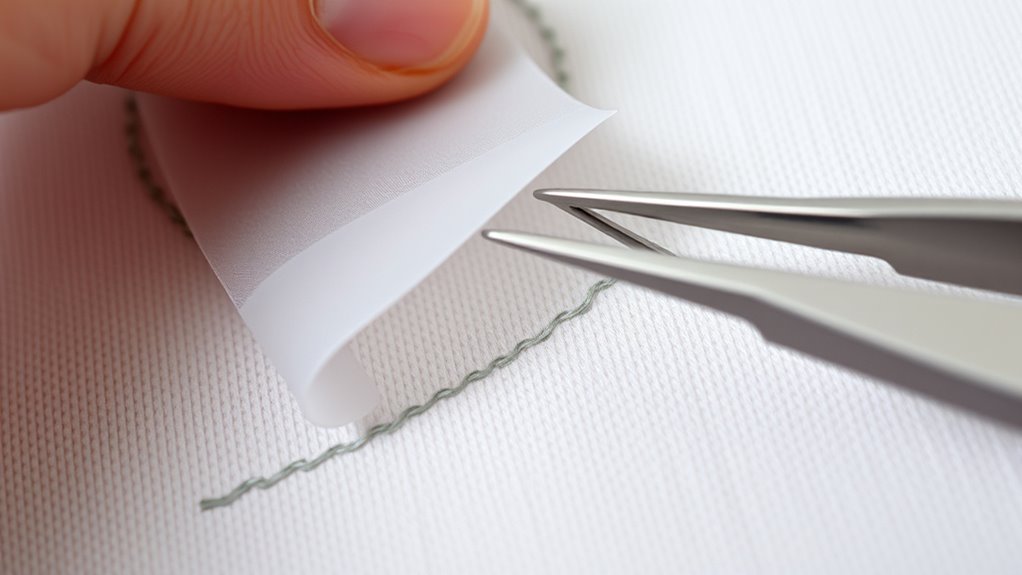
Safely Removing Cut-Away Stabilizer

Removing cut-away stabilizer safely requires careful handling to avoid damaging your fabric or stitches. To protect your embroidery design and maintain fabric stability, follow these steps:
- Gently trim excess stabilizer close to the stitches without pulling on the fabric. Proper stabilizer removal techniques can help prevent damage. Incorporating fabric stability awareness ensures your stitches remain intact throughout the process. Being mindful of stitch integrity during removal helps preserve your design quality.
- Use small, sharp scissors for precise cuts, avoiding the embroidery design.
- Carefully peel away larger pieces, working slowly to prevent pulling or fraying.
- Check the area frequently, ensuring stitches stay intact and fabric remains undamaged.
- Incorporating visual and auditory cues can help monitor the stability of stitches during removal.
Using Water or Solvents to Dissolve Water-Soluble Stabilizer
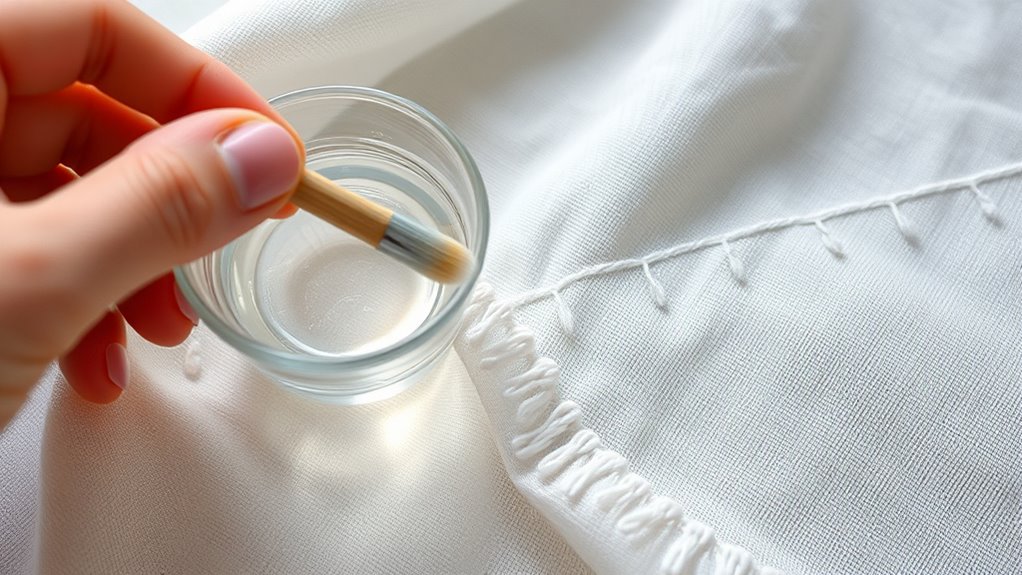
To eliminate water-soluble stabilizer, you need to select the appropriate solvent options and apply them carefully. Using techniques like gentle soaking or targeted brushing can make the process more effective. Remember to follow precautions to protect your fabric and ensure safe handling of the solvents.
Suitable Solvent Options
Are water or common solvents effective options for dissolving water-soluble stabilizers? Yes, but choosing the right solvent depends on solvent safety and fabric compatibility. Here are your options:
- Water – safest for most fabrics, dissolves water-soluble stabilizer quickly. Understanding water-soluble stabilizer properties can help you determine the most appropriate method. Additionally, knowing fabric safety is essential for preventing damage during stabilizer removal.
- Mild Detergents – diluted, can help if water alone isn’t enough; ensure fabric safety.
- Isopropyl Alcohol – effective for some stabilizers, but test fabric compatibility first.
- Commercial Solvents – specifically designed for stabilizer removal; check for fabric safety and follow manufacturer instructions. Using appropriate removal techniques can improve effectiveness and protect your fabric.
Application Techniques Effectively
Wondering how to effectively apply water or solvents for dissolving water-soluble stabilizer? First, identify your stabilizer type, as some respond better to specific methods. For water-soluble stabilizers, gently dampen the area with a soft cloth or sponge soaked in plain water, ensuring you don’t disturb your embroidery stitches. If using solvents, test a small area first to avoid damage. Use a clean applicator to apply the solvent carefully, targeting only the stabilizer. For embroidery techniques requiring delicate detail, you might prefer minimal liquid application to prevent distortion. Keep the fabric taut and avoid excessive rubbing. Additionally, employing safe application methods helps dissolve the stabilizer efficiently while preserving your stitches, giving you a clean removal without compromising your project’s quality.
Precautions During Removal
When using water or solvents to dissolve water-soluble stabilizer, taking precautions to protect your fabric and embroidery is vital. Handling stubborn residue or avoiding fabric damage requires careful steps.
- Test a small area first to confirm the solvent won’t harm your fabric.
- Use gentle, controlled application to prevent soaking the fabric excessively.
- Avoid scrubbing aggressively; instead, gently dab or peel away stabilizer.
- Keep the fabric damp to prevent fibers from fraying or warping.
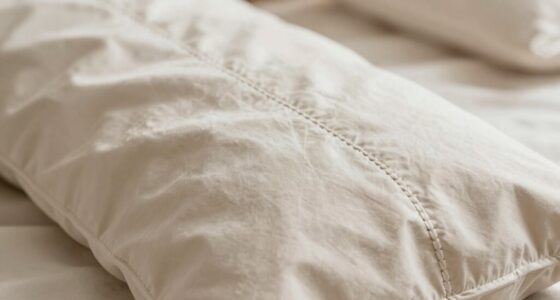
Tips for Gently Removing Stabilizer From Delicate Fabrics
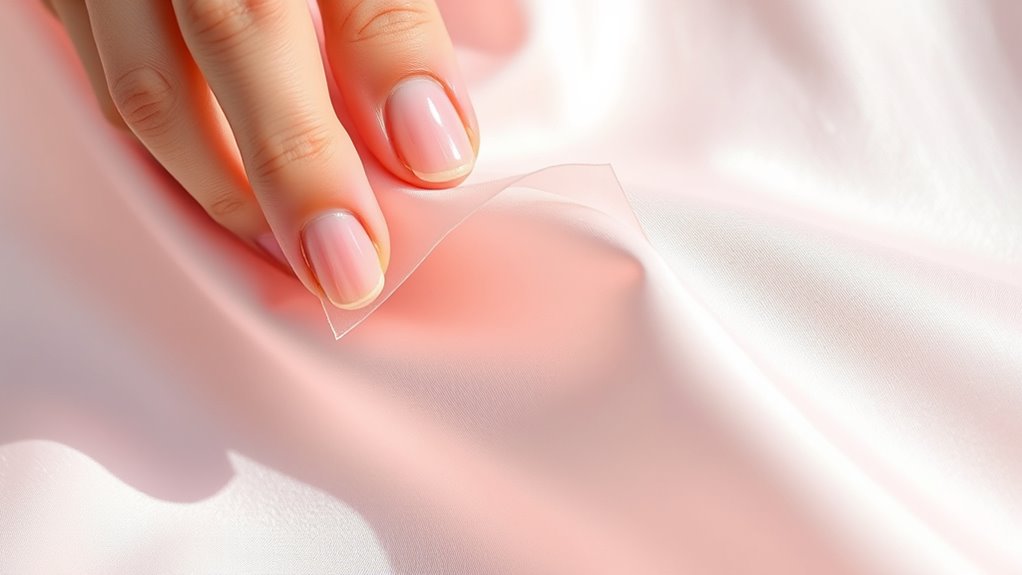
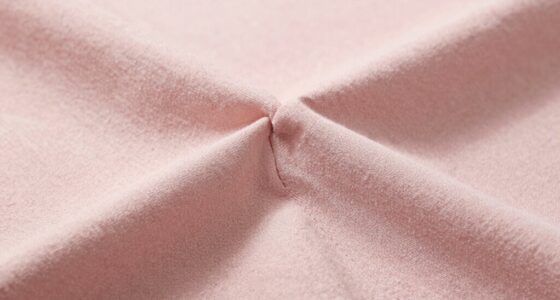
Gently removing stabilizer from delicate fabrics requires careful handling to prevent damage. Start by softly peeling away any loosened stabilizer with your fingers, avoiding force that could stretch or tear the fabric. If the stabilizer is water-soluble, soak the fabric briefly in cool water, allowing it to dissolve naturally without aggressive rubbing. For non-soluble stabilizers, use a damp cloth to gently dab and lift the stabilizer, ensuring you don’t disturb your embroidery stitches. Always consider fabric care by testing a small, inconspicuous area first. Remember, patience is key—rushing can ruin your embroidery techniques or damage delicate fibers. Take your time and handle the fabric with care to preserve both the fabric’s integrity and the quality of your stitched design.
Tools and Supplies That Make Removal Easier
Using the right tools can make removing stabilizer much easier. Gentle removal tools, specialized embroidery pickers, and adhesive removers are all helpful options. Having these supplies on hand guarantees a smoother, damage-free process.
Tools for Gentle Removal
Having the right tools can make removing stabilizer much easier and safer for your fabric. Using gentle tools prevents damage and maintains stitch quality. Here are four essentials:
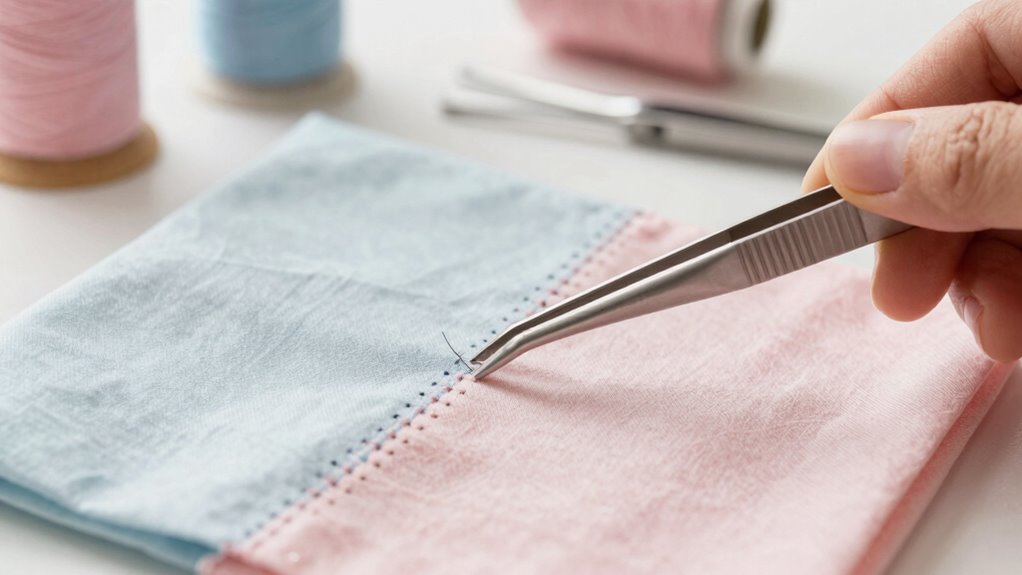
- Tweezers or Embroidery Picks – Perfect for lifting delicate stabilizer without pulling on stitches.
- Soft Cloths or Sponges – Use with water or fabric softeners to loosen stabilizer gently.
- Small Scissors – Great for trimming away stubborn bits without snipping your stitches.
- Adjustable Thread Tension Settings – Helps prevent puckering during removal, reducing stress on your fabric and maintaining proper tension.
These tools, combined with careful handling and proper tension, make stabilizer removal smoother and protect your stitches from damage. Remember, patience is key to a clean finish without ruining your embroidery work.
Specialized Embroidery Pickers
Specialized embroidery pickers are designed to make stabilizer removal more precise and effortless. These tools help you steer delicate stitches without damaging your fabric or embroidery. Using the right picker can also improve your embroidery machine maintenance by preventing unnecessary stress on machine parts. When selecting tools, consider fabric types and the stability of your stitches—softer fabrics need gentler tools. Here’s a quick guide:
| Tool Type | Best Use |
|---|---|
| Fine Point Tweezers | Removing small stabilizer fibers |
| Plastic Pickers | Gently lifting stabilizer from delicate fabrics |
| Curved Embroidery Pickers | Navigating tight stitch areas |
| Precision Knives | Cutting stubborn stabilizer residues |
Choosing the right tool streamlines removal, preserves your stitches, and enhances overall embroidery quality.
Helpful Adhesive Removers
Adhesive removers are essential tools that simplify the process of eliminating stubborn stabilizer residues. They help break down adhesive residue without damaging your fabric or stitches. When choosing a remover, consider fabric compatibility to prevent any discoloration or weakening. Here are some helpful options:
- Rubbing Alcohol: Effective for many fabrics, but test first to ensure no discoloration.
- Vinegar Solution: A gentle, natural option suitable for delicate fabrics.
- Commercial Adhesive Removers: Specifically designed for fabric use, ensuring compatibility.
- Baby Oil or Mineral Oil: Softens adhesive residue without harming fabric or stitches.
Using the right adhesive remover makes stabilizer removal easier and safer, ensuring your project stays pristine.
Common Mistakes to Avoid During Stabilizer Removal
Removing a stabilizer might seem straightforward, but many people make common mistakes that can damage the keyboard or affect its performance. One major error is rushing the process, which can tear the fabric or disturb your embroidery thread care. Be gentle and patient to avoid pulling or snagging stitches. Another mistake is neglecting proper fabric preparation techniques beforehand; skipping this step can cause uneven removal or fabric distortion. Additionally, using excessive force or sharp tools can ruin your work. Remember, stabilizer removal isn’t about quick fixes—it’s about precision. Carefully selecting the right tools and techniques helps prevent damage and ensures your stitches stay intact. Avoid these mistakes to keep your embroidery looking professional and your fabric in pristine condition.
Final Checks for a Flawless Embroidery Finish

Before calling your embroidery project complete, it’s vital to perform thorough final checks. First, examine the fabric texture to verify there are no puckers or uneven areas caused by stabilizer removal. Next, check the thread tension to confirm stitches are tight and uniform, not loose or skipped. Third, inspect the overall design for missed or incomplete details. Finally, gently run your fingers over the stitches to feel for consistency and smoothness. This helps catch issues with fabric stretching or tension imbalance. Address any irregularities promptly to prevent flaws from becoming permanent. Taking these steps guarantees your embroidery looks professional and polished, with a flawless finish that showcases your skill. Remember, meticulous final checks make all the difference in achieving a perfect result.
Frequently Asked Questions
Can Stabilizer Removal Damage the Embroidered Stitches?
Yes, removing stabilizer can damage your embroidered stitches if you’re not careful. Different stabilizer types, like tear-away or wash-away, require specific removal techniques to prevent pulling or distorting stitches. You should gently peel or dissolve the stabilizer, depending on its type, and avoid pulling on the stitches. Proper removal techniques confirm your embroidery stays intact and looks professional, so take your time and follow the recommended methods for each stabilizer type.
Is It Safe to Use Heat During Stabilizer Removal?
Using heat during stabilizer removal can be safe if you’re careful, but you need to prioritize heat safety to prevent fabric damage. Avoid high temperatures, and test on a small, inconspicuous area first. Use a low-heat setting on your iron or heat gun, and keep it moving to avoid burning the fabric or distorting stitches. Always monitor closely to protect your embroidery and fabric integrity.
How Do I Remove Stabilizer From Stretchy or Delicate Fabrics?
To remove stabilizer from stretchy or delicate fabrics, you should use gentle removal techniques tailored for fabric types. For water-soluble stabilizers, soak the fabric in lukewarm water to dissolve the stabilizer without damaging the fabric. For tear-away stabilizers, carefully peel or gently lift the stabilizer, avoiding excessive force. Always test a small area first, and work slowly to prevent stretching or tearing delicate fabrics during removal.
Can I Reuse Stabilizer After Removal?
Yes, you can reuse stabilizer after removal if it’s a reusable stabilizer designed for multiple uses. For eco-friendly removal, gently peel or carefully wash the stabilizer to preserve its integrity. Reusing stabilizer saves money and reduces waste, making it an eco-conscious choice. Just make certain it’s clean and intact before reapplying, and always follow the manufacturer’s instructions to maintain its effectiveness and avoid damaging your fabric or stitches.
What Are Eco-Friendly Options for Stabilizer Removal?
You can choose eco-friendly options like biodegradable stabilizers made from natural materials such as bamboo or cotton. For natural removal methods, gently peel or dissolve water-soluble stabilizers with warm water, avoiding harsh chemicals. These biodegradable options break down easily and are safe for the environment, while natural removal methods reduce waste and minimize chemical use. Always follow manufacturer instructions to guarantee your stitches stay intact and your project remains eco-friendly.
Conclusion
Now that you’ve learned how to remove stabilizer without ruining your stitches, you’re ready to dance through your embroidery journey. Think of it as gently peeling away a delicate layer to reveal the masterpiece beneath. With patience and the right tools, every stitch will sing in harmony, and your fabric’s beauty will shine through. Embrace the process like a gentle breeze—smooth, steady, and confident—bringing your embroidery dreams to life with flawless grace.