
When working with resin, bubbles often form if you pour too quickly, don’t mix thoroughly, or leave trapped air. Resin can yellow over time due to UV exposure and heat, especially if it’s not UV-resistant. Sticky surfaces usually mean incomplete curing or high temperatures during the process. While some fogging and yellowing are normal over time, understanding these causes helps you prevent or fix issues, and if you keep going, you’ll discover how to achieve clear, long-lasting results.
Key Takeaways
- Bubbles form from trapped air during pouring, improper mixing, or environmental humidity; controlled pouring and degassing help reduce this.
- Resin yellows over time due to UV exposure, heat, and chemical aging; using UV-resistant resin prolongs clarity.
- A sticky or tacky surface often indicates incomplete curing, insufficient exposure to UV light, or contamination during the process.
- Proper temperature control, gentle mixing, and slow pouring minimize bubbles and surface imperfections.
- Recognizing normal yellowing and fogging as part of aging helps differentiate between normal wear and potential issues needing troubleshooting.
Amazon Product B0BWYJWPG9
As an affiliate, we earn on qualifying purchases.
Understanding the Chemistry of Resin Curing

Understanding how resin cures is vital to working successfully with it. Resin formulation influences how the material behaves during curing, affecting clarity, flexibility, and durability. The resin’s chemical makeup determines how quickly it sets and its final properties. Curing temperature plays a key role; too cold, and the resin may cure slowly or remain sticky, while excessive heat can cause overheating, bubbling, or discoloration. Maintaining the recommended curing temperature ensures proper polymerization, resulting in a strong, clear finish. Proper temperature control is essential for achieving optimal results and avoiding defects. Additionally, understanding the chemistry behind resin curing helps you control these factors, preventing common issues like cloudiness or uneven hardening. Being familiar with curing conditions can aid in troubleshooting unexpected issues during the process. Knowledge of polymerization processes can further enhance your ability to predict and improve curing outcomes. Recognizing the chemical reactions involved can help you understand why certain problems occur and how to prevent them.
Amazon Product B0DT8PV51T
As an affiliate, we earn on qualifying purchases.
Common Causes of Bubbles in Resin Pieces

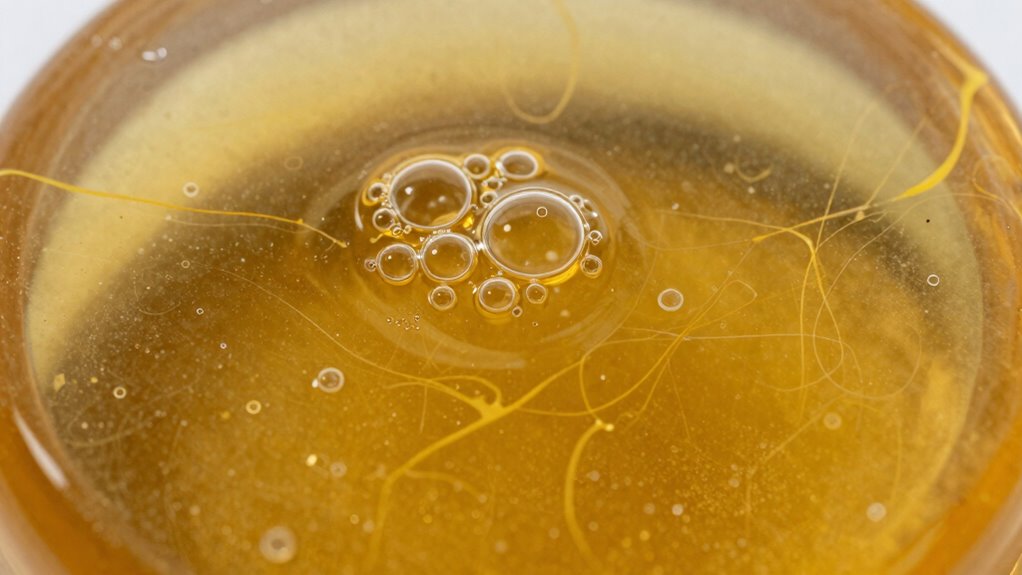
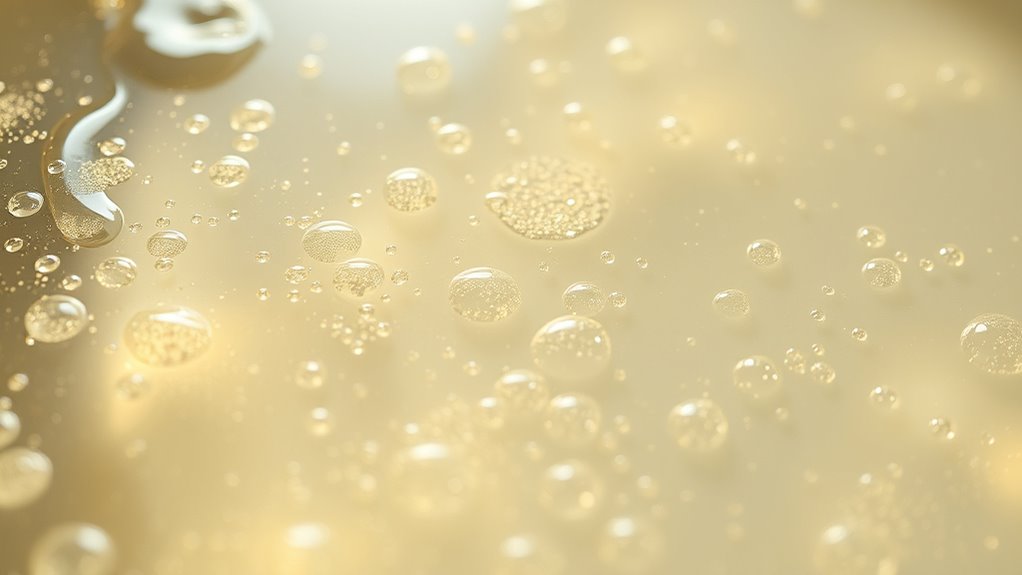
Bubbles often appear in resin pieces due to air getting trapped during pouring or from insufficient degassing. Rushing the pour can also introduce more bubbles into your resin. Understanding these common causes helps you take steps to achieve a smooth, bubble-free finish. Additionally, natural filtration systems used in eco-friendly pools can reduce the need for chemical additives that may contribute to surface imperfections. Proper degasification techniques are essential for minimizing trapped air and ensuring clarity in your resin projects. Employing techniques for controlling ambient humidity can also significantly reduce the formation of bubbles caused by moisture in the environment. Incorporating precise measurement of resin components can further help prevent bubbles caused by improper mixing or ratios. Using a vacuum chamber during the curing process can effectively remove any remaining entrapped air to produce a clearer final product.
Air Entrapment During Pour
Air entrapment during pouring is one of the most common reasons bubbles form in resin pieces. When you pour resin too quickly or from too high, air bubbles can become trapped beneath the surface, resisting release due to surface tension. These bubbles often appear as air bubbles on the surface or within the resin, affecting clarity and finish. To minimize this, control your pour speed and angle, allowing resin to flow smoothly and reduce turbulence.
- Pour slowly to prevent excess air from being caught.
- Use a steady, controlled flow to minimize surface agitation.
- Ensure your resin is at the right temperature to reduce surface tension, making it easier for bubbles to escape.
Insufficient Degassing Techniques
Insufficient degassing techniques are a common cause of bubbles in resin pieces because trapped air isn’t effectively removed before curing. If your resin preparation lacks proper degassing, air bubbles remain suspended, leading to visible defects. To improve, use effective degassing techniques such as vacuum chambers or pressure pots to eliminate trapped air during resin preparation. Skipping or rushing this step means you’re not giving the resin enough time to release bubbles naturally. Gentle stirring can also introduce air, so stir slowly and carefully. Ensuring thorough degassing before pouring reduces the likelihood of bubbles forming later. Remember, proper degassing techniques are essential for achieving a smooth, bubble-free finish and professional-quality resin pieces.
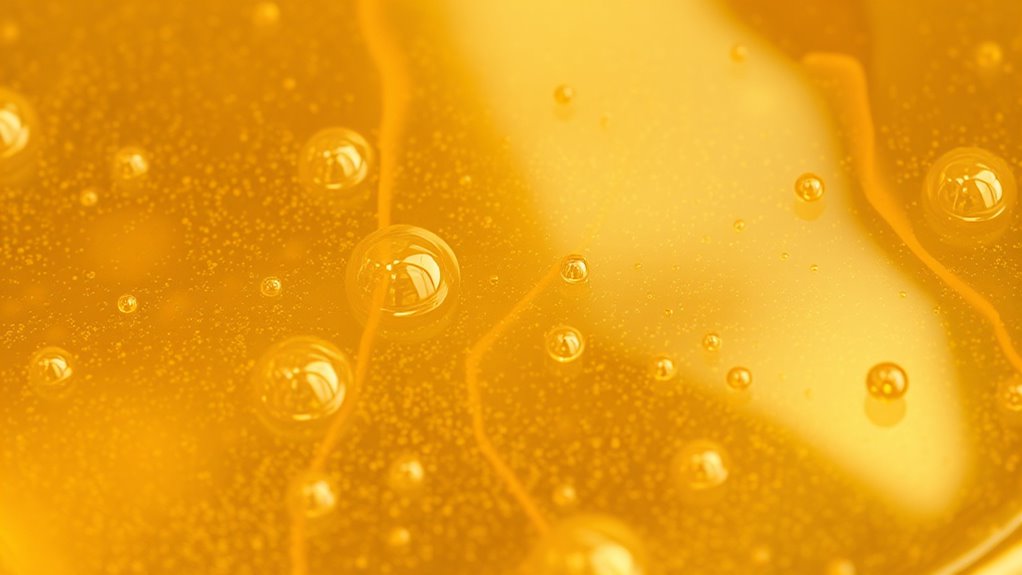
Rapid Pouring Causes Bubbles
Rushing the pouring process can introduce bubbles into your resin pieces, undoing the benefits of proper degassing. When you pour too quickly, the surface tension and resin viscosity don’t have enough time to settle, trapping air in the process. This creates visible bubbles that can mar your finished piece. To minimize this, pour slowly and steadily, allowing the resin’s surface tension to work in your favor. Additionally, temperature control helps keep resin viscosity consistent, reducing bubble formation. Keep in mind:
- Rapid pouring increases air entrapment, especially with high-viscosity resins
- Faster pours prevent bubbles from rising and escaping
- Proper temperature management maintains ideal surface tension and viscosity
Slowing your pour allows bubbles to escape naturally, resulting in a smoother, clearer finish.
Amazon Product B0CGRKMT3F
As an affiliate, we earn on qualifying purchases.
Why Resin Sometimes Turns Yellow Over Time
Over time, resin can turn yellow due to chemical changes triggered by exposure to light and heat. This color change is a natural part of resin aging, caused by ultraviolet (UV) radiation breaking down the resin’s chemical structure. As the resin ages, it produces compounds that give it a yellow hue, even if it initially appeared clear. This process varies depending on the resin type and exposure conditions. Some resins are more resistant to yellowing, but all will eventually show some degree of discoloration with prolonged exposure. If you want to minimize yellowing, store your resin away from direct sunlight and heat sources. Recognizing this as a normal part of resin aging helps you set realistic expectations for your projects. Being aware of the effects of UV radiation can help you better understand how to protect your resin from discoloration over time. Additionally, selecting UV-resistant resin can significantly reduce the likelihood of yellowing and preserve clarity longer.
Amazon Product B0DB887MCD
As an affiliate, we earn on qualifying purchases.
The Reasons Behind Sticky or Tacky Residue

You might notice sticky residue on your resin if it wasn’t fully cured or if some uncured resin remains. Excessive heat during the curing process can also cause the surface to stay tacky or sticky. Understanding these factors helps you achieve a smooth, properly cured finish. Additionally, environmental factors such as humidity can influence curing and result in sticky surfaces, especially if the resin absorbs moisture during the process.
Residue From Uncured Resin
Ever wonder why some uncured resin leaves a sticky or tacky residue behind? That’s often due to incomplete curing, resulting in leftover resin residue or curing residue on your piece. This residue can feel tacky because the chemical reaction didn’t fully finish, leaving behind uncured components. It’s essential to understand that some residual stickiness is normal in certain stages, but persistent tackiness indicates issues.
- Insufficient cure time prevents full curing, leaving curing residue.
- Using too little or uneven UV or UV/LED light causes incomplete polymerization.
- Contaminants or dust can interfere, trapping uncured resin and leaving residue.
Knowing these causes helps you address sticky residue effectively, ensuring a smooth, fully cured final product.
Excessive Heat During Curing
Excessive heat during the curing process can cause resin to become sticky or tacky, even if it’s been exposed to enough UV or LED light. High temperatures accelerate chemical reactions, leading to incomplete curing or residual tackiness. When the temperature exceeds recommended levels, it can alter the resin’s viscosity and hinder proper cross-linking. To visualize this, consider the following:
| Temperature Effect | Result |
|---|---|
| Too high | Sticky, soft surface |
| Ideal | Firm, fully cured finish |
| Too low | Under-cured, tacky interior |
| Excessive heat | Chemical reactions go awry |
| Rapid curing | Surface cures faster than inside |
Maintaining proper temperature ensures consistent chemical reactions, preventing sticky residues and achieving a smooth, durable finish. Proper curing conditions are essential for optimal results and avoiding common issues like bubbling, yellowing, or stickiness.
Normal Reactions During the Curing Process
During the curing process, several reactions are considered normal as the resin shifts from a liquid to a solid state. You might notice a color change, which indicates chemical transformation, and surface tackiness, a temporary glue-like feel that will fade. These signs show the resin is curing properly. You may also observe slight fogging or cloudiness, which usually clears as curing progresses. Recognizing normal curing reactions helps prevent unnecessary concern during the process. Proper installation practices and understanding these reactions ensure your resin cures safely and effectively. Additionally, being aware of the chemical transformation involved can help you better anticipate how your resin will behave during curing. The color change signals chemical reactions underway, not a flaw. Surface tackiness is common and should diminish over time. Slight fogging can appear but typically resolves, confirming proper curing.
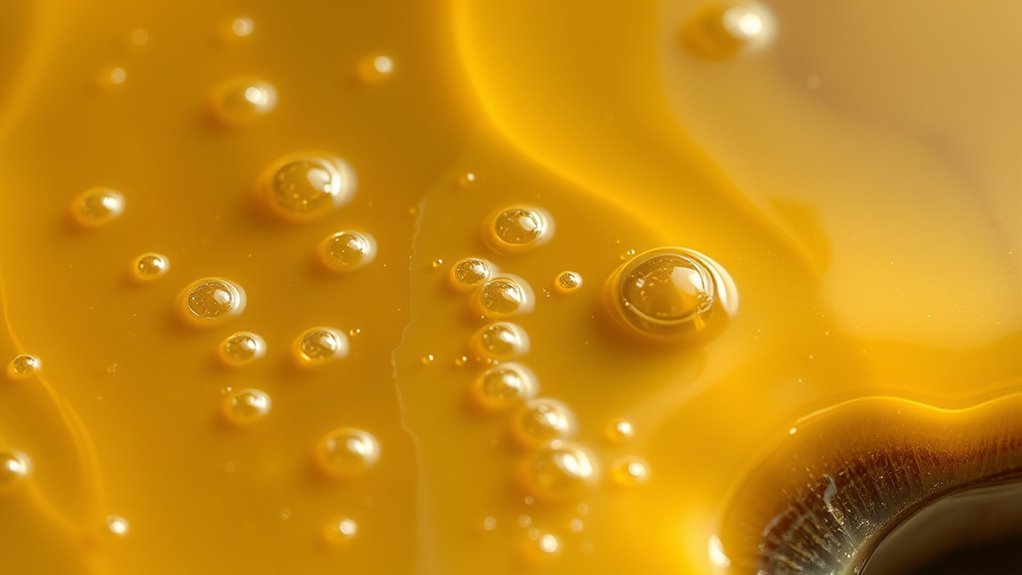
Tips to Minimize Bubbles and Other Imperfections
To effectively minimize bubbles and other imperfections in your resin projects, it’s essential to prepare your materials and workspace carefully. Start by mixing resin additives, colorants, and dyes thoroughly before pouring. Adding a few drops of a bubble-release additive can help prevent bubbles from forming during mixing and curing. When tinting your resin, stir slowly to reduce introducing air. To further minimize bubbles, pour resin slowly and from a low height, allowing it to spread gently. Use a heat gun or torch briefly over the surface after pouring to release trapped air and smooth out imperfections. Keep your workspace dust-free and work in a warm environment, which helps resin cure evenly. Proper preparation and technique are key to achieving a smooth, flawless finish. Incorporating connected equipment and smart tools can also enhance control over the curing process and improve your results.
How to Fix or Cover Up Common Resin Flaws

When you notice flaws like bubbles, cracks, or uneven surfaces in your cured resin piece, don’t panic. Small surface imperfections can often be fixed or hidden. To address surface etching or minor flaws, consider lightly sanding the area and applying a thin layer of resin over it. For bubbles or discoloration, resin coloring can help camouflage imperfections. If cracks are persistent, filling them with clear resin or using surface etching to create a textured effect can make flaws less noticeable. Remember, sometimes embracing surface imperfections as part of the design adds character. Incorporating surface finishing techniques can also help in creating consistent and professional-looking resin projects. Proper curing and resin mixing techniques are essential to minimize flaws from the start. Additionally, understanding resin chemistry can help prevent common issues like bubbling and yellowing during curing. Here are key tips:
Small surface flaws in resin can be hidden or fixed with gentle sanding, resin coloring, or embracing them as part of the design.
- Use resin coloring to blend flaws into your design
- Sand and recoat to smooth out surface imperfections
- Incorporate surface etching for a textured, intentional look
Best Practices for Long-Lasting, Clear Resin Projects

Achieving a beautiful, long-lasting clear resin piece requires more than just proper technique; it involves understanding how to safeguard your work over time. First, choose resin with the right resin color to prevent unwanted yellowing and preserve clarity. Ensure you follow the recommended curing time carefully—undercured resin can remain sticky or brittle, while overcuring may cause discoloration. To maintain transparency, keep your project away from direct sunlight during curing and curing in a dust-free environment. Use a level surface to prevent warping or uneven curing. Proper mixing and avoiding bubbles also help retain clarity. Once cured, consider applying a protective coating if necessary, especially for items exposed to frequent handling or sunlight, to extend the lifespan of your resin masterpiece.
Frequently Asked Questions
How Does Temperature Affect Resin Curing Time?
Temperature control directly impacts resin curing time, so warmer temperatures speed up curing, while cooler temps slow it down. If you want faster curing, keep your workspace between 75-85°F. Conversely, lower temperatures can extend curing speed, giving you more working time but delaying the process. Always monitor temperature to guarantee consistent results, and avoid extreme fluctuations, which can cause issues like bubbles or uneven curing.
Can Additives Prevent Resin From Yellowing?
Adding UV inhibitors can help prevent resin from yellowing over time by blocking harmful UV rays, but they don’t guarantee complete stability. You might think pigments alone can stop discoloration, but pigment stability is vital too. Combining UV inhibitors with stable pigments offers the best defense. While additives improve longevity, make certain they’re compatible with your resin to avoid unintended effects. Proper formulation is key to maintaining clarity and color integrity long-term.
What Safety Precautions Should I Take When Working With Resin?
When working with resin, you should prioritize resin safety by always wearing protective gear like gloves, goggles, and a mask. This prevents skin contact and inhalation of fumes, which can be harmful. Make certain proper ventilation in your workspace, and follow manufacturer instructions carefully. Keep your work area clean and avoid ingestion or skin exposure. Taking these precautions helps you work safely and minimizes health risks associated with resin handling.
Is It Possible to Recycle or Reuse Resin Leftovers?
Did you know that over 70% of resin waste ends up in landfills? Reusing resin leftovers is possible with proper resin disposal and reuse techniques. You can pour leftover resin into molds for small projects or mix it with new resin for larger pieces. Always guarantee you work in a well-ventilated area and wear protective gear. Reusing resin reduces waste and saves you money in the long run.
How Do Different Resin Brands Compare in Quality and Results?
Different resin brands vary in quality and results because of their formulation and brand consistency. You’ll find that some brands offer smoother finishes and fewer bubbles, while others may yellow or get sticky over time. To get the best results, stick to reputable brands known for consistent formulations. This way, you minimize surprises and guarantee your projects come out looking professional every time.
Conclusion
Think of your resin projects as a delicate dance—you’ll encounter some missteps like bubbles or yellows, but with patience and care, you can lead them back on track. Understanding what causes imperfections helps you fine-tune your technique and keeps your pieces shining like stars. Embrace these quirks as part of the journey, and soon you’ll be creating stunning, lasting art that reflects your skill and passion. Keep practicing, and your resin dance will only get smoother.