To get clean pyrography lines without scorch marks, choose the right tips suited for fine or broad detail and keep your pen at the correct temperature for your material. Maintain steady, slow strokes with consistent pressure and smooth motion, avoiding sudden starts or stops. Guarantee your workspace is well-ventilated and organized, with tools within easy reach. Mastering heat control and technique helps prevent damage, and exploring detailed tips will improve your results even further.
Key Takeaways
- Use the appropriate pyrography tip shape and size for fine, precise lines.
- Maintain consistent hand pressure and move slowly to prevent scorching.
- Keep the pen at a steady angle and control heat settings to avoid dark spots.
- Practice smooth, even strokes with controlled speed for clean lines.
- Regularly clean and replace tips to ensure consistent heat distribution and results.

FIRElood Wood Burning Kit,Wood Burning Tips Wood Burner tip,Burning Tool Wood Burning High impedance Nickel-Chromium Wire Pen tip Wood Burning Tool Pen tip nibs for Writing Instruments Pen nibs
- High-Quality Materials: Durable, heat-resistant pen tips for long use
- Wide Compatibility: Fits most wood burning tools easily
- 10 Precision Nibs: Includes 10 steel pyrography tips for detailed work
As an affiliate, we earn on qualifying purchases.
As an affiliate, we earn on qualifying purchases.
Choosing the Right Pyrography Pen and Tips
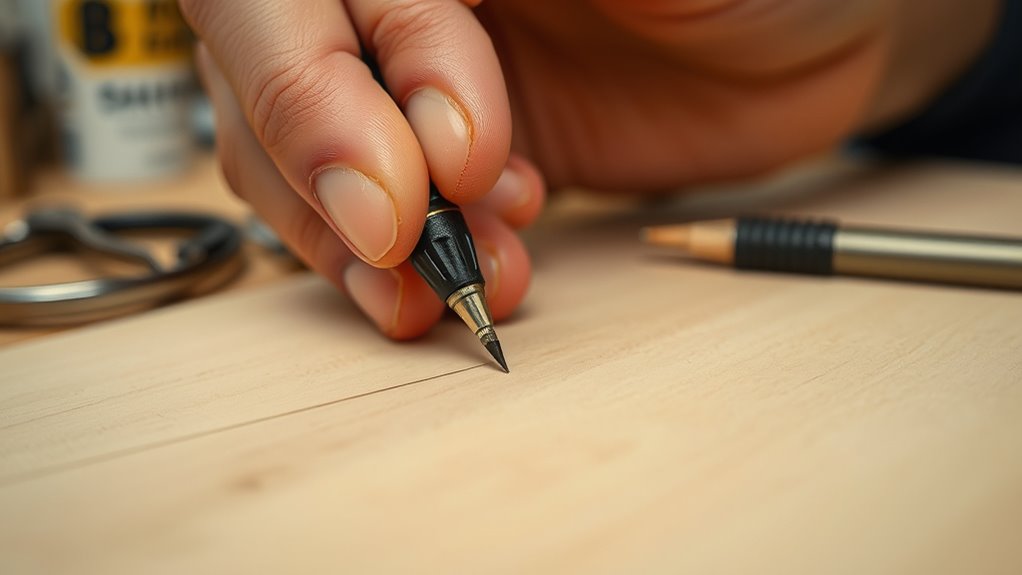
Choosing the right pyrography pen and tips is essential for achieving clean, detailed designs. Your pen tips come in various shapes and sizes, each suited for different effects. Selecting the correct tip allows you to create fine lines or broad shading, depending on your project. Equally important is heat control; a pen with adjustable heat settings gives you the flexibility to modulate temperature, preventing scorch marks and ensuring smooth, precise lines. When you can fine-tune heat, you avoid burning the wood or developing unwanted dark spots. Experiment with different pen tips and settings to find what works best for your style. Mastering these choices helps you produce professional-looking pyrography art with clean lines and consistent results. Additionally, understanding the energy efficiency of your tools can help reduce power consumption and extend the lifespan of your equipment. Being aware of power consumption can also guide you in selecting more sustainable options for your workspace.

YIHUA 930-IV Pyrography Wood Burning Pen Kit Adjustable Temperature, Power Switch, Heat Deflector, Rubber Grip with 10 Pyrography Tips, 2 Wood Pieces, Flip-Up Pen Stand, for Woodburning DIY Crafts
- Complete Wood Burning Kit: Includes pen, tips, wood pieces, stand, sponge
- Adjustable Temperature Control: Turn dial to set desired heat level
- Built-in Power Switch: Turn on/off with indicator light
As an affiliate, we earn on qualifying purchases.
As an affiliate, we earn on qualifying purchases.
Preparing Your Workspace and Materials

Before you start pyrography, make sure your workspace has proper ventilation to keep fumes safe. Gather all essential tools and organize your work surface so everything is within easy reach. This setup helps you work efficiently and safely throughout your project. Additionally, ensuring your workspace is well-ventilated supports safe working conditions and reduces exposure to potentially harmful fumes. Proper temperature control of your pyrography tool is also vital to prevent scorching and achieve clean lines. Maintaining a well-ventilated environment not only safeguards your health but also helps maintain optimal tool performance. Being aware of fume management techniques can further improve your safety during the process. Remember that good air circulation is key to dispersing any residual fumes efficiently.
Select Proper Ventilation
Ensuring proper ventilation is essential for a safe and comfortable pyrography workspace. Good airflow helps remove fumes, dust, and smoke generated during burning, promoting fumes safety. Choose a well-ventilated area, ideally with an exhaust fan or open windows, to prevent the buildup of harmful vapors. If working indoors, consider using a portable air purifier with a HEPA filter to improve air quality. Avoid cramped or poorly ventilated spaces, as lingering fumes can cause discomfort or health issues over time. Always prioritize fumes safety by ensuring your workspace has adequate airflow. Proper ventilation not only protects your health but also keeps your workspace clear of smoke, making it easier to see your work and achieve those clean lines you want. Additionally, understanding clean-home systems can help you maintain an environment that minimizes dust and airborne particles, supporting overall workspace safety. Incorporating air filtration systems tailored for hobbyist use can further enhance air quality and safety during pyrography sessions. Regularly monitoring air quality levels can help you identify when additional ventilation or filtration is necessary.
Gather Essential Tools
Gathering the essential tools is the first step to setting up an effective pyrography workspace. You need reliable tools, proper safety precautions, and a plan for tool maintenance to ensure clean lines without scorch marks. Keep your pen, replacement tips, and safety gear nearby. Regularly check and clean your tools to prevent buildup that can cause uneven burns. Use heat-resistant mats and gloves to protect yourself. Here’s a quick overview:
| Tool | Purpose | Maintenance Tip |
|---|---|---|
| Pyrography pen | Creating lines and shading | Keep tips clean and sharp |
| Tip replacements | Versatility in designs | Replace worn tips promptly |
| Safety gear | Protects from burns | Regularly inspect and clean |
Proper preparation helps you create precise art while staying safe and maintaining your tools effectively. Additionally, understanding the proper handling of heat can significantly improve your results and safety. Being aware of heat distribution can help prevent scorch marks and achieve cleaner lines.
Organize Work Surface
To create a safe and efficient pyrography workspace, you need to organize your work surface and materials thoughtfully. Start with work surface organization by clearing clutter and designating specific areas for tools, materials, and safety gear. Keep your pyrography pen, pens, and wires within easy reach, ensuring proper tool placement to prevent accidents. Use a heat-resistant mat or surface protector under your work to avoid scorch marks on your table. Arrange your wood pieces in order of project sequence to streamline your workflow. Maintaining a tidy, well-organized workspace helps you focus on precision and reduces the risk of mistakes or injuries. Proper tool placement and workspace setup create a safer environment, making your pyrography projects more enjoyable and successful. Organized workspace supports efficiency and safety, helping you work more confidently and comfortably. Additionally, ensuring good ventilation is crucial to disperse fumes generated during pyrography, promoting a healthier work environment. Incorporating proper tool placement also minimizes the chances of accidental burns or tool damage. Paying attention to workspace ergonomics can further reduce fatigue and improve your control during detailed work, and actively managing air quality can significantly enhance your overall safety and comfort during long sessions.

6PCS Pyrography Wire Tip Wood Burning Ball Tips Burner Tool Wood Adjustable Nibs Machine Pen tip Replacement Tools for Machine
- Package Includes: 6 ball tips in 3 sizes
- Durable Material: Made of high-quality chromium alloy
- Temperature Resistant: High resistance to high temperatures
As an affiliate, we earn on qualifying purchases.
As an affiliate, we earn on qualifying purchases.
Mastering Proper Speed and Motion Techniques

To create clean, precise designs, you need to maintain a consistent pace and use smooth, even motions. Practice slow, focused strokes to build control and confidence with your tool. When you master these techniques, your pyrography work will look more professional and polished. Additionally, understanding the importance of consistent motion patterns can help prevent scorch marks and achieve cleaner lines. Developing a steady hand through regular practice can further enhance your ability to produce sharp, clean results. Remember that user control over your device is crucial for maintaining the quality of your work. Incorporating visual and auditory cues from speech therapy techniques can also improve your precision and steadiness during detailed work. Paying attention to proper tool maintenance, such as ensuring your pyrography pen is clean and functioning correctly, can also contribute to better control and cleaner lines.
Maintain Consistent Pace
Maintaining a consistent pace is essential for achieving smooth, even pyrography lines. To do this, focus on your pressure control, applying gentle, steady pressure throughout each stroke. Too much pressure can cause scorching, while too little can lead to faint lines. Your grip techniques also matter—hold the pen comfortably but firmly, avoiding tension that might cause uneven movement. Keep your hand steady and avoid rushing; moving at a controlled, uniform speed guarantees clean lines without scorch marks. Practice maintaining this rhythm as you trace curves and edges. With consistent pressure and an even grip, you’ll develop a natural flow that produces professional-looking results. Remember, patience and deliberate control are key to mastering a steady, uniform pace in pyrography. Being aware of passive voice in your instructions can help make your technique clearer and more direct. Additionally, focusing on technique consistency helps ensure that your strokes remain even and predictable.
Use Smooth, Even Motions
Using smooth, even motions is essential for achieving clean, consistent pyrography lines. Focus on controlling your pressure to prevent scorch marks and guarantee uniform lines. Keep your grip technique relaxed but firm, allowing steady movement without unnecessary tension. As you glide the pen, maintain a consistent speed to avoid jagged or uneven strokes. Practice moving your hand smoothly across the wood, rather than stopping and starting, which can cause unevenness. Consistent pressure and a steady grip help you apply even heat, preventing dark spots or burn throughs. Remember, the goal is fluid, controlled motions that produce crisp, clean lines. By mastering these techniques, you’ll develop greater precision and confidence in your pyrography projects.
Practice Slow, Focused Strokes
Practicing slow, focused strokes is essential for developing control and precision in pyrography. Moving at a deliberate pace helps you master pressure control and shading techniques, reducing the risk of scorch marks. To improve, start by:
- Maintaining a steady hand and deliberate rhythm
- Applying consistent pressure for smooth, even lines
- Using slow, controlled motions to refine shading and details
- Regularly pausing to assess your work and adjust your speed
This approach allows you to build muscle memory, ensuring clean lines and even shading. As you become more comfortable, your strokes will become more fluid, and your control over pressure and motion will improve. Practice patience, and you’ll see your pyrography skills sharpen.

The Art & Craft of Pyrography: Drawing with Fire on Leather, Gourds, Cloth, Paper, and Wood (Fox Chapel Publishing) More Than 40 Patterns, Step-by-Step Projects, and Expert Advice from Lora S. Irish
- Book Title: The Art & Craft of Pyrography
As an affiliate, we earn on qualifying purchases.
As an affiliate, we earn on qualifying purchases.
Controlling Heat for Precise Lines

Controlling heat is essential for creating precise lines in pyrography because it directly affects the depth and clarity of your burn marks. To achieve this, focus on temperature control by adjusting your tool’s heat setting to suit the material and desired line thickness. Keep in mind that a hotter tip produces darker, more defined lines, while a cooler one yields lighter, more delicate strokes. Pressure management is equally important; applying consistent, gentle pressure prevents scorch marks and uneven lines. Practice maintaining steady pressure as you move the pen, avoiding pressing too hard or too softly. By fine-tuning your temperature and managing pressure effectively, you gain better control over your burns, resulting in clean, sharp lines without unwanted marks.
Practicing Strokes and Creating Consistent Lines

Mastering consistent strokes is key to achieving uniform lines in pyrography. To improve, focus on these aspects:
- Adjust your hand pressure—apply steady, moderate pressure to avoid scorch marks or uneven lines.
- Maintain a consistent stroke angle—keep your tool at the same angle for smooth, even lines.
- Practice slow, deliberate movements—rushing causes waviness and inconsistency.
- Use short, controlled strokes—this helps you manage hand pressure and stroke angle precisely.
Troubleshooting Common Issues and Improving Your Skills

Even the most skilled pyrographers encounter common issues that can affect the quality of their work. Surface preparation is vital; ensure your wood is clean, smooth, and free of dust or oils. This helps prevent scorch marks and uneven lines. If your artistic shading looks patchy or blotchy, adjust your technique by practicing lighter, controlled strokes and gradually building up layers. Troubleshooting often involves checking your temperature settings—too hot can cause burning, while too cool hampers shading. Don’t rush; take time to refine your control and develop a steady hand. Regularly evaluate your work, identify problem areas, and adjust your pressure or speed accordingly. Consistent practice, combined with proper surface prep, will steadily improve your skills and help you produce cleaner, more professional-looking pyrography.
Frequently Asked Questions
What Types of Wood Are Best for Clean Pyrography Lines?
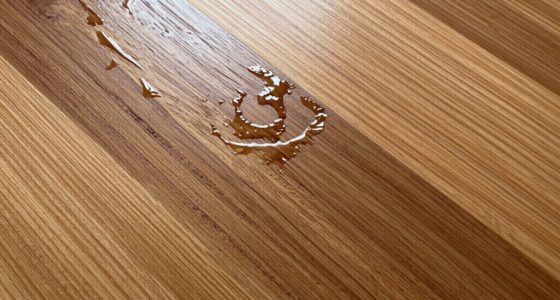
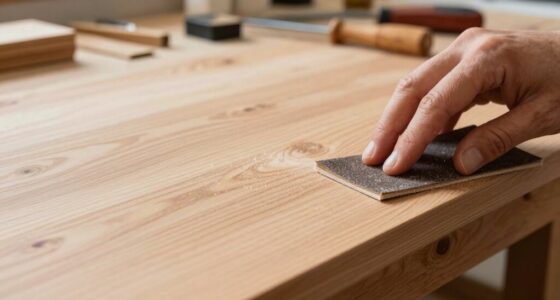
You should choose woods with a tight, smooth grain like basswood, maple, or cherry for clean pyrography lines. These woods have minimal grain variation, helping you achieve precise details. Before you start, prep the surface by sanding it smoothly to remove rough spots and open the grain slightly. This prep work allows your pyrography tool to glide easily, reducing scorch marks and ensuring crisp, clean lines every time.
How Do I Prevent My Pyrography Pen From Skipping?
To prevent your pyrography pen from skipping, you should control your pen pressure, applying consistent, gentle pressure for smooth lines. Make sure your tip is well-maintained—clean, sharp, and free of residue—to guarantee even contact with the wood surface. Regularly check and replace tips if they become dull or damaged. Proper technique and maintenance help you achieve clean, even lines without skips or scorch marks.
Can I Use Pyrography on Materials Other Than Wood?
Yes, you can use pyrography on alternative materials like leather, gourds, or certain plastics. To do so, make sure to prepare the surface properly—clean and smooth it—to avoid uneven burns. Keep in mind that different materials may require adjusting your pen’s temperature and technique. Always test on a small area first, and use appropriate safety measures, so you achieve clean lines without scorching or damaging your chosen surface.
What Safety Gear Should I Wear During Pyrography?
You should wear protective gloves to safeguard your skin from burns and a respirator mask to prevent inhaling harmful fumes. Make sure the gloves fit well and are heat-resistant, and choose a mask with proper filtration. Always work in a well-ventilated area to reduce inhalation risks. These safety gear items help you stay protected while enjoying pyrography, ensuring a safer, more comfortable creative process.
How Do I Fix Mistakes or Uneven Lines on My Work?
Think of correcting mistakes or fixing uneven lines as smoothing out a rough road. To do this, carefully erase or lighten the error with a fine sandpaper or a craft knife, then gently re-burn the area for a clean fix. If the line is too uneven, blend it with shading or use a darker tone to incorporate the mistake into your design. Patience and a steady hand are your best tools here.
Conclusion
Now that you’ve got the basics down, you’re ready to create beautiful, clean pyrography art without scorch marks. Remember, patience and practice are your best allies—like a knight honing their sword. Keep experimenting with your tools, control your heat, and master your strokes. Before long, your work will shine brighter than a medieval tapestry, impressing everyone with your skill. So, grab your pen and let your creativity run wild—your masterpiece awaits!