If your satin stitch looks lumpy, it’s likely caused by uneven tension, inconsistent stitch length, or fabric handling errors. Make sure your tension is balanced—not too tight or loose—and keep your stitch length steady, ideally between 2 to 4 mm. Handle your fabric gently to avoid distortion, and use smooth, high-quality thread. Small adjustments and patience will help you achieve a sleek, flawless finish—if you keep exploring, you’ll discover more tips to perfect your stitches.
Key Takeaways
- Inconsistent thread tension causes uneven stitches, leading to a lumpy satin finish; adjust tension regularly.
- Stitch length that is too long or too short creates bulk and bumps; keep stitches within 2-4 mm.
- Overly tight fabric or uneven hand tension can distort stitches; maintain proper fabric tautness.
- Using low-quality or snagging thread can cause irregular stitches and lumps; opt for smooth, high-quality thread.
- Practice patience and small adjustments to tension and stitch length improve stitch smoothness and professional appearance.

Are you looking to perfect your satin stitch embroidery? If your stitches keep looking lumpy or uneven, it’s time to examine some key factors that influence the smoothness of your work. One of the most common issues is inconsistent thread tension. When your thread is too tight, it pulls the fabric tightly against the needle, causing the stitches to bunch up and create a lumpy appearance. Conversely, if your thread tension is too loose, your stitches will look floppy and uneven, making the surface appear uneven and rough. To achieve sleek, shiny satin stitches, you need to find that perfect balance—tight enough to keep stitches flat and smooth, but not so tight that they distort the fabric or the stitch itself. Many embroidery machines and hand embroidery techniques allow you to adjust tension settings; if you’re hand stitching, be mindful of maintaining consistent tension as you work. Practice controlling your grip on the thread to prevent variations that lead to lumps.
Another vital element is stitch length. When your stitches are too long, the fabric naturally bunches between stitches, resulting in a bumpy, uneven surface. On the other hand, stitches that are too short can cause unnecessary buildup of thread, making the surface look bulky rather than smooth. The ideal stitch length for satin stitch typically falls between 2 to 4 millimeters, depending on the project and fabric. Keeping your stitch length consistent throughout your work is essential. Use markings or a guide on your embroidery hoop or machine to help maintain this uniformity. If you notice your stitches are becoming uneven, pause and recheck your stitch length setting or your hand control. Consistent stitch length creates a uniform, glossy surface that reflects light beautifully, giving your embroidery that professional finish.
Additionally, the way you handle your thread and fabric plays a role. Make sure your fabric is taut but not stretched too tightly, as excessive tension can distort the stitches. When working by hand, gently pull the thread to keep it even, avoiding pulling so hard that the stitches bunch up or become distorted. When using a machine, regularly check your tension and stitch length, especially after changing threads or fabric types. Also, keep an eye on your thread quality—using good-quality, smooth thread minimizes snagging and uneven stitches. With practice, adjusting your thread tension and stitch length becomes second nature, helping you produce satin stitches that are sleek, flat, and beautiful. Remember, patience and consistency are key—small adjustments can make a significant difference in the final appearance of your embroidery.
Frequently Asked Questions
Can Fabric Type Affect Satin Stitch Smoothness?
Yes, fabric type definitely affects satin stitch smoothness. Stretchy fabrics can cause puckering, making stitches look uneven, so you should choose stable, non-stretch fabrics for best results. Also, fabric color and thread color contrast can highlight any unevenness, so pick thread that matches your fabric color for a cleaner look. Using the right fabric and thread combination helps achieve smooth, professional-looking satin stitches.
Is Tension Adjustment Necessary for Perfect Satin Stitches?
Tension adjustment is essential for perfect satin stitches. If your thread tension is too tight or too loose, stitches become uneven or lumpy, disrupting the smooth appearance. You should regularly check and fine-tune your thread tension and stitch length to guarantee each stitch is uniform and flat. Proper tension prevents puckering and helps create that glossy, professional finish, transforming your project from amateur to polished.
How Does Needle Size Influence Stitch Appearance?
Using the right needle size critically impacts your stitch appearance. A smaller needle creates cleaner, smoother satin stitches by reducing fabric puncture, while a larger needle can cause lumpy, uneven results. Additionally, thread tension plays an essential role; too tight tension can pull stitches tight, making them look puckered, whereas proper tension allows stitches to lay flat. Experiment with different needle sizes and tension settings to achieve the smooth, professional finish you desire.
What Role Does Thread Quality Play in Stitch Lumpiness?
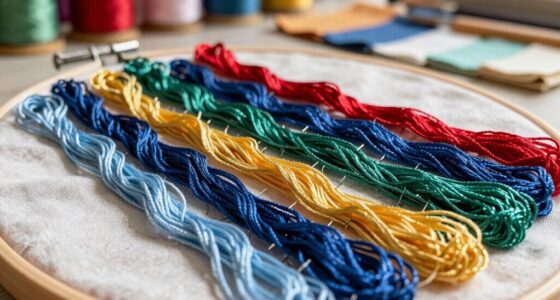
Thread quality is the backbone of smooth stitches, much like a sturdy foundation. If you use poor-quality thread, it’s prone to fraying and uneven tension, making your satin stitch lumpy. Pay attention to thread color and stitch length; mismatched or inconsistent stitching magnifies imperfections. Opt for high-quality thread to guarantee your stitches glide effortlessly, resulting in a polished, professional look. Good thread transforms your work from rough to refined.
Should I Use a Stabilizer for Better Satin Stitch Results?
Yes, using a stabilizer can considerably improve your satin stitch results. It provides essential fabric support and prevents puckering or lumpiness, especially on stretchy or delicate fabrics. Stabilizer necessity varies with fabric type, but generally, it helps keep stitches even and smooth. For best results, choose the right stabilizer—tear-away or cut-away—based on your project, and always test on a scrap piece first to ensure stability and a professional finish.
Conclusion
So, next time your satin stitch looks lumpy, don’t blame your sewing skills—blame your tension or stitch length instead. Ironically, the very perfection you chase might be hiding in the details you overlook. With a little patience and tweaking, you’ll turn those uneven bumps into smooth, glossy satin. After all, isn’t it amusing how the tiniest adjustments can transform a mess into a masterpiece? Happy stitching—smooth sailing ahead!