To master threading a needle easily, start by choosing the right needle size for your fabric—smaller for delicate materials and larger for heavier fabrics. Cut your thread about 18 inches, moisten the tip or use a needle threader if needed, and hold the needle steady. Carefully push the thread through the eye, trimming or flattening the tip if necessary. With practice and organization, you’ll find threading becomes quick and stress-free—learn more tips to perfect your technique as you go.
Key Takeaways
- Choose the right needle size for your fabric to make threading easier and prevent damage.
- Cut about 18 inches of thread, moisten or use a needle threader for smoother threading.
- Hold the needle steady and gently push the thread through the eye, trimming or flattening the tip if needed.
- Use proper lighting and organize tools nearby to avoid frustration and save time.
- Practice regularly and stay patient to develop confidence and make threading quick and stress-free.
Have you ever struggled to thread a needle and felt frustrated before even starting your sewing project? You’re not alone. Threading a needle can be tricky, especially when you consider the variety of fabric types you might be working with and the different needle sizes available. Getting the right needle size for your fabric is essential because it affects how easily the thread passes through the material and how neat your stitches look. For lightweight fabrics like silk or chiffon, you’ll want to use a smaller needle, such as a size 9 or 10, to prevent damaging the delicate fibers. Thicker fabrics like denim or canvas require larger needles, like size 16 or 18, which can handle the tougher material without bending or breaking. Choosing the correct needle size not only makes threading easier but also guarantees your sewing turns out professional-looking.
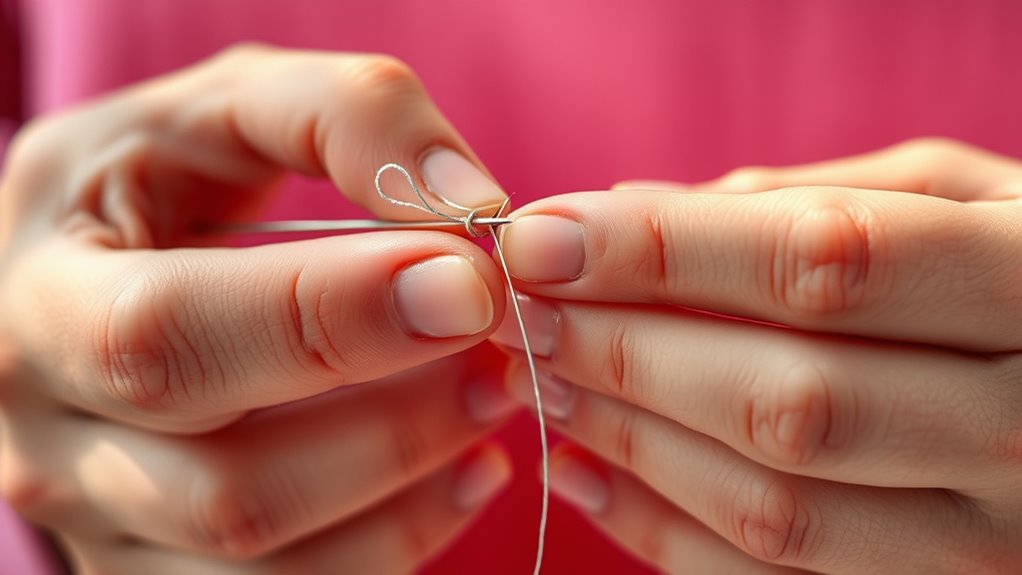
When you’re ready to thread the needle, start by selecting the right needle size for your fabric type. Hold the needle steady, and cut a length of thread about 18 inches long—anything longer tends to tangle easily. To make threading smoother, moisten the tip of the thread slightly or use a needle threader if you find it hard to see the eye of the needle. If your eyes are tired or vision isn’t perfect, a magnifying glass can help you see the tiny eye clearly. Hold the needle steady in one hand and the thread in the other, then gently push the thread through the eye. If you’re struggling to get it through, try flattening the thread’s tip or trimming it at an angle for a sharper point. Once the thread is through, pull a few inches on either side, then tie a knot at the end to keep the thread secure.
The key is patience and adjusting your technique based on your fabric type and needle size. For thicker fabrics, you might need to use a bit more force or a larger needle to get through the material and the eye of the needle. For delicate fabrics, be gentle to avoid causing tears or puckering. Remember, practicing makes perfect. If you find yourself getting frustrated, take a break, and come back with fresh eyes. Keep your workspace well-lit, and organize your tools so everything is within reach. Over time, threading a needle will become a quick, almost automatic task, making your sewing projects more enjoyable and less stressful. Just stay patient, choose the right needle for your fabric, and you’ll be sewing confidently in no time.
needle threader for sewing
As an affiliate, we earn on qualifying purchases.
As an affiliate, we earn on qualifying purchases.
Frequently Asked Questions
What Types of Needles Are Easiest for Beginners?
As a beginner, you’ll find small, sharp needles with a fine needle size easiest for threading and sewing. Look for needles with a round or slightly tapered shape, which glide smoothly through fabric and make threading simpler. Larger eye needles also help save time and frustration. Choosing needles with a comfortable grip and a sturdy yet lightweight design can boost your confidence as you learn sewing basics.
Can I Use a Different Thread Material for Easier Threading?
Think of threading as opening a treasure chest—you want the easiest key. Yes, you can try threading alternatives and experiment with different thread material options like polyester or silk, which are smoother and easier to handle. These choices make threading less frustrating, especially for beginners. So, don’t hesitate to switch up your thread material options to find what works best for you and makes the process smoother.
How Do I Prevent the Needle From Slipping While Threading?
To prevent the needle from slipping while threading, use threading aids like a needle threader or magnifying glass for better control. Also, try needle grip tips such as moistening the end of your thread or using a small piece of tape to hold it in place. These tricks make threading smoother and help keep the needle steady, so you can focus on your sewing without frustration.
Are There Specific Lighting Tips for Better Visibility?
You need clear, focused lighting setup and magnifying tools to see the tiny eye of the needle. Position a bright, adjustable lamp directly above your workspace, avoiding shadows that hide details. Use a magnifying glass or a magnifying lamp to enlarge the eye and thread easily. Bright, natural light or daylight bulbs work best, providing sharp contrast and clarity, so you can thread with confidence and precision without straining your eyes.
What’s the Best Way to Store Needles After Use?
After use, store your needles in a secure needle storage container or a designated pincushion to keep them organized and prevent accidents. Always cap or cover the needles to avoid pricks or injuries. Follow safety tips by keeping your needle storage out of children’s reach and inspecting needles regularly for damage. Proper needle storage not only maintains your needles’ condition but also keeps your workspace safe and tidy.
magnifying glass for sewing
As an affiliate, we earn on qualifying purchases.
As an affiliate, we earn on qualifying purchases.
Conclusion
Now that you’ve mastered threading a needle, you’re practically a sewing superhero! With a little patience and practice, you’ll breeze through your projects without pulling out your hair or losing your mind. Remember, even the most seasoned stitchers started right where you are now—so don’t get discouraged if it feels tricky at first. Keep at it, and soon threading will be as easy as pie, turning sewing into your new favorite superpower!
assorted sewing needles for fabric
As an affiliate, we earn on qualifying purchases.
As an affiliate, we earn on qualifying purchases.
sewing thread organizer
As an affiliate, we earn on qualifying purchases.
As an affiliate, we earn on qualifying purchases.