To plan a tear-resistant papercutting design, start by choosing sturdy, high-quality paper that’s thick yet flexible, and use sharp tools for clean cuts. Sketch your design with purpose, ensuring the layout supports structural integrity by connecting elements strategically and balancing delicate with strong areas. Test your ideas on scrap material first, adjusting as needed. Proper planning and technique help prevent tears, and exploring these tips further will give you even more confidence in your craft.
Key Takeaways
- Use high-quality, appropriately thick and flexible paper to prevent tearing during cutting and handling.
- Plan your design with strategic connections and balanced negative space to distribute stress and enhance stability.
- Test your design on scrap material to identify weak points and refine delicate areas before final cutting.
- Incorporate overlapping cuts and shared borders to strengthen connections between elements.
- Keep cut lines and details thick enough for durability, avoiding overly narrow or fragile sections.

amoolo Clear Safety Glasses, ANSI Z87.1 Impact Resistant, 24 Pack, Adult
- Compliance: ANSI Z87.1 impact resistant safety glasses
- Material: Premium Japanese polycarbonate construction
- Protection: Blocks 99% UV400 rays and resists scratches
As an affiliate, we earn on qualifying purchases.
Choosing the Right Paper and Tools
When selecting paper and tools for papercutting, it’s important to choose materials that are easy to work with and suited to your project. Start with paper that has a good balance of thickness and flexibility—too thin, and it tears easily; too thick, and it’s hard to cut. Consider color coordination to match your overall design, choosing hues that enhance your artwork’s visual impact. Pay attention to paper texture as well; smooth surfaces allow for clean, precise cuts, while textured paper can add interesting depth and dimension. Using sharp scissors or craft knives ensures clean lines and reduces tearing. Selecting the right combination of paper and tools sets a solid foundation for a successful, neat papercutting project. Additionally, understanding the importance of material quality can significantly influence the durability and appearance of your finished design. For intricate designs, opting for precision cutting tools can help achieve cleaner, more professional results. Moreover, choosing appropriate tools that match the complexity of your pattern will make detailed work easier and more accurate. Ensuring proper tool maintenance can also extend the lifespan of your cutting instruments and maintain their effectiveness over time.

50 Pack Clear Safety Glasses for Men Women,Scratch & Impact Resistant
- Pack Size: 50 pairs of safety glasses
- Frame Dimensions: 5.6-inch width, 4.3-inch temple
- Lens Size: 2.75 x 1.6 inches
As an affiliate, we earn on qualifying purchases.
Sketching Your Design With Purpose

Before you start cutting, it’s essential to sketch your design with purpose to guarantee your final piece turns out just as you envision. Consider your color palette and cultural influences to guide your choices. This step helps you visualize how different elements will interact and ensures your design’s integrity. Use your sketches to refine details and decide where delicate cuts are necessary. Incorporate meaningful symbols or motifs inspired by cultural influences to add depth. To organize your ideas, think about this layout:
| Element | Purpose | Cultural Influence |
|---|---|---|
| Main motif | Focus | Heritage symbolism |
| Background | Support | Traditional patterns |
| Accents | Highlights | Regional color schemes |
| Negative space | Balance | Cultural motifs |
Clear sketches rooted in purpose prevent tearing and help create a harmonious design. Additionally, understanding floating on water techniques can inspire your use of space and flow within your design, ensuring it remains resilient during the cutting process. Being aware of material strength considerations can further assist in choosing the appropriate paper or fabric for your project, reducing the risk of tearing during handling. Exploring the different Vetted electric bike conversion kits can serve as inspiration for designing durable and adaptable materials, emphasizing the importance of quality and compatibility in your project. Incorporating Glycolic acid benefits into your skincare routine can also serve as a metaphor for selecting resilient materials—just as proper chemical use promotes healthy skin, choosing the right materials ensures your papercut remains intact and vibrant. Knowing about Grocery Savings Strategies can also inspire you to plan your supplies effectively, ensuring your materials are suitable for your design durability.

Hoqiwild ANSI Z87.1 Clear Safety Glasses Bulk 120 pack, Safety Glasses for men and women, Scratch&Impact-Resistant Clear Protective Glasses for construction, lab, in-/outdoor work
- 120 Pack, Individually Wrapped: Cost-effective safety glasses for work and labs
- Impact-Resistant Polycarbonate: Exceeds ANSI Z87.1 standards with side shields
- Scratch-Resistant Coating: Long-lasting lenses with easy maintenance
As an affiliate, we earn on qualifying purchases.
Considering Structural Integrity in Your Layout

When planning your design, think about how your material choice affects strength and durability. Connecting elements strategically can prevent weak points, while avoiding overly thin cuts keeps your piece from becoming fragile. Incorporating structural integrity principles into your layout ensures the design remains sturdy and visually appealing. Additionally, understanding free floating techniques can help you create more flexible and resilient designs that resist tearing. Paying attention to material properties can further enhance the overall durability of your work, ensuring it withstands handling and environmental factors over time. Recognizing load distribution in your design can also contribute to its long-term stability and prevent accidental tears. Properly distributing stress throughout your piece is essential for maintaining its structural soundness over time.
Material Choice Matters
Choosing the right material is essential for guaranteeing your papercutting project stays sturdy and well-structured. The type of paper affects both durability and visual impact. Consider color schemes that complement your design’s theme; vibrant or muted tones can influence the overall aesthetic. Cultural influence also plays a role—certain patterns and colors hold specific meanings in different traditions, guiding your material choice. Thicker, high-quality paper offers strength, reducing the risk of tearing, especially in intricate designs. Lightweight paper might be easier to cut but can compromise structural integrity. Balance your artistic vision with the practical need for durability. Selecting appropriate material ensures your design not only looks stunning but also withstands handling and display, making your effort worth the investment. Additionally, choosing materials that promote biodiversity through sustainable sourcing can help reduce environmental impact and support conservation efforts. Using environmentally friendly papers supports sustainable practices in art and craft projects, aligning your work with eco-conscious values. Incorporating environmentally friendly materials can also inspire more mindful and eco-conscious crafting habits. Being aware of environmental impact when selecting materials helps promote responsible and eco-friendly creation.
Connecting Elements Strategically
Connecting elements thoughtfully is essential to maintaining the structural integrity of your papercutting design. Using interlocking motifs creates stability by distributing weight evenly and preventing tears. Strategically placed connections enhance visual balance, guiding the viewer’s eye smoothly across the piece. To achieve this, consider how each element links to others, ensuring they support each other without excessive fragility. Here’s a quick guide:
| Connection Type | Purpose | Example |
|---|---|---|
| Overlapping cuts | Increase strength | Intersecting branches |
| Shared borders | Distribute stress | Joined foliage edges |
| Interlocking motifs | Enhance stability & design | Puzzle-like shapes |
This approach helps your design stay intact, even when delicate. Additionally, choosing lightweight and durable materials that are lightweight and durable can serve as a metaphor for balancing strength and delicacy in your design. Understanding structural integrity principles is crucial for creating complex yet resilient papercuts. Furthermore, incorporating supportive connections strategically throughout your design can significantly improve its overall robustness.
Avoid Overly Thin Cuts
Thin cuts can add delicate detail to your design, but they also weaken the overall structure. When planning fine detailing, avoid making cuts so narrow that they risk tearing or breaking easily. Thin cuts can enhance color contrast by creating intricate patterns, but overdoing it compromises structural integrity. To balance detail and strength, keep your cuts thicker enough to withstand handling and display. Consider the placement of fine detailing—use it to highlight key areas without overextending fragile sections. Remember, stronger sections support delicate cuts better, preventing tears. Use contrasting colors strategically to make your design stand out without relying solely on overly thin lines. By maintaining a mindful approach to cut width, you guarantee your papercutting remains durable and visually striking. Additionally, understanding the importance of structural integrity can help you design more resilient and long-lasting artwork.

NoCry Clear Safety Glasses for Men and Women with Anti-Fog and Scratch Resistant Wrap Around Lenses, Adjustable Temples and Nose Pads — ANSI Z87 Certified Protective Eyewear with 100% UV Shielding
- Durable Polycarbonate Wraparound Design: Provides superior protection from threats
- Adjustable Fit with Comfort Features: Extendable arms and soft nose pads
- Anti-Fog and Scratch-Resistant Lenses: 5x more fog resistant, 2x more scratch resistant
As an affiliate, we earn on qualifying purchases.
Planning Cut Lines and Negative Spaces

Planning your cut lines and negative spaces is a crucial step that determines the overall look and stability of your papercut design. Carefully consider how your lines will flow and connect, ensuring the design remains strong and visually appealing. Think about your color schemes and how negative spaces will highlight or contrast them. Use inspiration sources like nature, architecture, or art to guide your choices. When planning, keep these tips in mind:
Thoughtfully plan your cut lines and negative spaces to ensure a balanced, strong, and visually captivating papercut design.
- Balance positive and negative spaces for harmony
- Avoid overly complex details that might weaken thin areas
- Place cut lines strategically to enhance the design’s flow
- Preview your layout, adjusting as needed before cutting
Testing and Adjusting Your Design Before Final Cuts
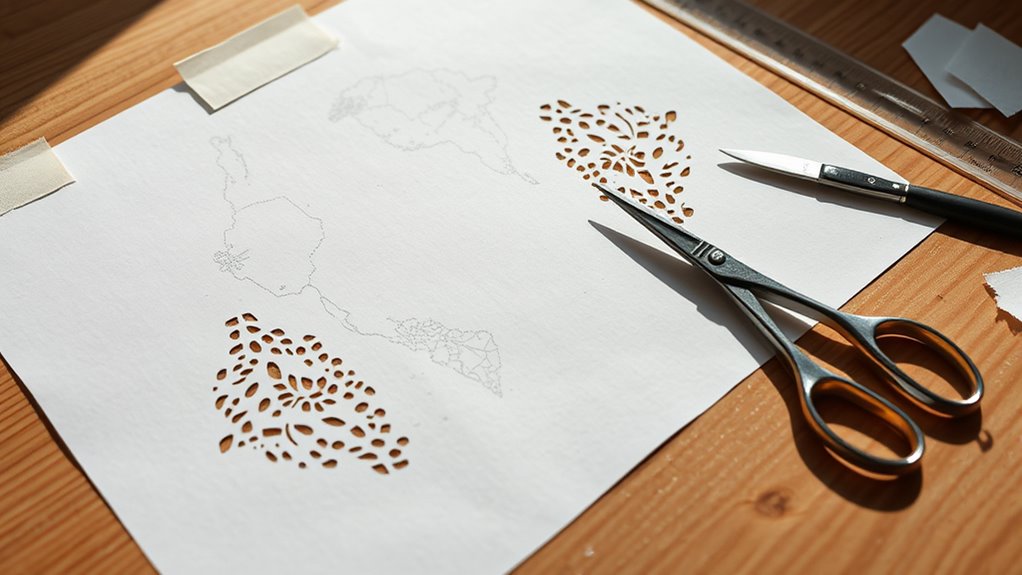
Before making your final cuts, it is crucial to test your design first. Create test samples using scrap material to see how it holds up and make any needed adjustments. This way, you can refine the details and guarantee your finished piece looks perfect.
Create Test Samples
Have you ever finished an intricate papercutting design only to realize it doesn’t look quite right? Creating test samples helps you catch issues early, saving time and materials. Use scrap paper to cut small versions of your design, experimenting with different elements. Focus on your color palette to see how colors work together and adapt as needed. Test display techniques by mounting samples to different backgrounds to find the best presentation. Consider adding or removing details to strengthen the overall composition. Pay attention to how delicate areas hold up and if any parts might tear. Adjust your design accordingly to ensure it’s both beautiful and durable before committing to your final piece. This process guarantees a polished, tear-resistant finished product.
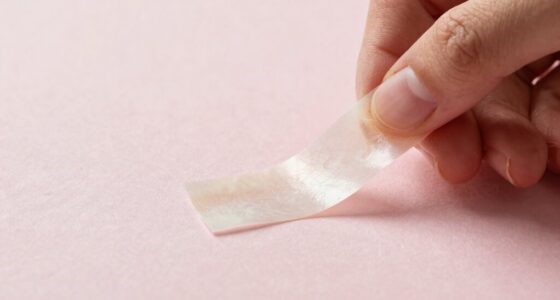
Use Scrap Material
Using scrap material is a practical way to test and refine your design before making the final cuts. Recycling scraps allows you to practice without wasting your good paper, promoting creative reuse. By working on leftover pieces, you can identify potential tearing points or areas that need reinforcement. This approach helps you adjust your design for better stability and precision, ensuring your final cut is clean and professional. Keep different scraps on hand to experiment with various shapes and techniques, making sure your design holds together as intended. Testing on scrap material saves time and materials, giving you confidence before committing to the final piece. Embracing recycling scraps not only enhances your skills but also makes your papercutting process more sustainable and resourceful.
Adjust Design Details
Once you’ve practiced on scrap material and refined your design, it’s time to focus on adjusting the details before making your final cuts. Check your design’s color contrast—ensure the negative space stands out clearly against the background. Simplify overly complex patterns that might tear during cutting, as high pattern complexity increases the risk. Test your design by lightly tracing or cutting small sections to spot potential weak points. Make sure delicate areas are strengthened or adjusted for durability. Consider how the overall composition flows, making sure each element complements the others. Finally, verify that the design’s details are clear and not too thin, preventing tears during final execution. Keep these adjustments in mind to create a resilient, striking papercut.
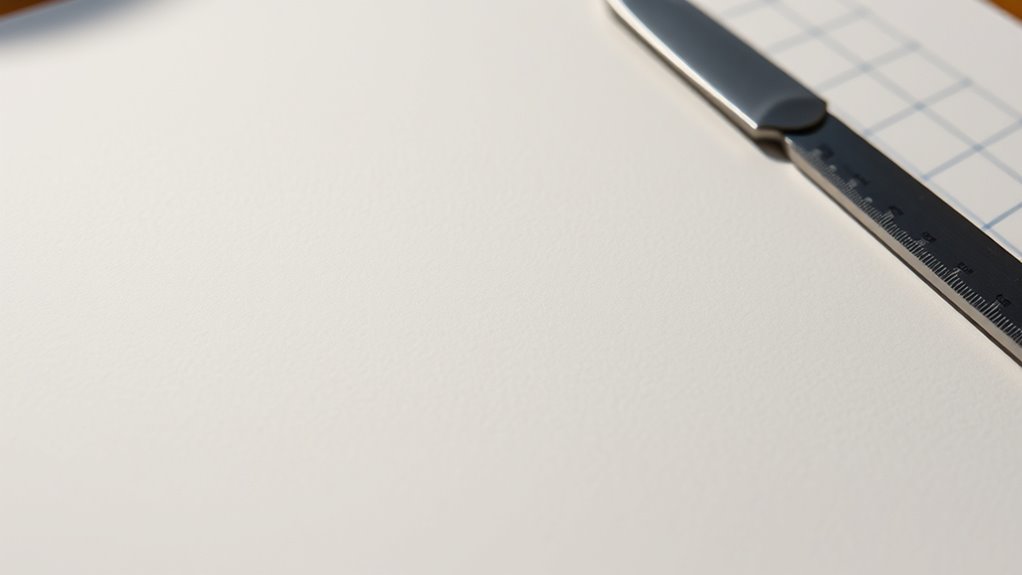
Tips for Safe and Precise Cutting Techniques

To guarantee safe and accurate cuts, always prioritize proper technique and the right tools. Use a sharp craft knife and a cutting mat to ensure clean, controlled cuts. Pay attention to color contrast; a darker background helps you see your lines clearly, reducing mistakes. Adjust your cutting speed—slow down for intricate details and speed up for straight, long cuts. Steady hands and consistent pressure prevent tearing or jagged edges. Remember, precision matters more than speed. Practice safe handling, keeping blades away from your fingers.
| Tip | Benefit |
|---|---|
| Use high contrast paper | Better visibility |
| Cut slowly for details | Increased precision |
| Maintain steady pressure | Clean, tear-free edges |
Frequently Asked Questions
How Do I Choose the Best Paper Thickness for My Project?
You should choose a paper weight that matches your project’s complexity and durability needs. For delicate, intricate cuts, go for lighter craft supplies with a weight around 80-120 gsm. If your design requires sturdiness, opt for thicker paper, like 200-300 gsm. Experiment with different paper weights to find the best balance between flexibility and strength, ensuring your project won’t tear during cutting or handling.
What Are the Common Mistakes That Cause Paper Tearing?
Ever wonder why your paper tears so easily? It’s often due to using paper with a rough texture or applying too much adhesive, which weakens the fibers. Avoid common mistakes like rushing through cuts or using improper tools. Always check your paper’s texture and use adhesive sparingly. By paying attention to these details, you’ll prevent tearing and keep your design intact, making your project look polished and professional.
How Can I Fix a Torn or Damaged Paper Design?
If your paper design is torn or damaged, start by carefully applying restoration techniques like using acid-free adhesive to mend the tears. To prevent further damage, handle the paper gently and store it flat in a dry, stable environment. You can also reinforce weak areas with thin, transparent repair tissue. Taking these preventive measures helps maintain your artwork’s integrity and extends its lifespan.
Are There Specific Tools Recommended for Intricate Cuts?
When tackling intricate cuts, your best tools are precision blades and cutting mats. These tools help you stay sharp and avoid mishaps — they’re the bread and butter of delicate work. Use sharp, fine-point blades for detail, and always work on a sturdy cutting mat to protect your surface. With these, you can cut through the tiniest details smoothly, proving that a steady hand and the right tools make all the difference.
How Long Does It Typically Take to Complete a Detailed Papercut?
The time it takes to complete a detailed papercut varies greatly depending on your project’s complexity. For intricate designs, you might spend anywhere from a few hours to several days. Simpler projects could take just an hour or two, while highly detailed pieces require patience and careful work. To better estimate your project’s time, consider its complexity and break it into manageable steps, avoiding rushing and potential tears.
Conclusion
By following these tips, you can create stunning paper cuts without tearing. Remember, nearly 60% of beginners experience some tears when starting out—so patience and careful planning are key. With the right tools and thoughtful design, you’ll improve your skills and produce intricate, beautiful pieces. Keep practicing, test your ideas first, and enjoy the process. Before long, you’ll be crafting delicate designs that impress everyone—without the frustration of accidental tears.