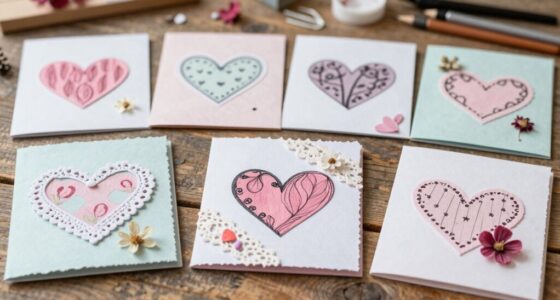
If your paper roses look flat, it’s likely because they lack surface textures, shading, and light reflections that mimic real petals. To add depth, emboss veins and ridges with tools like a ball stylus, and incorporate subtle surface variations to catch light differently. Use layered shading—darker near petal edges and lighter at the center—to create a realistic glow. Keep exploring to discover more techniques that bring your paper flowers to life.
Key Takeaways
- Flat paper roses lack surface details like ridges and veins that mimic natural petal textures.
- Using embossing tools to add surface ridges creates light reflection and enhances depth.
- Uniform coloring makes petals appear flat; layering shades adds dimension and realism.
- Incorporating shadows and highlights around edges and ridges emphasizes petal curvature.
- Failing to vary surface texture and color prevents the illusion of three-dimensionality.
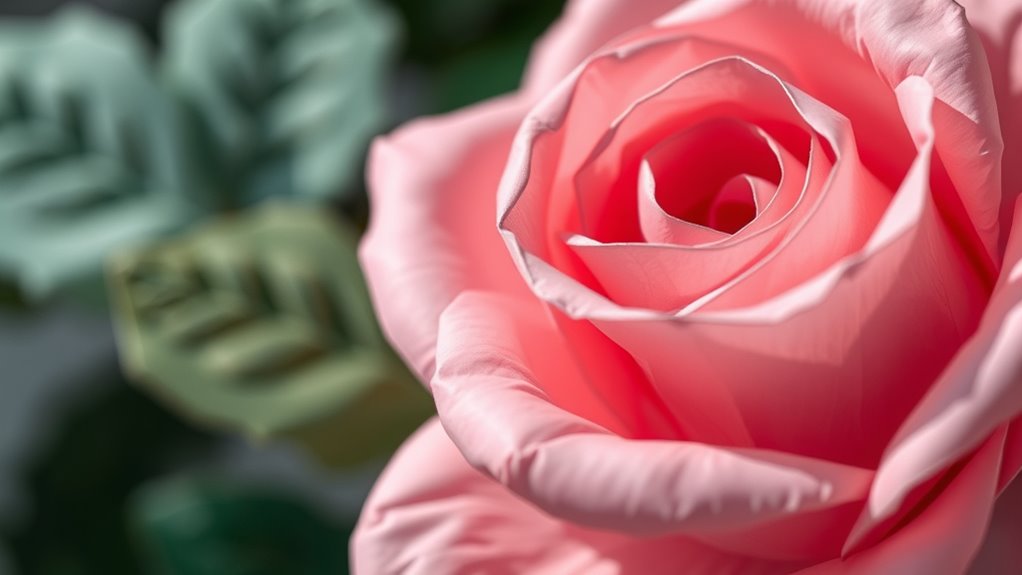
Adding depth to paper roses can transform a simple craft into a stunning, lifelike floral display. When your paper roses look flat, it’s often because the flower petal textures lack variation and the color shading techniques haven’t been fully utilized. To create a realistic appearance, you need to pay close attention to how each petal’s surface and hue contribute to the overall depth. Flat petals tend to appear two-dimensional, so your goal should be to introduce visual interest through subtle differences in texture and color.
Start by examining the petal textures. Real flower petals aren’t perfectly smooth; they have gentle ridges, veins, and slight curves that catch light differently. To mimic this, you can add surface details to your paper petals. Use tools like a ball stylus or the edge of a paintbrush to gently emboss veins or subtle ridges along the petals. This creates a tactile variation that, when painted or shaded, reflects light at different angles and gives the illusion of depth. Even slight indentations or raised areas can make a big difference. Remember, the goal is to replicate how real petals naturally catch and reflect light, which adds a three-dimensional quality.
Next, focus on your color shading techniques. Flat, uniform colors make petals appear dull and two-dimensional. Instead, layer different shades of the same color to add complexity. Use a darker hue around the edges and the base of each petal to create shadows, then blend lighter shades toward the center. This gradient mimics how light interacts with real petals, making them look more natural and rounded. Blending is key—use a sponge or soft brush to seamlessly transition between shades, avoiding harsh lines that can make your petals look artificial. Adding tiny touches of white or a lighter hue to the tips or ridges can also simulate how light hits raised surfaces.
Additionally, understanding color temperature adjustments can help you better simulate natural lighting conditions and enhance the realism of your petals. Combine these two approaches—texturing the petals and applying careful shading—to elevate your paper roses from flat to lifelike. When you craft each petal with textured surfaces and nuanced color gradients, you create an interplay of light and shadow that adds convincing depth. The more attention you pay to these details, the more your paper roses will resemble the real thing, with a sense of dimension that invites admiration. Ultimately, it’s about understanding how light interacts with form and color, then translating that into your craft. With patience and practice, you’ll see your paper roses become more vibrant, realistic, and engaging.
amoolo Clear Safety Glasses, ANSI Z87.1 Impact Resistant, 24 Pack, Adult
- Compliance: ANSI Z87.1 impact resistant safety glasses
- Material: Premium Japanese polycarbonate construction
- Protection: Blocks 99% UV400 rays and resists scratches
As an affiliate, we earn on qualifying purchases.
Frequently Asked Questions
What Types of Paper Are Best for Realistic Paper Roses?
You should choose crepe paper or tissue paper for realistic paper roses because they mimic flower petal textures well. Crepe paper offers flexibility and natural-looking curves, while tissue paper creates delicate, layered petals. Consider paper thickness options; thinner papers give a soft, realistic appearance, but thicker ones add durability. Experiment with different types to find the perfect balance of texture and sturdiness for your roses.
How Can I Prevent My Paper Roses From Curling?
To prevent your paper roses from curling, focus on proper petal shaping techniques and careful handling. Use a curling tool or your fingers to gently shape the edges, keeping consistent pressure. When assembling your flower arrangement, handle petals delicately and avoid excess moisture, which can cause curling. Store your roses flat or in a supportive container to uphold their shape. Practicing these steps ensures your paper roses stay beautiful and well-formed.
What Tools Help Create Natural-Looking Petal Edges?
Imagine shaping delicate paper petals for a realistic rose. Using a fine-tipped embossing tool or a sculpting knife helps create natural-looking petal edges. These tools excel in flower shaping and petal texturing, allowing you to add subtle curves and ruffled edges. For best results, gently curl or bevel the edges to mimic real petals, giving your paper roses a lifelike, dimensional appearance that captivates everyone.
Can Adding Color Variations Improve the Depth of Paper Roses?
Yes, adding color variations can substantially improve the depth of your paper roses. You should focus on color blending and petal shading to create a more realistic look. Apply darker shades to the edges or the base of petals, then blend lighter tones towards the center. This technique adds dimension, making your paper roses appear layered and lifelike, ultimately giving them a richer, more natural appearance.
How Do Lighting Techniques Affect the Appearance of Paper Roses?
Lighting techniques are like a painter’s brush, shaping your paper roses’ depth. By carefully adjusting light placement, you highlight the petals’ curves and creases, creating natural shadows that give your flowers a three-dimensional feel. Proper shadow creation emphasizes the layers and textures, making your roses appear lively and realistic. Experiment with angles and intensity to find the perfect balance that brings your paper roses to life with vibrant depth.

50 Pack Clear Safety Glasses for Men Women,Scratch & Impact Resistant
- Pack Size: 50 pairs of safety glasses
- Frame Dimensions: 5.6-inch width, 4.3-inch temple
- Lens Size: 2.75 x 1.6 inches
As an affiliate, we earn on qualifying purchases.
Conclusion
By adding shadows, by creating layers, and by shaping each petal, you give your paper roses depth. You make them pop with realism, bring them to life with dimension, and transform your craft from flat to fabulous. Embrace the details, enjoy the process, and experiment freely. When you focus on these techniques, your paper roses won’t just look beautiful—they’ll look stunning, vibrant, and full of life, turning your craft into a true work of art.

Hoqiwild ANSI Z87.1 Clear Safety Glasses Bulk 120 pack, Safety Glasses for men and women, Scratch&Impact-Resistant Clear Protective Glasses for construction, lab, in-/outdoor work
- 120 Pack, Individually Wrapped: Cost-effective safety glasses for work and labs
- Impact-Resistant Polycarbonate: Exceeds ANSI Z87.1 standards with side shields
- Scratch-Resistant Coating: Long-lasting lenses with easy maintenance
As an affiliate, we earn on qualifying purchases.

NoCry Clear Safety Glasses for Men and Women with Anti-Fog and Scratch Resistant Wrap Around Lenses, Adjustable Temples and Nose Pads — ANSI Z87 Certified Protective Eyewear with 100% UV Shielding
- Durable Polycarbonate Wraparound Design: Provides superior protection from threats
- Adjustable Fit with Comfort Features: Extendable arms and soft nose pads
- Anti-Fog and Scratch-Resistant Lenses: 5x more fog resistant, 2x more scratch resistant
As an affiliate, we earn on qualifying purchases.