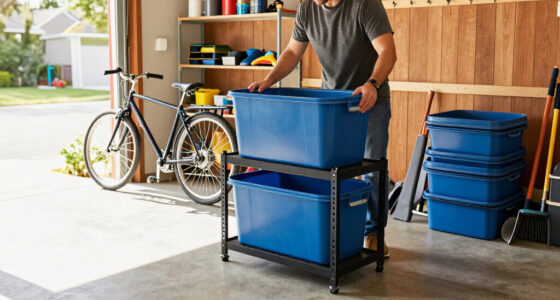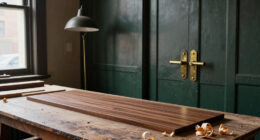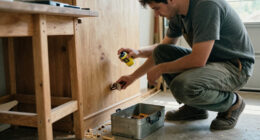

Making things yourself can mean many things: sewing a durable bag, building a hardwood table, cutting stickers for a small creative business, or preparing inventory for a craft fair. The materials and techniques vary, but successful projects share the same foundation: a clear plan, an appropriate workspace, and tools matched to the work.

Get business pricing on tools and workshop supplies
- Business-only prices and quantity discounts
- Tax-exempt purchasing
- Multiple users, one account, clear invoices
This hub is an orientation guide to DIY, tools, sewing, crafting, and woodworking. Use it to decide where to begin, understand which equipment matters, and find detailed guides for specialized purchases. You do not need a fully equipped workshop on day one. A focused collection of dependable tools, expanded as your projects demand, is usually more useful than a room full of equipment you rarely touch.
Start With the Project, Not the Tool
It is easy to become fascinated by machines, accessories, and workshop upgrades. Before buying anything, define the project you want to complete. List its dimensions, materials, required operations, and desired finish. A wooden cabinet might involve measuring, cutting, drilling, joinery, assembly, sanding, and finishing. A structured fabric bag may require pattern preparation, cutting, layered seams, edge finishing, pressing, and hardware installation.
This project-first approach reveals which capabilities you genuinely need. It also helps you separate essential tools from conveniences. A convenience can still be worthwhile when it reduces repetitive work, improves control, or makes a favorite technique more enjoyable. The important point is to connect every purchase to a real task.
Questions to answer before choosing equipment
- Which materials will you use, and how thick, dense, or delicate are they?
- What is the largest workpiece or pattern you expect to handle?
- How much permanent workspace and storage do you have?
- Will the equipment remain in one place or travel to classes, markets, and job sites?
- Which operations will you repeat often enough to justify a specialized machine?
- What safety equipment, dust control, lighting, ventilation, or electrical capacity will the work require?
As an affiliate, we earn on qualifying purchases.
Build a Workspace That Supports the Work
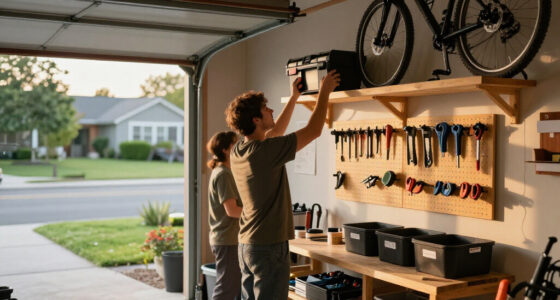
A productive workspace does not have to be large, but it should make common actions comfortable and predictable. Give frequently used hand tools visible, reachable homes. Keep cutting areas clear, provide bright task lighting, and leave enough room to guide long boards or spread fabric without fighting nearby furniture.
Work height deserves particular attention. A surface that suits detailed seated work may be uncomfortable for standing, cutting, planing, or assembling. If one room serves several crafts or several people, an adaptable table can make the space easier to use. Explore the considerations in this guide to craft tables with adjustable height.
Organize by workflow rather than simply by tool type. In a sewing area, patterns, measuring tools, fabric, machines, pressing supplies, and finished pieces can follow the natural progression of a project. In a woodshop, material storage should lead logically toward milling, joinery, assembly, and finishing. Reducing unnecessary carrying and rearranging makes short work sessions much more productive.
Shared-space priorities
- Use mobile or collapsible storage when the room has another purpose.
- Separate clean activities from sawdust, adhesives, paint, and finishing products.
- Label small parts so fasteners, needles, blades, and machine accessories remain identifiable.
- Leave safe clearance around tools and keep cords away from walking paths.
- Plan where unfinished projects can rest without blocking the next task.
As an affiliate, we earn on qualifying purchases.
Choose Sewing Tools Around Materials and Techniques
Sewing equipment should be evaluated as a system. The machine matters, but needles, thread, presser feet, cutting tools, pressing equipment, stabilizers, and accurate setup all influence the result. Start by identifying whether you plan to sew garments, quilts, bags, home décor, stretch fabrics, or mixed-material projects.
Material demands are especially important. Multiple fabric layers, dense seams, batting, webbing, and bulky intersections can change what you need from a machine. If your projects regularly involve challenging assemblies, consult the guide to sewing machines for thick fabrics and layers to compare the category with that use case in mind.
Features should also connect to specific techniques. Needle up/down control, for example, is relevant when a sewer wants the needle to stop in a selected position. That can be useful during pivoting and controlled stitching. The roundup of sewing machines with a needle up/down feature provides a focused starting point for shoppers who have identified that function as a priority.
When specialized seam-finishing equipment enters the picture
A conventional sewing machine remains the center of many sewing rooms, but specialized machines can support particular construction methods. Sergers trim and finish edges as part of their workflow, while coverstitch machines are associated with professional-looking hems and related applications. Some shoppers prefer separate machines; others investigate combined formats because of their space, workflow, or project preferences.
If both functions are relevant to your plans, use the guide to serger and coverstitch combo machines to understand the available options. Consider changeover steps, threading, stitch needs, workspace, and how frequently you expect to use each function before deciding whether a combination machine fits your routine.
Modern pattern preparation
Paper patterns are familiar and portable, but projected sewing patterns offer another workflow. A projector can display compatible pattern files over a cutting surface, potentially changing how patterns are prepared and stored. The setup requires careful attention to mounting, image clarity, alignment, calibration, and the size and position of the cutting area.
Anyone exploring this method can begin with the guide to portable projectors for sewing patterns. Treat the projector as part of a complete setup rather than an isolated purchase: room lighting, available height, device compatibility, calibration, and surface dimensions all affect usability.
As an affiliate, we earn on qualifying purchases.
Develop a Practical Woodworking Tool System
Woodworking rewards accuracy, but accuracy begins before the cut. Learn to select boards, identify grain direction, measure from consistent reference surfaces, and mark clearly. A simple tool kit might include measuring and marking tools, a saw appropriate to the stock, a drill or driver, clamps, sanding equipment, and personal protective gear. Add machines only when project scale, repetition, or a particular technique makes their role clear.
Joinery is a useful example. Screws, dowels, rabbets, dados, loose tenons, and traditional mortise-and-tenon joints solve different structural and visual problems. A mortiser is specialized equipment intended for creating mortises. It becomes relevant when this operation is frequent enough to warrant a dedicated machine and when the available space can accommodate one.
For furniture makers and other woodworkers investigating that category, see the guide to benchtop mortiser machines. Before choosing one, think about the stock sizes you use, intended mortise dimensions, workpiece support, setup requirements, and how the machine would fit into your existing joinery process.
Accuracy habits matter more than equipment volume
- Check measuring and layout tools against known references.
- Mark a clear waste side before cutting.
- Make test cuts and test joints with scrap from the project.
- Use stops, fences, or templates when repeating an operation.
- Dry-fit assemblies before applying glue or finish.
- Allow for seasonal wood movement when designing solid-wood projects.
A machine cannot compensate for a vague layout or unstable workpiece. Learn how each tool references the material, where cutting forces travel, and how the work will be supported throughout the operation. That understanding improves both accuracy and safety.
dust collection system for workshop
As an affiliate, we earn on qualifying purchases.
As an affiliate, we earn on qualifying purchases.
Expand Into Digital and Small-Business Craft Tools
Digital craft equipment combines design files, software, printers, cutters, and consumable materials. Sticker making is a common entry point because it brings these elements into one workflow: preparing artwork, managing color and scale, printing, aligning cuts, removing waste, and packaging the finished pieces.
An integrated machine may appeal to someone seeking a consolidated workflow, but the right choice depends on media compatibility, software, available space, maintenance, and expected production volume. The guide to all-in-one sticker printer and cutter machines focuses on equipment for creators considering that format.
Before investing, map the entire process from design to finished product. Remember to account for storage, replacement materials, test pieces, file organization, and packaging. A machine is only one part of a repeatable production system.
Prepare for Craft Fairs and Mobile Making
Selling at a market introduces a different set of tool decisions. Products, display fixtures, signs, packaging, weather supplies, and personal essentials must move from storage to a vehicle and then to the booth. Weight that feels manageable for one box can become tiring across repeated trips or uneven ground.
A folding wagon can help consolidate loads, but selection should reflect the actual venue and cargo. Consider folded dimensions, interior capacity, handle design, wheel style, terrain, storage space, and how items will be secured. Review the guide to folding wagon carts for craft fairs when planning a transport setup.
Create a repeatable event system
- Pack in the reverse order of booth setup so the first-needed items are accessible.
- Use a checklist for display pieces, inventory, payment supplies, packaging, and personal gear.
- Label containers by booth area or product category.
- Test the complete display before the event.
- Record what was unused, forgotten, damaged, or difficult to transport after each market.
The same principle applies to classes, retreats, and shared workshops: portability is not merely low weight. It includes protection, organized accessories, quick setup, and a realistic plan for moving everything safely.
Buy Tools With a Long-Term Plan
Compare tools according to the work they must perform, not the length of their feature lists. Begin with non-negotiable requirements, then evaluate convenience features, dimensions, storage, consumables, maintenance, and compatibility with equipment you already own. Read manuals before purchasing when possible; they can clarify setup, limitations, and routine care.
Budget for the complete working setup. Depending on the craft, that may include blades, bits, needles, thread, mats, dust collection, clamps, lighting, protective equipment, software, or replacement materials. The headline machine is not always the only meaningful expense.
Finally, leave room for your interests to evolve. Choose versatile foundational tools where versatility helps, and specialized tools where specialization solves a repeated problem. Whether you are stitching garments, building furniture, cutting stickers, or preparing for a craft fair, the best workshop is not the one with the most equipment. It is the one that helps you move confidently from an idea to a finished object.
Halloween Picks
halloween
As an affiliate, we earn on qualifying purchases.