To store finished crafts for a spring craft fair, carefully package each piece with tissue paper, bubble wrap, or foam to prevent damage. Use clear containers or resealable bags, label everything with details, and organize by category on shelves at eye level. Keep storage areas clean and dust-free, stacking heavier items at the bottom. By maintaining an organized, protected system, you’ll keep your crafts in pristine condition, ready when you decide to showcase them. Keep exploring for more helpful tips.
Key Takeaways
- Use protective wrapping like tissue paper and bubble wrap to prevent damage during storage and browsing.
- Organize crafts in labeled, clear containers sorted by category or size for easy identification.
- Store fragile items on top shelves and heavier pieces at the bottom to avoid crushing.
- Maintain a clean, dust-free environment and regularly check for damage or dust buildup.
- Label each craft with details and instructions, making retrieval quick and efficient for upcoming fairs.
Storing finished crafts properly guarantees they stay beautiful and in good condition for years to come. When preparing for a spring craft fair, you want your creations to look their best, whether you’re displaying them for sale or simply browsing for inspiration. The key to maintaining their quality starts with effective storage techniques that protect your work and keep your space organized.
Proper storage preserves your crafts’ beauty and quality for years, ensuring they look their best at every craft fair.
First, focus on protective wrapping. Wrap each craft carefully using tissue paper, bubble wrap, or foam sheets, especially if they’re fragile or have delicate details. This prevents scratches, dents, or any accidental damage during storage or transport. For items that might be prone to dust or dirt, consider using clear plastic sleeves or resealable bags. Not only does this safeguard your crafts, but it also makes it easier to identify specific pieces without unwrapping everything each time. When wrapping, ensure the material is snug but not tight—this avoids warping or crushing your work. Label each package with details like the craft’s name, date, or any special instructions so you can quickly locate what you need later.
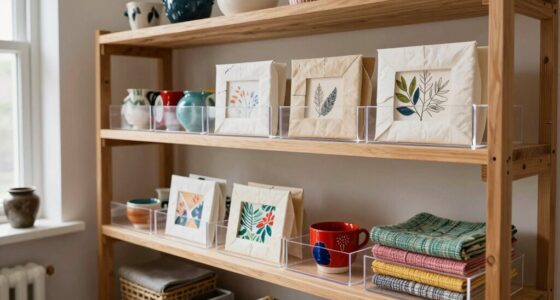
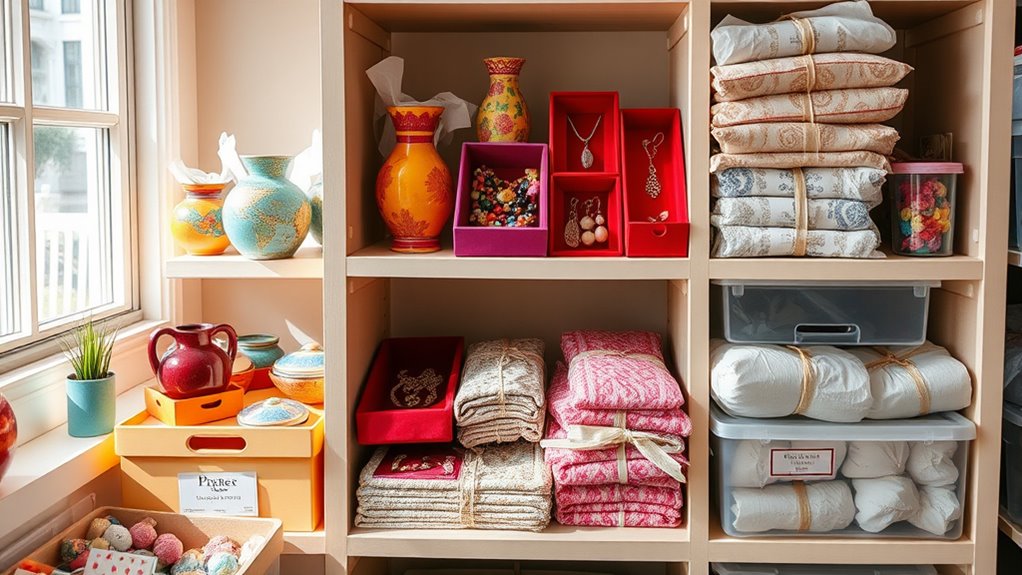
Next, organize your storage space with dedicated shelving. Using sturdy, labeled shelves allows you to categorize your crafts by type, size, or theme, making it simple to find specific items when you need them. Keep your most frequently accessed pieces at eye level or within easy reach, and store seasonal items or less-used crafts on higher or lower shelves. This systematic approach prevents clutter and minimizes the risk of accidental damage when retrieving or replacing items. Use dividers or small bins on your shelves to separate different categories, which further enhances organization and protects your crafts from being jostled or knocked over. When stacking items, ensure heavier or larger pieces are on the bottom to avoid crushing delicate or smaller crafts. Incorporating proper storage conditions helps preserve the quality of your crafts over time.
Additionally, maintaining a clean, dust-free environment is essential. Regularly wipe down your shelves and storage containers to prevent dust buildup that can settle on your crafts. If space allows, consider storing certain items in clear, stackable containers so you can see what’s inside without opening them. This saves time and keeps your crafts in pristine condition. Remember, the goal is to create a storage system that’s both protective and accessible, making your craft preparation less stressful. When everything has its place, you can focus more on perfecting your crafts and less on scrambling to find or protect them at the last minute. Proper storage isn’t just about safety; it’s about preserving your creative work for many craft fairs to come.
craft storage containers with dividers
As an affiliate, we earn on qualifying purchases.
As an affiliate, we earn on qualifying purchases.
Frequently Asked Questions
How Can I Prevent My Crafts From Getting Dusty During Storage?
To prevent your crafts from getting dusty during storage, use airtight containers to keep out dust and debris. Make certain everything is clean and dry before sealing, as moisture can cause damage. You can also add silica gel packs inside to absorb any excess moisture. Store your crafts in a cool, dry place away from direct sunlight, and regularly check on them to ensure they stay dust-free and in good condition.
What Types of Storage Containers Are Best for Delicate Items?
For delicate items, opt for glass jars or fabric bins. Glass jars provide clear, sturdy protection, keeping your crafts visible and dust-free, while fabric bins offer softness and breathability, preventing damage from pressure or impact. Use padded dividers inside these containers to keep your items secure. Avoid plastic containers that may trap moisture or cause static. These choices help preserve the quality and appearance of your delicate crafts during storage.
How Do I Organize My Crafts for Easy Access at the Fair?
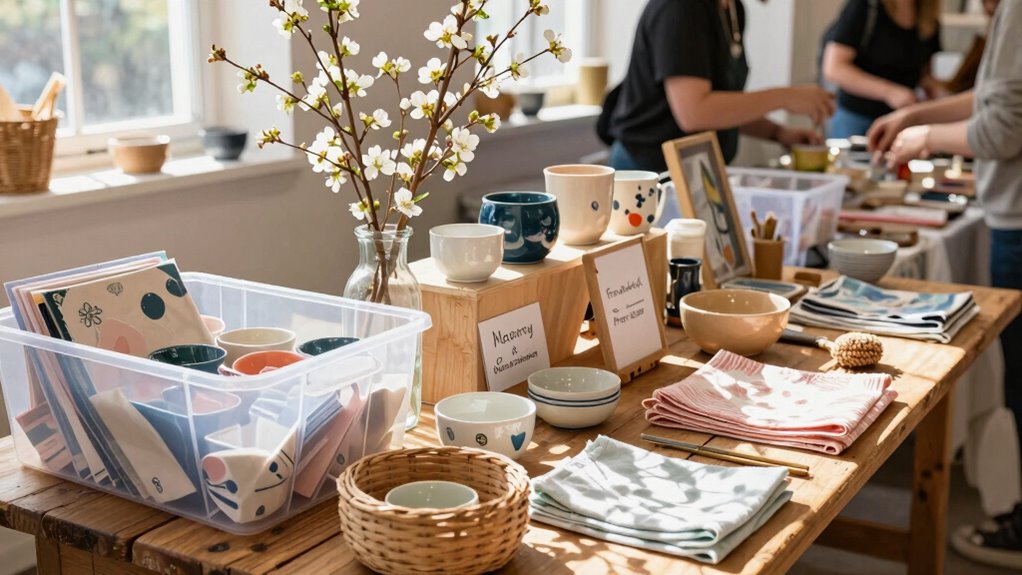
Imagine your crafts neatly arranged on display shelving and craft racks, ready for quick access. You organize by type and size, grouping similar items together for easy browsing. Use labels or small signs to guide customers effortlessly. Keep your most popular pieces at eye level and reserve space for new creations. This way, you can swiftly restock and assist shoppers, making your booth inviting and efficient.
Should I Label My Storage Boxes for Quick Identification?
Yes, you should label your storage boxes for quick identification. Use a clear labeling system with descriptive tags, and consider color coding to differentiate categories easily. This way, you can find your crafts swiftly during setup or browsing, saving time and reducing stress. A well-organized, color-coded labeling system guarantees you always know what’s inside each box, making your craft fair experience smoother and more enjoyable.
What’s the Best Way to Protect Painted or Fragile Crafts?
Think of your fragile crafts like delicate Fabergé eggs—careful handling is key. Wrap painted or fragile items with protective wrapping such as bubble wrap or tissue paper, ensuring cushioning from all sides. Use sturdy display stands to prevent accidental falls or bumps during storage and transport. By doing so, you safeguard your creations and keep them looking pristine, ready to impress at the craft fair.
bubble wrap for fragile crafts
As an affiliate, we earn on qualifying purchases.
As an affiliate, we earn on qualifying purchases.
Conclusion
Storing your finished crafts is like tucking precious treasures safely away for future admiration. Keep your creations protected, organized, and ready to shine at the craft fair. With a little care, your crafts will stay as vibrant and inviting as the day you made them, just waiting to catch eyes and spark conversations. Think of your storage as the silent guardian of your artistic journey, ensuring your passion remains pristine until it’s time to showcase.
clear plastic storage bins for crafts
As an affiliate, we earn on qualifying purchases.
As an affiliate, we earn on qualifying purchases.
labeling supplies for craft organization
As an affiliate, we earn on qualifying purchases.
As an affiliate, we earn on qualifying purchases.