
When fixing loose threads, small cracks, or tiny chips, repair is often your best option because it preserves the item’s authenticity and can be more cost-effective than replacing or redoing. Use precise tools, matching materials, and careful techniques to blend repairs seamlessly. Addressing minor issues early can extend your item’s lifespan and maintain its character. If you want to learn effective methods and tips, you’ll find useful details on how to tackle each type of damage.
Key Takeaways
- Repair small damages preserves original aesthetics and authenticity more effectively than full replacement or redo.
- Using proper techniques and matching materials ensures seamless, durable fixes for loose threads, cracks, or chips.
- Repairing minor issues is often more cost-effective and quicker than complete restoration or replacement.
- Regular inspection and preventative care extend the lifespan of repaired items, reducing the need for extensive repairs later.
- Focused repairs maintain the integrity of delicate or historic artifacts, avoiding unnecessary loss of original craftsmanship.

COCONIX Fabric & Carpet Repair Kit | Fix Tears, Holes, and Burns on Fabric and Carpet Upholstery, Rugs, and Clothing | Easy Application with Customizable Colors
CUSTOMIZABLE COLOR MIXING: Mix the included colors to create a closer match for many fabrics and carpets. Exact…
As an affiliate, we earn on qualifying purchases.
As an affiliate, we earn on qualifying purchases.
Assessing the Damage: When Repair Is the Best Choice

Before deciding to repair a loose thread, you need to assess the extent of the damage. If the damage is minor, repair might be more cost-effective than replacing the entire item. Consider cost-effective alternatives like simple sewing or knotting to secure loose threads quickly. Aesthetic considerations also matter; if the damage is small and discreet, a repair can preserve the item’s look without sacrificing style. However, if the tear or looseness affects the fabric’s integrity or appearance markedly, redoing the item might be better. Evaluate whether the damage is localized or widespread. Small, isolated loose threads typically warrant repair, while extensive damage could justify a full replacement. Your goal is to balance durability, visual appeal, and affordability when deciding whether to repair or replace. Additionally, understanding the contrast ratio of the material can help determine how well the repair will blend with the surrounding fabric and maintain visual consistency. Moreover, assessing the material’s resilience can guide you in choosing the most durable repair method to withstand future wear. Considering the longevity of the repair is also essential to ensure it provides a lasting solution. A thorough understanding of piercing materials and their properties can help you select the best repair techniques for different fabrics or materials, ensuring a seamless and durable fix. Being aware of the net worth of repair techniques and tools can influence your decision, ensuring you select options that offer both effectiveness and value.

Coquimbo Sewing Kit for Adults College Dorm Essentials, Portable Sewing Supplies Accessories Contains Thread, Needles, Scissors, Gifts for Mom Grandma Women Wife Teen Girls Beginner Traveler (Black)
𝑩𝒊𝒓𝒕𝒉𝒅𝒂𝒚 𝑮𝒊𝒇𝒕𝒔 𝑰𝒅𝒆𝒂𝒔: This sewing kit is terrific gifts for people who travel frequently, mother, grandmother, backpacker, adults,…
As an affiliate, we earn on qualifying purchases.
As an affiliate, we earn on qualifying purchases.
Essential Tools and Materials for Small-Scale Fixes
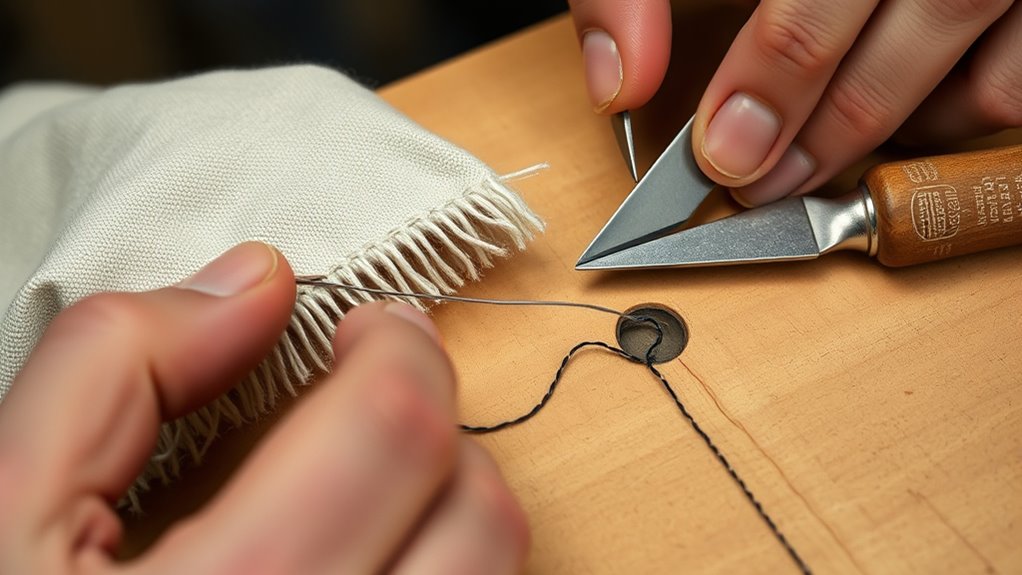
To fix loose threads effectively, you need the right tools for tight repairs, like a sharp needle and small scissors. You’ll also want materials for seam sealing, such as fabric glue or matching thread, to reinforce the area. Having these essentials on hand makes small-scale fixes quick and secure, especially when using precision tools designed for delicate repairs in modern home maintenance. Additionally, understanding free floating techniques can help ensure that repairs blend seamlessly with the existing fabric.
Tools for Tight Repairs
When tackling loose threads, having the right tools makes all the difference. A quality pair of small scissors or a seam ripper helps you trim excess thread neatly without damaging the fabric. For securing loose threads or tiny cracks, fabric adhesives are essential—they provide a strong, invisible bond that holds everything in place. Repair kits often include these adhesives along with needles, pins, and tweezers, making small repairs straightforward. A fine-tipped brush can help apply adhesives precisely. Keep a magnifying glass handy for detailed work on delicate fabrics. Proper fabric repair techniques can greatly improve the longevity of your fixes. Using appropriate fabric adhesives and repair kits, you can fix small issues quickly and effectively, saving your garment from unnecessary redoing. Additionally, selecting the right adhesive type ensures compatibility with different fabrics and enhances durability.
Materials for Seam Sealing
Having the right materials on hand makes seam sealing straightforward and effective. For small repairs, fabric adhesives and seam sealants are essential. They help reinforce seams, prevent leaks, and restore integrity. When choosing materials, consider these key options:
- Seam sealants designed for your fabric type
- Clear, flexible fabric adhesives for discreet fixes
- Specialized seam tape for quick sealing
- Small applicators or brushes for precise application
Using high-quality seam sealants ensures durability and flexibility, preventing future damage. Fabric adhesives work well for tiny chips or loose threads, creating a strong bond without stiffness. Proper application techniques and understanding material compatibility are crucial for long-lasting repairs. Selecting the proper seam sealing materials suited for your fabric ensures a secure and lasting fix. Keeping these materials accessible allows for quick, reliable repairs that extend your gear’s lifespan and keep it performing at its best. Being familiar with fabric types can help you choose the most compatible adhesives and sealants for your specific needs. Additionally, understanding warranty considerations can help ensure your repairs do not void any manufacturer guarantees. Moreover, paying attention to repair techniques can significantly improve the effectiveness of your fixes.

GEAR AID Seam Grip WP Waterproof Sealant and Adhesive for Jackets, Tents, Tarps, Rain Gear and Outdoor Fabric, Repairs Rips and Seals Seams on Nylon, Canvas, Vinyl, 1 oz Tube Seals 12 ft, 1 Pack
Permanent Repairs – Seal seams and fix holes in tents, tarps, awnings, rainflies, and gear like Thermarest sleeping…
As an affiliate, we earn on qualifying purchases.
As an affiliate, we earn on qualifying purchases.
Step-by-Step Techniques for Fixing Loose Threads
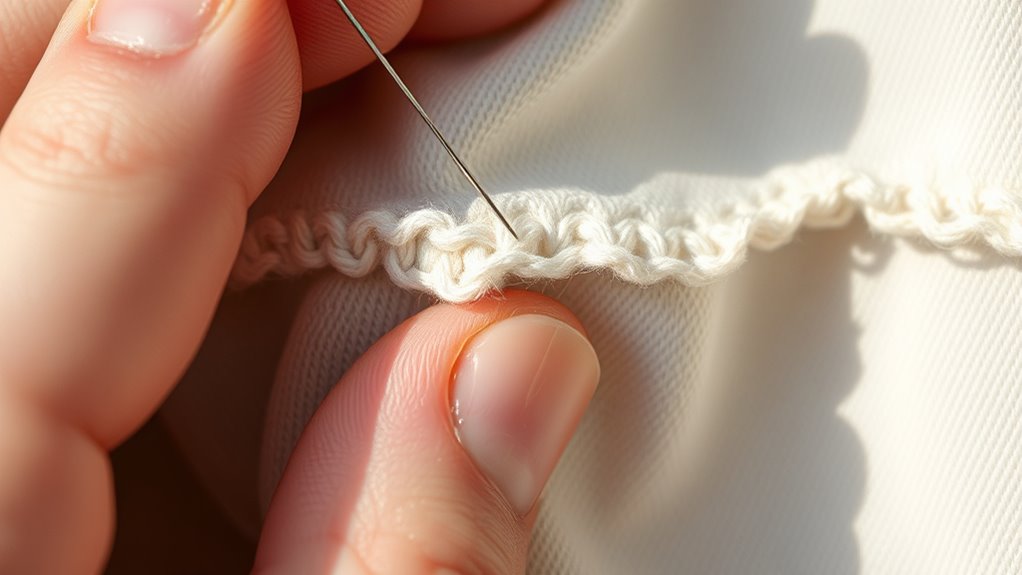
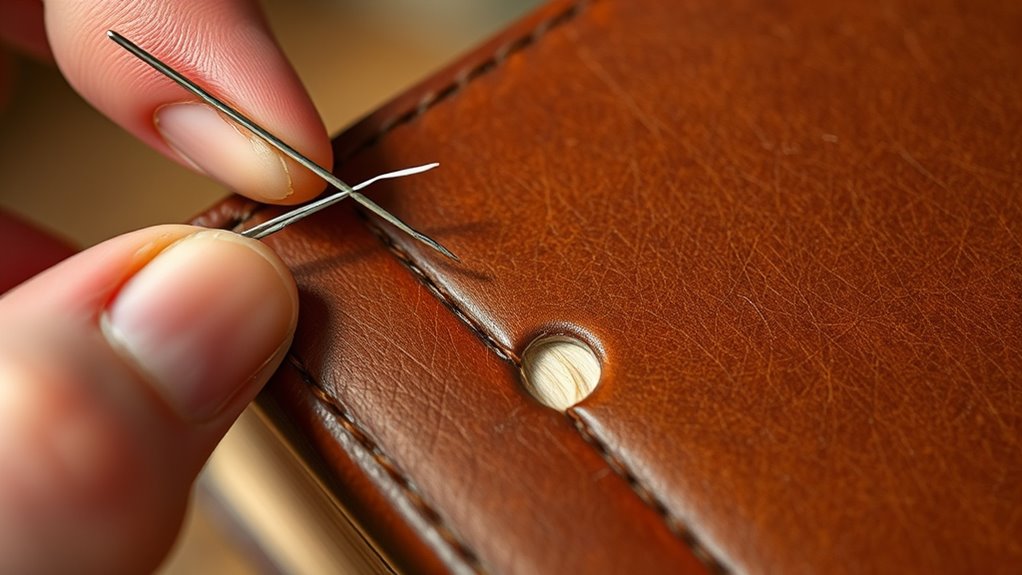
Dealing with loose threads can be straightforward if you follow the right steps. Begin by selecting the appropriate stitching techniques to secure the loose thread. Use a fine needle and matching thread—preferably a color that closely resembles the original fabric or thread—to guarantee a seamless repair. Thread the needle and gently knot the end to prevent slipping. Insert the needle near the base of the loose thread, then make small, even stitches along the original seam or fabric edge, pulling gently to avoid puckering. Continue stitching until the loose thread is firmly secured. For a cleaner look, trim any excess thread close to the fabric once finished. Proper stitching techniques combined with thread matching keep your repair discreet and durable. Effective stitching techniques help prevent further unraveling and extend the life of your repair.

REALINN Wood Furniture Repair Kit- Set of 28 – Touch Up Markers, Fillers with Wood Putty – Repair Scratch, Cracks, Hole, Discoloration for Wooden Door, Floor, Table, Cabinet
KIT INCLUDES our most powerful wood repair compounds, so you can repair all levels of damage to wood…
As an affiliate, we earn on qualifying purchases.
As an affiliate, we earn on qualifying purchases.
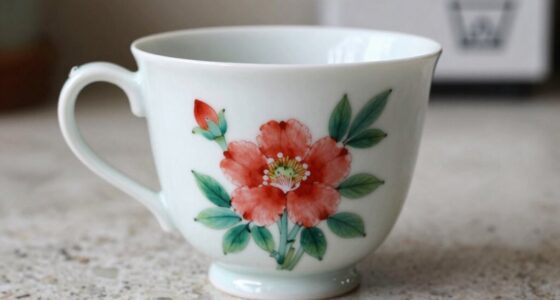
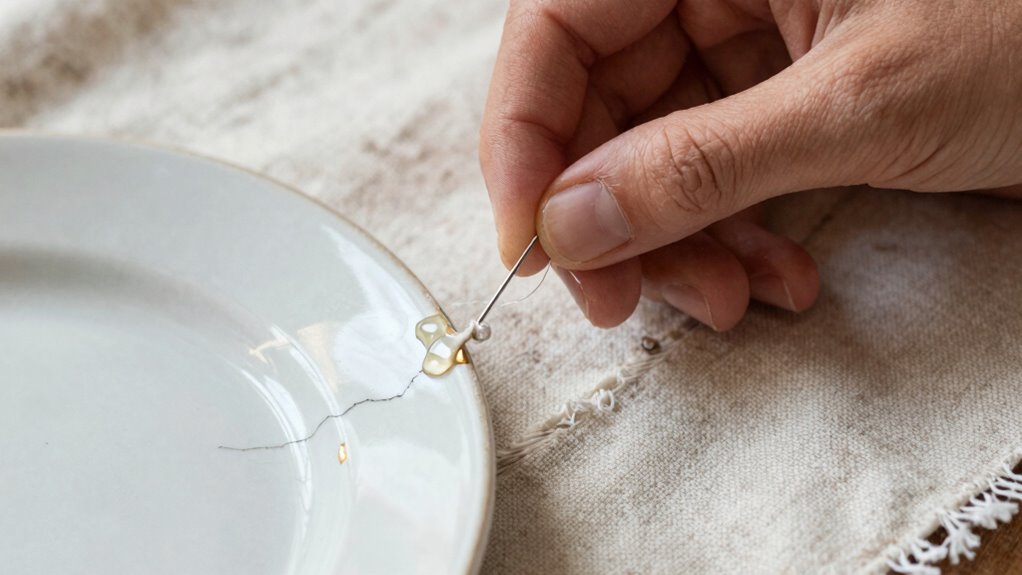
Repairing Small Cracks in Porcelain, Glass, and Other Surfaces

Small cracks in porcelain, glass, and similar surfaces can often be repaired effectively with the right techniques. First, clean the area thoroughly to remove dirt and grease. Then, follow these steps:
- Choose a suitable adhesive designed for the material, ensuring it’s compatible with surfaces like porcelain or glass.
- Use color matching compounds if available, to blend the repair seamlessly with the surrounding surface.
- Apply the adhesive carefully into the crack, avoiding excess that can mar the surface.
- Consider aesthetic considerations; smooth out excess adhesive and allow proper curing time for a neat finish.
- For high-heat surfaces like outdoor pizza ovens or grills, use thermal-compatible adhesives to ensure durability under temperature fluctuations.
Tips for Restoring Tiny Chips on Ceramics and Glassware
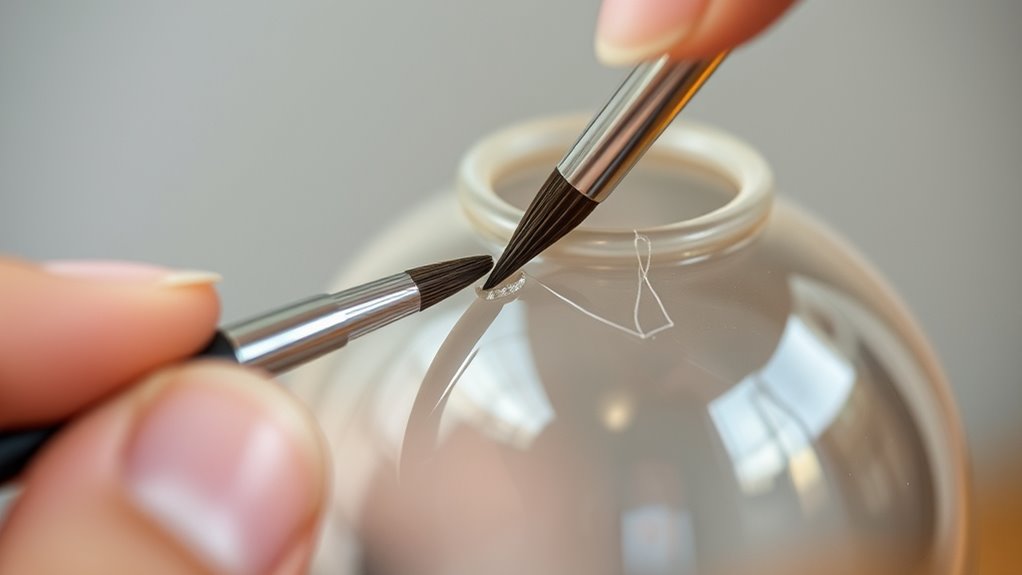
Ever wondered how to make tiny chips on your ceramics and glassware less noticeable? For artistic restoration and historical conservation, precise touch-ups are essential. Use a fine artist’s brush to carefully fill chips with a matching color or clear epoxy for a seamless look. Apply the filler sparingly, then gently smooth it with a soft tool or finger. Once dry, lightly sand the area with very fine grit to blend the repair into the surrounding surface. For glassware, clear nail polish or specialized glass filler can help conceal small chips. Always test your materials on an inconspicuous spot first. These subtle techniques help preserve the piece’s aesthetic and historical integrity, making tiny imperfections less visible while respecting the artifact’s original craftsmanship.
Preventative Measures to Keep Repairs Lasting
To guarantee your repairs stand the test of time, taking proactive steps to prevent further damage is essential. Preventative maintenance ensures your fixes last longer and enhances long-term durability. Here are four ways to attain this:
- Regularly inspect repaired areas for signs of wear or strain. Incorporating preventative measures into your routine can help identify issues before they escalate. Paying attention to cultural insights related to your items can also inform better care practices. Additionally, understanding the air quality around your home can influence how you protect and maintain your repaired items.
- Avoid exposing repaired items to extreme temperatures or moisture.
- Use protective covers or storage to shield delicate surfaces. Proper home maintenance routines can also prevent small issues from developing into larger problems.
- Schedule routine maintenance to address minor issues before they worsen.
- Incorporate simple maintenance routines into your regular home care to catch emerging problems early.
Frequently Asked Questions
How Do I Determine if a Repair Is Permanent or Temporary?
You can determine if a repair is permanent or temporary by evaluating material compatibility and repair longevity. Check if the repair material bonds well with the original surface and is designed for long-term use. If it’s a durable, high-quality fix that withstands regular wear and tear, it’s likely permanent. Test the repaired area after some time—if it holds up without further issues, you’ve achieved a lasting repair.
Can DIY Repairs Be as Durable as Professional Fixes?
DIY repairs can sometimes be durable, but they often face pitfalls like improper technique or using the wrong materials. You might save money initially, but professional advantages include better materials, expertise, and long-lasting results. If you want a repair that lasts and maintains quality, it’s smarter to seek professional help. While DIY can work for small fixes, for more durable, permanent solutions, experts guarantee the job’s done right the first time.
What Signs Indicate a Repair Might Fail Over Time?
If your repair shows poor color matching or the materials aren’t compatible, it’s likely to fail over time. Watch for signs like peeling, cracking, or signs of wear around the repair area. If the fix feels weak or doesn’t blend seamlessly with the original surface, it’s a good indicator that the repair might not hold up long-term. Address these issues early to guarantee lasting durability.
Are There Specific Brands Recommended for Repair Kits?
For repair kits, stick to trusted brand recommendations like Tear-Aid, Gorilla, or Patex, which offer high-quality products. Choose the right repair kit types based on your needs—fabric, plastic, or ceramic repair kits. These brands provide reliable adhesives and tools that guarantee a durable fix. Always read reviews and check if the kit matches your specific repair task to get the best results and prolong your item’s lifespan.
How Long Should I Wait Before Using a Repaired Item?
Think of your repair like planting a seed—you need patience for it to grow strong. You should wait for the drying time and curing period specified on the repair kit instructions, typically 24-48 hours. Rushing it could weaken the fix. So, give your item the necessary time to set, ensuring durability and longevity. Once the recommended period passes, you can confidently start using your item again.
Conclusion
When you choose to repair, you’re planting seeds of patience and care in your treasures. Think of each fix as a gentle stitch in a tapestry, weaving strength and beauty back into what you cherish. With the right tools and a steady hand, your repairs become a delicate dance, transforming small imperfections into stories of resilience. Embrace the process, and watch your cherished items bloom anew, like a garden after a gentle rain.