
TL;DR
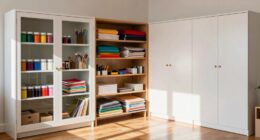
Moving your rig into a closet or small space can drastically reduce noise—if you properly treat, ventilate, and seal it. Proper placement of panels and understanding sound transfer types make all the difference, saving you money and headache.
Ever wish your noisy rig didn’t invade your quiet space? Or maybe you’re tired of blasting your music or recordings into a room that’s way too reflective? The truth is, the right placement and simple treatment tricks can turn a tiny closet into a peaceful, soundproof sanctuary. And no, you don’t need to tear down walls or spend a fortune.
This article explains how to dampen sound, position your gear smartly, and avoid common pitfalls like heat buildup. You can learn more about acoustic dampening and placement techniques. Whether you want a whisper-quiet workspace or a makeshift vocal booth, these practical tips will get you there faster—and cheaper—than you think.
Acoustic dampening
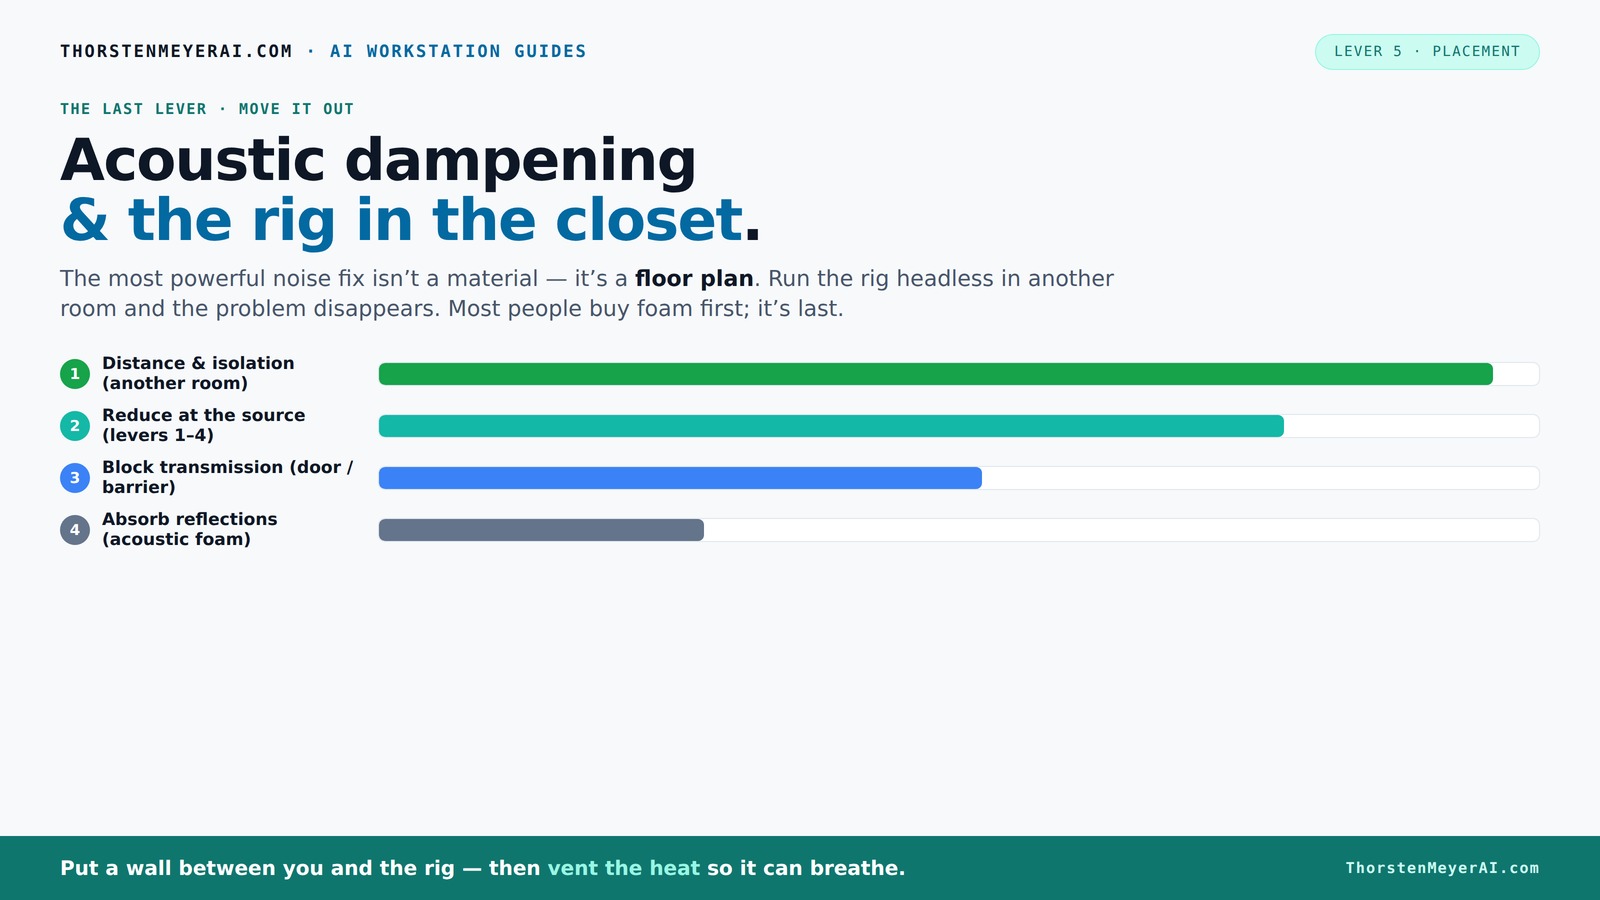
& the rig in the closet.
The most powerful noise fix isn’t a material — it’s a floor plan. A rig you can’t hear because it’s in another room beats any amount of foam. Tap the approaches in Part 1 to see what actually works.
(another room)
(levers 1–4)
(door / barrier)
(acoustic foam)
Contain the noise, not the heat
Key Takeaways
- Sealing gaps and adding mass are the cheapest yet most effective ways to block sound transfer in a closet setup. For detailed tips, see this guide on acoustic treatment DIY.
- Placement of acoustic panels at reflection points inside the closet drastically reduces echo and 'boxy' sound.
- Ventilation is critical—without airflow, your rig will overheat and get loud, defeating the purpose of a quiet space.
- Avoid over-treating with foam; focus on sealing gaps, reflection points, and low-frequency control for best results.
- A 'rig in the closet' can be surprisingly effective for quiet recording if you treat reflections, seal gaps, and ventilate properly.

Focusound 52 Pack Acoustic Foam Panels 1" x 12" x 12" Sound Proof Foam Panles Soundproofing Noise Cancelling Wedge Panels for Home Office Recoding Studio with 300PCS Double-Side Adhesive
Soundproofing - Acoustic foam panels triangular grooves structure for better noise absorption, helps to reduce and absorb unwanted...
As an affiliate, we earn on qualifying purchases.
As an affiliate, we earn on qualifying purchases.
How to Block Sound Transfer in a Closet — The Secret to a Quiet Space
Soundproofing is about stopping noise from escaping or entering. In a closet, the biggest leaks are gaps around the door, cracks in the wall, or unsealed floors. Sealing these with weatherstripping or acoustic sealant can cut noise leakage by over 50%. But it’s not just about sealing; adding mass to surfaces—like thick drywall or dense blankets—can make a significant difference because mass dampens the transmission of sound waves. This combination creates a barrier that’s much more effective at preventing sound from escaping or entering, which is crucial if you want to maintain a quiet environment or avoid disturbing others.
For example, a closet door often acts like a drumhead—adding a heavy blanket or a dense moving pad can dramatically improve sound blocking. Remember, it’s not just about adding mass but sealing gaps to prevent sound leaks. The tradeoff is that too much sealing or mass can make access difficult or impact ventilation, so balance is key.
According to soundproofing experts, sealing every crack is the cheapest, fastest way to make a big difference—think of it as closing the door on noise. The implications are that even small gaps can significantly undermine your efforts, so thorough sealing is essential for a truly quiet space.

Audimute Soundproofing Acoustic Door Seal Kit - Door Sweep and Seal - (Standard Size)
Includes a Door Seal (3/16" x 1/2" x 25') and a Door Sweep (1/2" x 1.5" x 4').
As an affiliate, we earn on qualifying purchases.
As an affiliate, we earn on qualifying purchases.
The Best Placement Tricks to Minimize Reflections & Echo
Placement is everything when it comes to controlling reflections inside your closet. You might find these placement tips helpful. Acoustic dampening isn't just about blocking sound—it's about controlling how sound bounces around. If reflections are uncontrolled, they can cause a 'boxy' or echoey sound that diminishes clarity and warmth in recordings. Strategically placing soft materials like thick blankets, foam panels, or even rugs on the walls and ceiling can absorb these reflections. The goal is to target primary reflection points—areas where sound waves bounce directly back to your microphone or listening position.
Placing absorption materials at these points reduces harshness and echo, leading to a more natural and professional sound. For instance, if you’re recording vocals, positioning the mic away from reflective surfaces and using a reflection filter helps isolate the sound. The tradeoff is that over-treating can deaden the room too much, making recordings sound unnaturally dry, so it's important to find a balance.
Pro tip: use a mirror to identify reflection points—any spot where you see the mic's reflection is where to put treatment. Understanding these dynamics helps you tailor your treatment for optimal sound quality without unnecessary clutter or expense.

Knightsacoustic 48 Pack Sound Proof Foam Panels for Walls with Self Adhesive, 12x12x1 Acoustic Foam Panels, High Density Acoustic Panels Sound Absorbing, Fire Resistant Studio Sound Proofing Black
TIP: Thanks to the flame-retardant tech, the foam might smell strong. No worries, it’s safe. Just air it...
As an affiliate, we earn on qualifying purchases.
As an affiliate, we earn on qualifying purchases.
Why Your 'Rig in the Closet' Needs Ventilation — The Hidden Heat Trap
Placing a powerful computer or GPU in a sealed closet sounds ideal—but it’s a heat disaster waiting to happen. Learn more about proper rig setup and ventilation. A rig running 600W of power continuously in a closed space can quickly heat up, causing fans to spin faster and noise to spike. Overheating not only risks hardware damage but also can lead to increased noise levels, defeating the purpose of a quiet setup. Effective ventilation is essential to maintain a stable, cool environment and preserve your equipment’s longevity.
The trick? Incorporate passive vents, exhaust fans, or ducting systems that promote airflow. For example, a small exhaust fan pulling hot air out and bringing in cooler air can keep temperatures stable and noise levels low. The tradeoff is that ventilation systems can introduce noise if not chosen carefully, so selecting quiet fans and designing a discreet airflow path is key. Without proper airflow, your rig will throttle performance and produce more noise, negating your soundproofing efforts. According to cooling specialists, a well-ventilated closet can maintain safe temperatures while keeping noise levels manageable, ensuring your setup remains both quiet and reliable.

VEVOR Portable Vocal Booth, 6.56 ft Height, Portable Recording Studio with Travel Bag, Mobile Tablet Stand, Thickened Soundproofing, Sound Isolation Booth for Echo-Free Vocals, Podcasts, Voiceovers
Say Goodbye to Echoes: Built with durable Oxford cloth and acoustic padding, this recording booth for the home...
As an affiliate, we earn on qualifying purchases.
As an affiliate, we earn on qualifying purchases.
How to Use Acoustic Treatment Inside a Small Closet — The DIY Hack
Inside your closet, absorbing sound reflections is key to avoiding that 'boxy' echo. For DIY ideas, see this DIY acoustic treatment article. Start with foam panels at reflection points—like behind your mic and on the side walls—because these are where sound waves bounce directly back toward your microphone or ears. Proper placement ensures that the sound energy is absorbed before it can create echo or harshness, leading to clearer recordings.
Use bass traps in the corners to tame low-frequency buildup, which can cause muddiness in vocals or instruments. Rugs and thick blankets on the floor and door further absorb sound and reduce echo, especially in small, enclosed spaces where sound waves tend to bounce repeatedly. The tradeoff is that over-treatment can make the space sound unnaturally dead or dull, so focus on key reflection points and low-frequency areas for a balanced sound.
For example, a hobbyist recorded vocals in a tiny closet with just a few foam panels and a blanket over the door. The sound was clear and warm, not hollow or echoey. Remember, treating about 20-40% of the space with absorption materials is enough for most small rooms, avoiding overkill while still improving sound quality significantly.
Comparison: Soft Materials, Soundproofing, and Heavy Building Upgrades. To explore different approaches, visit this resource on soundproofing techniques.
| Approach | What It Does | Best For |
|---|---|---|
| Soft treatment only | Reduces echo, reflections, and harshness | Podcasts, voice notes, casual recording |
| Basic soundproofing | Seals gaps, reduces noise leakage | Shared apartments, late-night work |
| Heavy build-up (mass, insulation) | Significantly blocks outside sound transfer | Dedicated vocal booths, professional setups |
Common Mistakes to Avoid When Setting Up a Closet Studio
Over-treating with foam can make your closet sound dead and unnatural. Ignoring gaps around doors and floors lets noise leak out. And assuming that reflection panels alone will block outside noise—nope, that’s a misconception.
For example, many DIYers pile foam on every surface, only to find sound still escapes or the room sounds 'dead.' The key is understanding that effective soundproofing requires a combination of sealing, absorption, and ventilation. Over-treating can lead to a dull, unnatural sound or even trap heat, so balance is crucial. Also, neglecting gaps around doors or ventilation can significantly undermine your efforts—sound will find its way out or in through these leaks. The implication is that a holistic approach, combining sealing, reflection control, and airflow, yields the best results.
Experts warn: always balance absorption with proper sealing and ventilation for a truly effective setup.
Quick Steps to Turn Your Closet Into a Quiet, Functional Studio
- Seal gaps around the door, floor, and walls with weatherstripping and acoustic sealant.
- Add soft treatment at reflection points—behind the mic, on side walls, and ceiling.
- Install bass traps in corners for low-frequency control.
- Ensure proper ventilation—use passive vents or quiet exhaust fans.
- Place your gear carefully, away from reflective surfaces, and set your mic height for best sound.
This simple sequence turns a noisy closet into a tailored, quiet space in just a day or two.
Frequently Asked Questions
What’s the difference between soundproofing and acoustic treatment?
Soundproofing blocks sound from leaving or entering a space, mainly through sealing gaps and adding mass. Acoustic treatment, on the other hand, reduces reflections and echo inside the room, making it sound clearer but not necessarily blocking outside noise.Where should I place acoustic panels in a small closet?
Place panels at reflection points—behind your mic, on side walls facing the sound source, and on the ceiling above. Use a mirror trick to identify these points easily.Do I need bass traps in a closet studio?
Yes, especially if you notice low-end boominess or standing waves. Corner bass traps help tame low-frequency buildup, making recordings sound tighter and more balanced.How do I reduce echo without rebuilding my closet?
Start with soft materials—blankets, rugs, foam panels—focused on reflection points. Seal gaps around the door and floor. This combo significantly cuts echo and improves sound quality.What’s the cheapest way to make a closet usable for recording?
Seal gaps with weatherstripping, drape blankets or moving pads over gaps and door, and add some foam panels at reflection points. These DIY steps are inexpensive and highly effective.Conclusion
Transforming a closet into a quiet, functional studio isn’t about giant investments. It’s about smart placement, sealing gaps, and controlling reflections. Think of it as giving your gear a cozy, well-ventilated home where noise stays contained.
Remember, the best soundproofing isn’t just about absorbing sound—it's about stopping it at the source and preventing leaks. Take these tips, and your closet will become a secret weapon for professional-quality recordings, all without the noise.