
Start by choosing a neutral background like white poster board or seamless paper to keep the focus on your product. Use natural indirect light or affordable softbox lights to create soft, even lighting that avoids harsh shadows. Keep the setup simple and clutter-free, with minimal props if needed. Adjust your camera settings to guarantee crisp, vibrant images. Small adjustments can make a big difference, and by exploring these tips further, you’ll master a premium look on a budget.

Get business pricing on tools and workshop supplies
- Business-only prices and quantity discounts
- Tax-exempt purchasing
- Multiple users, one account, clear invoices
Key Takeaways
- Use natural, indirect lighting or affordable softboxes to create soft, even illumination without harsh shadows.
- Select a neutral, clutter-free background like white foam board or seamless paper for a clean, modern look.
- Adjust camera settings—aperture, shutter speed, ISO—for sharp, vibrant images with minimal editing.
- Keep props minimal and simple to maintain focus on the product, enhancing a premium feel.
- Ensure a tidy, organized setup with consistent lighting and backgrounds for professional, high-quality results.

Creating a professional-looking product photo setup doesn’t have to be complicated or expensive. With some smart choices, you can produce clean, appealing images that look polished and premium. The key lies in mastering basic lighting techniques and selecting the right background choices. These elements make a big difference in how your product is perceived, and they don’t require a hefty budget.
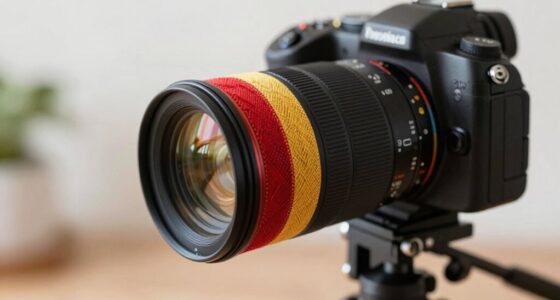
When it comes to lighting techniques, natural light is your best friend. Set up near a large window with indirect sunlight to avoid harsh shadows and glare. If natural light isn’t enough or isn’t consistent, invest in affordable softbox lights or ring lights. These help diffuse light evenly across your product, reducing shadows and highlighting details. Always aim for soft, even lighting to give your photos a professional feel. Avoid direct flash or overly bright lights, as they can create unflattering reflections or harsh shadows. Experiment with angles and distances to find the sweet spot that makes your product look its best. Using a reflector, even a simple piece of white poster board, can bounce light back onto your product, filling in shadows and creating a more balanced look. Paying attention to lighting techniques is crucial for achieving a premium appearance. Additionally, adjusting your camera settings to optimize exposure can further enhance your images. Properly setting your camera’s aperture, shutter speed, and ISO can make a significant difference in photo quality, helping you capture clearer, more vibrant images with less post-editing. Incorporating proper camera settings will help ensure your photos are clear and vibrant.
Background choices are equally vital. A plain, neutral background like white, gray, or black instantly looks clean and modern. White is especially versatile and makes your product pop. You can use a piece of foam board, poster paper, or a seamless backdrop paper roll, which are affordable and easy to set up. For a more premium feel, consider textured backgrounds like wood or marble, but keep them subtle so they don’t distract from your product. The goal is to achieve a clutter-free setting that directs attention solely to what you’re showcasing. If you want a slight variation, you can add a simple prop or two, but avoid clutter that takes away from the main focus. Choosing the right background can also help in conveying brand identity and setting the tone for your product images.
In essence, creating a simple product photo setup that looks premium boils down to paying attention to lighting techniques and background choices. Keep your lighting soft and consistent, and choose backgrounds that complement your product without overwhelming it. These small adjustments can dramatically elevate your images, making your products look more desirable and professional—without breaking the bank. With a little practice, you’ll be able to produce high-quality photos that stand out, all while keeping your setup straightforward and affordable.
affordable softbox lighting for product photography
As an affiliate, we earn on qualifying purchases.
As an affiliate, we earn on qualifying purchases.
Frequently Asked Questions
What Camera Settings Are Best for Product Photography?
For product photography, use a small aperture like f/8 or f/11 to guarantee a sharp depth of field, keeping your product in focus. Set your ISO low (around 100 or 200) to avoid noise, and choose a shutter speed that prevents motion blur. After shooting, apply color correction in post-processing to enhance colors and maintain a professional, premium look. This setup assures clarity and vibrant, true-to-life images.
How Do I Choose the Right Background for My Product?
Choosing the right background can make your product pop like fireworks on New Year’s Eve. Focus on color coordination to match your product’s vibe, ensuring it complements rather than clashes. Consider background textures—smooth or textured—based on the feel you want to evoke. A clean, neutral background often works best for a premium look, but don’t be afraid to experiment with subtle textures to add depth and interest, making your product stand out.
What Lighting Equipment Is Essential for a Premium Look?
You need essential lighting equipment like softboxes or diffusers to create even, flattering light, minimizing harsh shadows. Use adjustable lighting angles to highlight your product’s best features and add depth. Incorporate color correction gels or filters to guarantee accurate colors and a polished look. Properly positioning your lights and adjusting angles helps achieve a premium feel, making your product stand out while maintaining a clean, professional aesthetic.
How Can I Prevent Reflections and Glare on My Product?
Imagine your product as a mirror pond, smooth and inviting. To prevent reflections and glare, use reflection control techniques like polarizing filters and diffusers, which act like gentle ripples calming the surface. Keep your lights indirect and avoid harsh angles. Adjust your camera’s angle and use matte or non-reflective backgrounds. These steps will help you master glare reduction, revealing your product’s true beauty without unwanted shine or reflections.
What Post-Processing Techniques Enhance a Simple Setup?
You can enhance your product photos with post-processing by applying color correction to guarantee accurate, vibrant colors that match your product. Use background removal to create a clean, professional look, making your product stand out. Adjust contrast and sharpness to add depth, and consider subtle touch-ups for imperfections. These techniques elevate your simple setup, giving it a polished, premium feel that attracts customers and emphasizes your product’s quality.
white seamless paper backdrop for photos
As an affiliate, we earn on qualifying purchases.
As an affiliate, we earn on qualifying purchases.
Conclusion
By keeping your setup simple, you focus on what truly matters—your product. With clean backgrounds, soft lighting, and thoughtful angles, you create a scene that’s inviting, professional, and polished. This approach emphasizes your product’s best features, builds trust with your audience, and elevates your brand. Remember, a premium look doesn’t require complexity—just clarity, consistency, and a keen eye for detail. Keep it straightforward, keep it stunning, and let your product shine.
camera settings for product photography
As an affiliate, we earn on qualifying purchases.
As an affiliate, we earn on qualifying purchases.
As an affiliate, we earn on qualifying purchases.
Fall yard work Picks
leaf blowers
As an affiliate, we earn on qualifying purchases.