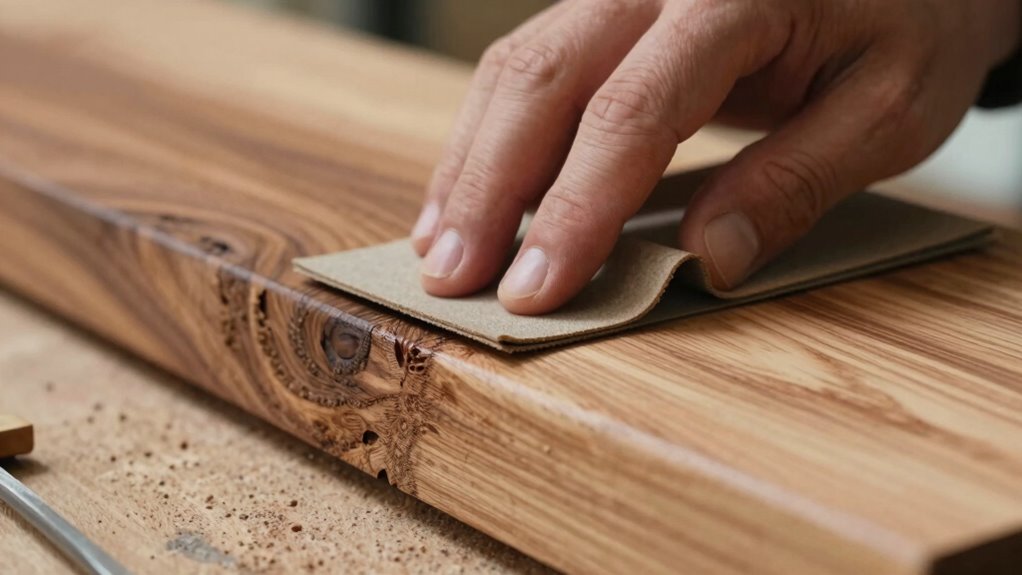

To sand end grain without losing patience, start with a medium grit like 120-150 and follow the grain carefully, using gentle, controlled motions. Switch to finer grits (220-320) gradually, making sure not to gouge or lift fibers. Use a small, soft pad or sanding sponge for detail work and keep pressure light. Follow these tips consistently, and you’ll master smooth end grain finishing—keep going to discover even more effective techniques.
Key Takeaways
- Always sand with the grain to prevent tearing and roughness on porous end grain surfaces.
- Start with medium grit (120-150) and gradually progress to finer grits for smooth results.
- Use soft sanding pads or sponges for better control and even pressure on intricate areas.
- Apply gentle, consistent pressure, especially on open grain, to avoid gouging or fiber lifting.
- Follow the grain pattern carefully and take your time to achieve a professional finish without frustration.

Sanding end grain can be tricky because it tends to absorb more finish and shows imperfections more clearly. The key to a smooth, professional-looking finish lies in understanding the grain texture and choosing the right sanding tools. End grain is porous and rougher than face grain, so it requires a delicate approach to avoid uneven spots or scratches. The first step is to assess the grain texture, which varies depending on the wood species. Some woods have a tight, fine grain, while others have a more open, coarse texture. Recognizing this helps you select the appropriate grit and technique. Additionally, grain direction plays a crucial role in achieving a smooth finish, so paying attention to it can prevent unintended scratches. Start with a medium grit, such as 120 or 150, to remove any rough spots or saw marks. Use sanding tools specifically designed for detailed work—like a block sander or a sanding sponge—to maintain control. These tools help you apply even pressure and follow the grain pattern, reducing the risk of gouging or creating uneven surfaces. When working on end grain, always sand with the grain rather than against it, as going against the grain can lift fibers and create a fuzzy surface that’s hard to smooth out later. Take your time and move the sander in gentle, circular or linear motions, making sure to cover all areas evenly. As you progress, switch to finer grits, such as 220 or 320, to refine the surface. Sand lightly; pressing too hard can cause uneven texture or remove too much material. Pay close attention to how the grain texture responds—if you notice fibers lifting or a rough feel, switch to a finer grit or adjust your pressure. Using the right sanding tools, like a soft pad or foam block, can help you apply consistent pressure and follow the contours of the wood more effectively. For corners or intricate areas, smaller sanding tools or pads give you better control and help avoid uneven spots.
Amazon Product B0FNBKTT97
As an affiliate, we earn on qualifying purchases.
Frequently Asked Questions
Can I Sand End Grain by Hand Effectively?
Yes, you can sand end grain effectively by hand. Focus on the grain orientation, sanding with the grain rather than against it, to prevent scratches. Use quality sanding tools like fine-grit sandpaper and block sanders for better control. Keep the surface steady and work slowly, paying close attention to how the grain responds. This approach helps you achieve smooth results without frustration, even when working with tough or uneven end grain surfaces.
What Grit Should I Start With for End Grain?
You should start with a coarse grit like 80 or 100 for end grain, because who wants to dance around the grain all day? This initial grit helps prep the surface, smoothing out roughness and opening up the grain for better finishing. Remember, for grain prep and finishing tips, don’t skip the finer grits afterward—progressively move up to 220 or higher for a silky smooth finish.
How Do I Prevent Splintering During Sanding?
To prevent splintering during sanding, focus on grain protection by sanding with the grain of the wood. Use proper sanding techniques, starting with a medium grit and gradually moving to finer grits. Keep the sander moving smoothly and apply gentle pressure. Consider using a sanding sealer or conditioner first, which helps minimize tear-out. Always check your progress frequently to avoid over-sanding and damaging the delicate end grain.
Is Power Sanding Safe for Delicate End Grain?
Power sanding can be safe for delicate end grain if you take proper precautions. You should use a low speed and a fine grit to minimize damage and splintering. Always wear safety gear, like a mask and goggles, to protect yourself from dust. Make certain you handle the sander gently and keep it moving to avoid gouging or overheating the wood. With careful technique, you protect delicate wood and achieve a smooth finish safely.
How Long Does It Typically Take to Sand End Grain Properly?
You’ll typically spend about 10 to 20 minutes sanding end grain properly, depending on the wood’s hardness and the finish you want. To avoid damaging the grain, use fine-grit sandpaper and gentle pressure. After sanding, apply grain sealing to smooth the surface and prepare it for finishing techniques. Taking your time guarantees a sleek, professional look, so don’t rush—proper sanding sets the foundation for excellent results.
Amazon Product B0F2DYH4Q4
As an affiliate, we earn on qualifying purchases.
Conclusion
Mastering the art of sanding end grain is like taming a wild stallion—you need patience, finesse, and the right technique. When you follow these steps, you’ll turn rough, stubborn surfaces into smooth, gleaming masterpieces. Remember, every gentle pass is a brushstroke on your woodworking canvas. Keep your tools sharp, your pressure light, and your mind focused. Soon enough, you’ll be riding high on the satisfaction of a job well done, with end grain smoother than silk.
Amazon Product B09BJ5SJRP
As an affiliate, we earn on qualifying purchases.
Amazon Product B0991VX3NZ
As an affiliate, we earn on qualifying purchases.