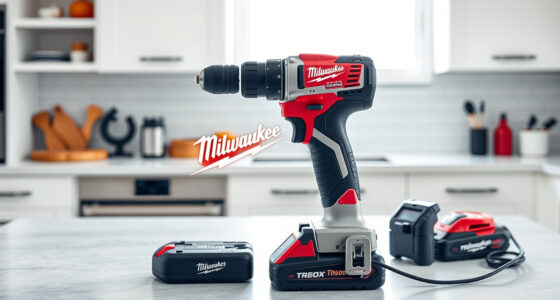
Use this guide to set up a cordless power drill, select the right bit and setting, and drill a hole or drive a screw in wood or another suitable material. It is for beginners doing a small household or workshop task. Allow 15-30 minutes, including setup and a practice run.

Get business pricing on tools and workshop supplies
- Business-only prices and quantity discounts
- Tax-exempt purchasing
- Multiple users, one account, clear invoices

DEWALT DCD771C2 20V MAX Cordless Compact Drill/Driver Kit
- ✔ Voltage: 20 V
- ✔ Battery: Two 20V MAX lithium-ion batteries; 1.3 Ah listed
- ✔ Chuck: 1/2 in

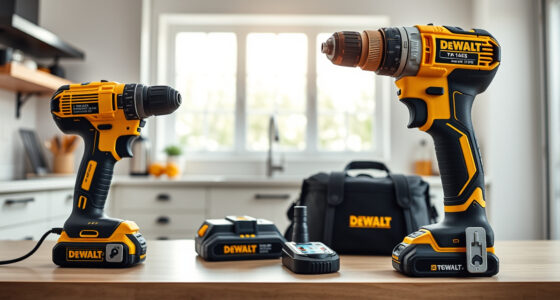
DEWALT 20V MAX Cordless Drill and Impact Driver Combo Kit (DCK240C2)
- ✔ Voltage: 20V MAX
- ✔ Battery type: Lithium-ion
- ✔ Batteries included: Two

DEKOPRO 20V Cordless Drill Set with Battery and Charger
- ✔ Voltage: 20V
- ✔ Battery: One 1.5 Ah lithium-ion battery
- ✔ Speed settings: Two: 0–350 rpm and 0–1,350 rpm
Difficulty: Beginner | Time: 15-30 minutes
What You’ll Need
Tools & Materials:
- Cordless drill with a charged, compatible battery
- Drill bit or screwdriver bit suited to the material and fastener
- Safety glasses
- Pencil or marker and tape measure
- Clamp or vise to secure the workpiece
Knowledge:
- Ability to identify the material and choose a matching bit
- Basic awareness of where electrical wires and pipes may run
Read the drill manual for its controls, battery, and any limits on use. Check the work area for hidden wires, plumbing, or other services before drilling. If you cannot confirm what is behind a wall, use an appropriate detector or choose another location.
DEWALT DCD771C2 20V MAX Cordless Compact Drill/Driver Kit
For most buyers looking for one dependable cordless drill/driver, the DEWALT DCD771C2 offers the clearest balance of size and flexibility. Its 1/2-inch chuck accepts a broad range of common bits, and the two-speed transmission separates slower fastening work from faster drilling. Two included batteries help us keep working while one is charging, a practical advantage over the single-battery DEKOPRO kit.This is still a drill/driver rather than a two-tool system. Compared with the DCK240C2, it lacks a dedicated impact driver for repeated or demanding fastening; buyers who regularly drive many screws may value that extra tool more. The DCD771C2’s listed 1.3 Ah battery capacity is modest, and the 1,500 rpm top speed is not the highest here, though it matches the DCK240C2’s stated maximum. For general household drilling and fastening, its straightforward setup makes the strongest all-around case.
Pros:
- Two batteries support rotation during work.
- 1/2-inch chuck accommodates a wide range of common bits.
- Two speed settings suit drilling and fastening.
- Compact design and ratcheting chuck support controlled everyday use.
Cons:
- The listed 1.3 Ah battery capacity is modest.
- It does not include a separate impact driver.
Best for: Homeowners and DIYers who want one compact drill/driver with a 1/2-inch chuck and two batteries.
Not ideal for: Buyers who need a dedicated impact driver or a higher-capacity battery for extended work.
Bottom line: We recommend the DCD771C2 as the most versatile single cordless drill/driver in this comparison, provided a modest-capacity battery suits our work.
“We recommend the DCD771C2 as the most versatile single cordless drill/driver in this comparison, provided a modest-capacity battery suits our work.”
DEWALT 20V MAX Cordless Drill and Impact Driver Combo Kit (DCK240C2)
The DCK240C2 earns its place through the second tool: alongside a drill/driver, it includes an impact driver for fastening jobs where a conventional drill may feel less suited to repeated screw driving. For a buyer assembling shelves, doing repairs, or handling a mix of drilling and fastening, carrying two tools can also reduce the need to swap bits as often. Two batteries, a charger, and a storage bag make this the most complete two-tool setup in the lineup.That versatility comes with a more complicated choice than the DCD771C2’s single drill/driver format. The product information lists impact-driver torque as both 1,400 and 1,700 in-lb, so we should not rely on either number to predict performance. The kit is also described with a 1/4-inch hex chuck, which applies to the impact driver; buyers should confirm the drill/driver’s chuck details before comparing it with the DCD771C2’s 1/2-inch chuck. Choose this kit for the second tool’s role, not because its conflicting torque figures appear to promise a specific advantage.
Pros:
- Includes both a drill/driver and a separate impact driver.
- Two lithium-ion batteries allow one to be charging while the other is in use.
- LED work lights on both tools include a 20-second delay.
- Storage bag keeps the two-tool kit together.
Cons:
- Impact-driver torque is reported as both 1,400 and 1,700 in-lb.
- The supplied chuck specification is 1/4-inch hex, so buyers should verify which tool it describes.
- Two tools may be more kit than occasional drill users need.
Best for: DIYers who expect to drill holes and drive many fasteners, and want a dedicated impact driver alongside a drill.
Not ideal for: Buyers who need a simple drill-only kit or want unambiguous impact-driver torque specifications.
Bottom line: We would choose the DCK240C2 when a dedicated impact driver matters more than having a simpler, clearly specified drill-only kit.
“We would choose the DCK240C2 when a dedicated impact driver matters more than having a simpler, clearly specified drill-only kit.”
DEKOPRO 20V Cordless Drill Set with Battery and Charger
The DEKOPRO 20V is the most immediately approachable kit for small home projects: it arrives with a battery, charger, drill bits, and screwdriver bits. That means a new DIYer can start with common drilling and fastening tasks without assembling a separate accessory bundle. Its 18+1 torque settings provide adjustment for fastening, while the two speed ranges let us choose slower control or faster drilling.Its convenience is strongest for short, occasional jobs. The listed 1.5 Ah battery is the only battery specified, so it lacks the rotation option of either DEWALT kit, both of which include two batteries. The 0.5-inch maximum chuck is described more broadly than the DEWALT DCD771C2’s explicit 1/2-inch chuck, and the kit’s 40 N·m maximum torque is not directly comparable with the DEWALT figures provided. We would favor DEKOPRO when included bits and a simple starter package matter most, while frequent users should weigh the battery limitation carefully.
Pros:
- Includes drill and screwdriver bits with the battery and charger.
- Two speed ranges cover slower fastening and faster drilling.
- 18+1 torque settings allow adjustment for different fastening tasks.
- Light listed weight of 2.5 pounds suits household use.
Cons:
- Only one 1.5 Ah battery is listed.
- The maximum chuck size is listed as 0.5 inches.
- The kit does not include a second tool for impact driving.
Best for: First-time DIYers who need a cordless drill and a starter assortment of bits for occasional home repairs.
Not ideal for: People planning long work sessions, frequent drilling, or jobs that benefit from rotating between two batteries.
Bottom line: We would pick the DEKOPRO for occasional household jobs when included bits matter more than having a spare battery or an impact driver.
“We would pick the DEKOPRO for occasional household jobs when included bits matter more than having a spare battery or an impact driver.”
As an Amazon Associate we earn from qualifying purchases.
Before You Start
Wear safety glasses and tie back long hair; keep loose clothing and jewelry away from the rotating chuck. Remove the battery before changing bits or adjusting the chuck. Secure the workpiece so it cannot spin, slide, or lift. Do not hold a small piece in your hand while drilling.
Choose a bit designed for the material: wood bits for wood, masonry bits for brick or concrete, and metal bits for metal. Use a bit that fits the screw head when driving. If this is your first time using the drill, practice on scrap material of the same type.
Step-by-Step Instructions
Step 1: Check the drill and battery
Inspect the drill, battery, and bit for cracks, damage, or looseness. Fit a charged battery according to the manual, then locate the trigger, forward/reverse switch, clutch ring, and speed selector. Keep your finger off the trigger while handling the drill.
Tip: If the battery, charger, or drill is damaged, do not use it. Use only a battery specified for the drill model.
Check: The battery locks in place, the drill has no visible damage, and you can identify the main controls.
Step 2: Mark and secure the work
Measure and mark the hole or screw location. Check that the marked point is clear of hidden services and that the bit can pass through without hitting a surface behind the workpiece. Clamp the material to a stable bench or support it firmly in a vise.
Tip: For a hole that must not break through the far side, mark the required depth on the bit with tape or use a depth stop if the drill has one.
Check: The mark is visible, the workpiece cannot move, and the drilling path is clear.
Step 3: Fit the correct bit
Set the forward/reverse switch to the center lock position and remove the battery if your manual directs you to do so. Open the chuck, insert the bit straight and far enough to grip its shank, then tighten the chuck securely. Keep the bit centered so it does not wobble.
Tip: For a keyed chuck, tighten it with the chuck key and remove the key before starting the drill. Never leave the key in the chuck.
Check: The bit is straight, firmly held, and does not shift when you gently tug it.
Step 4: Set direction, speed, and clutch
Select forward rotation for ordinary drilling and screw driving. Choose the low speed for larger bits, more control, or driving screws; use a higher speed for smaller bits when the material and drill manual allow it. For drilling, select the drill symbol or the setting specified by the manual. For screws, start with a low clutch number.
Tip: The clutch limits turning force and helps prevent stripped screw heads or damaged material. Increase its setting gradually if the screw stops before it is seated.
Check: The direction matches the task, the speed is suitable, and the selected mode is appropriate for drilling or driving.
Step 5: Make a practice run
Hold the drill with both hands if practical, keeping the bit aligned with the mark. Place the bit on scrap material, then squeeze the trigger gently to check the direction, speed, and control. Release the trigger and wait for the bit to stop before moving it.
Tip: A drill can twist suddenly if a bit catches. Keep a firm grip and stand in a stable position with your wrist aligned behind the drill.
Check: The drill turns in the intended direction, the bit runs without obvious wobble, and you can control the trigger.
Step 6: Drill the hole or drive the screw
Place the bit on the mark and hold the drill square to the surface. Squeeze the trigger slowly while applying steady, moderate pressure. Let the bit cut; do not force the drill. For a deeper hole, ease off periodically to clear chips. For a screw, keep the bit seated in the screw head and stop when the screw is flush or reaches the planned depth.
Tip: Release the trigger if the bit binds, the drill stalls, or the workpiece shifts. Set the switch to reverse only after the drill stops, then back the bit or screw out carefully if needed.
Check: The hole is at the intended location and depth, or the screw is seated without a damaged head or split material.
Step 7: Stop and inspect the result
Release the trigger and wait until the drill stops completely. Set the direction switch to the center lock position. Check the hole or screw, remove loose chips, and inspect the workpiece for cracks or movement. Remove the battery before taking out the bit or cleaning the drill.
Tip: A bit may be hot after use. Let it cool before touching the cutting end or changing it.
Check: The workpiece is intact, the hole or screw meets the planned position and depth, and the drill is switched off before storage or bit changes.
Common Mistakes to Avoid
- Using a bit made for a different material. — Match the bit to the workpiece and use a sharp bit in good condition.
- Starting at full speed or pushing too hard. — Begin with a light trigger pull and steady pressure; let the bit do the cutting.
- Leaving the workpiece unsecured. — Clamp it to a stable surface before drilling or driving.
- Changing a bit while the drill could start accidentally. — Lock the trigger and remove the battery before adjusting the chuck.
Troubleshooting
Problem: The bit wobbles while spinning.
Solution: Stop the drill, lock the trigger, and remove the battery. Reseat the bit straight in the chuck and tighten it. Replace a bent or damaged bit.
Problem: The drill stalls or the bit stops cutting.
Solution: Release the trigger. Check that the bit suits the material and is not clogged or blunt. Reduce pressure, select a lower speed for a large bit, and clear chips before trying again.
Problem: The screw stops before it is fully seated.
Solution: Check that the bit fits the screw head and that the drill is in forward. Increase the clutch setting one step at a time, or make a pilot hole if the material calls for one.
Problem: The screw head strips or the material splits.
Solution: Stop and replace a damaged bit or fastener. Use a well-fitting bit, lower the clutch setting, and drill a correctly sized pilot hole when appropriate.
What Success Looks Like
The drill and bit remain under control, the workpiece stays secure, and the finished hole or screw is in the marked position at the intended depth. The surrounding material has no unexpected cracks, the fastener head is intact, and the drill is off before you remove the bit or put it away.
Next Steps
Remove the battery, brush dust and chips from the drill, and store the drill and bits dry in their case. Recharge the battery using its specified charger. For future work, choose the bit and clutch setting for each material and fastener, and check the manual when using a new drill function or accessory.
Frequently Asked Questions
Should I drill a pilot hole before driving a screw?
A pilot hole helps guide a screw and can reduce splitting, especially near the edge of wood or in hardwood. Choose a pilot bit suited to the screw and material; follow the fastener maker’s guidance when available.
What does the clutch setting do?
The clutch limits the torque used to turn a screw. A lower setting stops the drill sooner and can help protect the screw head and material. Raise it gradually if the screw is not reaching the planned depth.
Can I use a cordless drill on brick or concrete?
Use a masonry bit and check whether your drill supports the material and task. Some holes require a hammer drill function; an ordinary drill may be too slow or unsuitable for hard masonry. Follow the drill and bit instructions.
Why does the drill have forward and reverse?
Forward turns the bit for drilling and driving most screws. Reverse backs out a screw or helps withdraw a bit. Let the drill stop before changing direction.