
The most overlooked trick to cutting cleanly with a craft knife is maintaining steady control and proper technique throughout the cut. Many skip carefully marking their lines, using a ruler for guidance, and applying consistent pressure at the right angle. Instead of rushing, focus on slow, controlled strokes, keep the blade sharp, and cut with confidence. Mastering these details makes all the difference—if you want specific tips, keep exploring for more insights.
Key Takeaways
- Keep your craft knife blade sharp through regular maintenance and replacement to ensure smooth, clean cuts.
- Cut slowly with controlled, steady strokes, avoiding force to prevent jagged edges and slips.
- Use a straightedge or ruler as a guide to maintain precise, straight lines.
- Hold the knife at a consistent 30-45 degree angle for optimal cutting efficiency.
- Always cut away from your body on a stable surface, focusing on safety and control throughout the process.
Preparing Your Workspace and Materials

Before you start cutting, it’s essential to set up a clean, well-lit workspace with all your materials within reach. Proper workspace organization helps prevent accidents and keeps your tools accessible. Clear away any clutter that could interfere with your cuts or cause distractions. Make sure your cutting surface is stable and resistant to damage. Safety precautions are vital—wear cut-resistant gloves if needed, and keep your fingers away from the blade’s path. Use a cutting mat to protect your work surface and ensure accurate cuts. Good lighting helps you see your lines clearly, reducing mistakes and the risk of slips. Taking the time to prepare your workspace ensures a safer, more efficient crafting experience, allowing you to focus on precision without unnecessary hazards. Paying attention to ergonomic setup can also reduce strain during detailed cutting tasks. Additionally, maintaining proper tool maintenance ensures your craft knife remains sharp and safe to use, resulting in cleaner cuts and less effort.
Choosing the Right Craft Knife and Blade

Selecting the appropriate craft knife and blade is essential for achieving clean, precise cuts. You want a blade with good durability, so it stays sharp longer and reduces the need for frequent replacements. Look for blades made from high-quality steel that resist dulling. Handle ergonomics also matter—choose a knife with a comfortable grip that fits well in your hand, reducing fatigue during detailed work. A well-designed handle provides better control and stability, helping you execute precise cuts effortlessly. Keep in mind that different projects may require different blades; some are better for thick materials, while others excel at fine, delicate work. Investing in the right tools guarantees smoother cuts and a more enjoyable crafting experience overall. Additionally, choosing tools with ergonomic design can help prevent hand strain during extended use. Selecting blades with high-quality steel ensures they maintain sharpness longer and improve cut quality over time. Furthermore, considering blade sharpness retention can lead to more consistent results and less frequent blade changes. When you select blades designed with durability in mind, you can achieve cleaner cuts with less effort and increased precision over the lifespan of the blade. Incorporating proper maintenance routines, like cleaning blades after use, can also extend their sharpness and effectiveness.
Marking Your Cut Line Precisely

Accurate marking is the foundation of a clean, precise cut. When designing templates, take your time to mark the cut lines clearly and accurately. Use a sharp pencil or fine-tip pen to trace your design, ensuring your lines are visible but not thick. Choosing the right cutting mat is essential; a smooth, self-healing mat provides a stable surface that helps you cut along your marked lines precisely. Before cutting, double-check your markings for accuracy, making small adjustments if needed. Using a ruler or straightedge for straight lines guarantees precision, especially on complex designs. Properly marked lines prevent mistakes and save time, giving you clean edges and professional results. Remember, the key to a perfect cut starts with marking your lines carefully. Incorporating free floating techniques can also help you maintain better control and achieve more precise cuts.
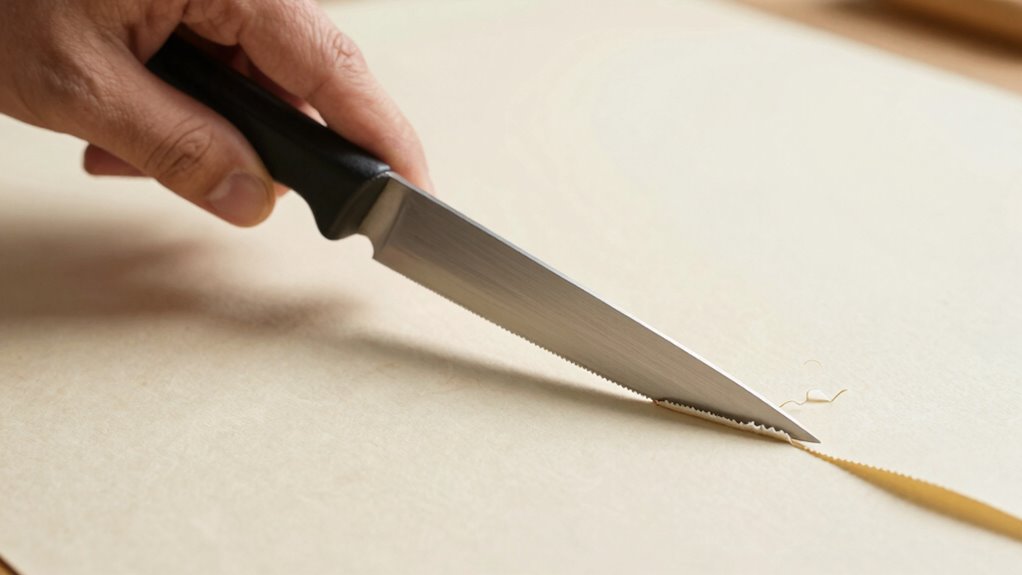
Using Proper Cutting Techniques and Angles

Using proper cutting techniques and angles is essential for achieving clean, controlled cuts with a craft knife. Keep your blade sharp through regular blade maintenance to prevent slips and uneven edges. Hold the knife at a consistent, shallow angle—around 30 to 45 degrees—to ensure precise cuts without tearing or jagged edges. Always follow safety precautions by cutting away from your body and using a stable, non-slip surface. Avoid applying excessive force; instead, let the sharpness of your blade do the work. Proper technique minimizes the risk of accidents and damaged materials. When you maintain your blade and adopt the correct angle, you’ll achieve smoother, more accurate cuts with less effort and safer handling. Additionally, understanding how to control your cutting tools helps prevent material waste and ensures professional results. Practicing proper grip and steady pressure can further enhance your cutting precision for cleaner, more consistent results. Developing a steady hand and controlled motion is crucial for maintaining cutting accuracy over longer projects. Being mindful of your technique can also reduce fatigue during extended use. Incorporating technique refinement into your practice routine can lead to continuous improvement in your skills.
Applying Steady Pressure and Maintaining Control
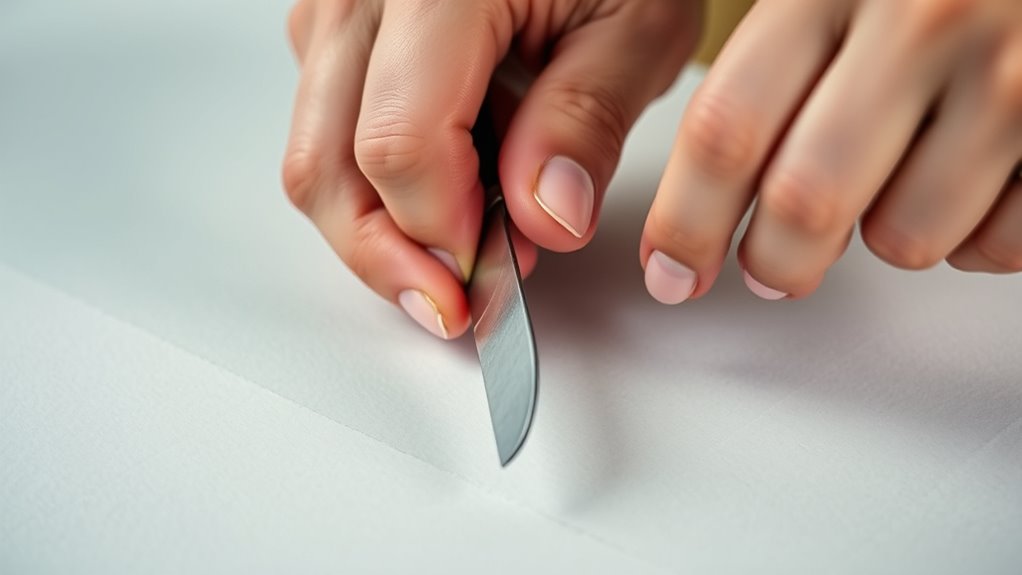
Keep your hand steady and maintain consistent placement on the craft knife to stay in control. Use gentle, controlled strokes rather than forcing through the material, adjusting your pressure gradually as needed. This approach helps guarantee precise cuts and reduces the risk of slips or mistakes.
Consistent Hand Placement
To achieve clean, precise cuts with a craft knife, you need to maintain consistent hand placement throughout your work. An ergonomic grip helps you control the knife comfortably, reducing fatigue and improving accuracy. Keep your hand steady and position your fingers securely on the handle, avoiding unnecessary shifts that could cause uneven cuts. Consistent hand placement also ensures you apply steady pressure, which is vital for a smooth cut. Remember, maintaining blade safety is essential—keep your fingers clear of the blade’s path and hold the handle firmly without gripping too tightly. This controlled, stable grip allows you to guide the knife smoothly along your lines, resulting in cleaner cuts and safer handling. Steady hand placement is the foundation of professional-looking results.
Gentle, Controlled Strokes
Applying steady pressure with your craft knife is essential for clean, precise cuts. Use an ergonomic grip to maintain control and reduce fatigue, helping you stay steady. Keep your hand relaxed but firm, avoiding excessive force that can cause slips or uneven edges. Always prioritize blade safety—ensure the blade is sharp and securely fixed to prevent accidents. Gentle, controlled strokes allow you to follow your line smoothly without pressing too hard, which can damage the material or compromise accuracy. Focus on consistent pressure and movement, letting the blade do the work without forcing it. This approach minimizes tearing and jagged edges, ensuring a cleaner cut and a safer cutting process overall. Incorporating sound vibrations can even enhance your focus and steadiness during detailed cutting tasks. Proper technique not only improves precision but also enhances safety during your craft projects. Additionally, maintaining a sharp blade helps reduce the effort needed and improves the quality of your cut. Being aware of projector technology fundamentals can also help you choose the right tools and techniques for your specific material and project. Paying attention to vetted wave and wind factors can further optimize your cutting approach in outdoor or complex environments.
Adjust Pressure Gradually
As you guide the craft knife along your cut line, gradually adjusting your pressure helps maintain control and achieve a smooth finish. Avoid sudden pressure variation, which can cause jagged edges or slips. Instead, apply steady, even pressure, matching your cutting speed to the material’s resistance. If you notice the blade skipping or dragging, lighten your grip to prevent rough cuts. Conversely, if the cut feels too slow or resistant, gently increase pressure without forcing it. Maintaining a consistent pressure allows you to control the blade’s movement precisely. Remember, slow and steady cuts often produce cleaner results. Focus on smooth, deliberate motions, adjusting pressure gradually to match the material’s response, ensuring a clean, professional finish every time.
Finishing Touches for a Professional Look

To achieve a polished, professional look, focus on aligning your edges precisely and using gentle cutting pressure. Techniques like smoothing out rough edges and cleaning up small imperfections make a big difference. Incorporating smart design principles into your work can enhance both functionality and aesthetics. Additionally, taking the time to properly finish your cuts ensures a seamless and refined final presentation. These finishing touches make certain your project looks clean and expertly crafted.
Precise Edge Alignment
Achieving a professional finish with your craft knife hinges on ensuring your edges are perfectly aligned. To do this, focus on maintaining blade safety and controlling your cutting speed. Keep your hand steady and apply smooth, consistent pressure to avoid jagged edges. When aligning your cut, use a ruler or guide for accuracy. Remember, rushing can lead to slip-ups and uneven lines.
- Use a sharp blade for clean cuts and safer handling
- Cut slowly and steadily to improve precision
- Always check your alignment before applying full pressure
Gentle Cutting Pressure
Applying gentle pressure with your craft knife is essential for finishing your cuts cleanly and professionally. Too much force can cause jagged edges or accidental slips, while too little may result in uneven cuts. Regularly sharpening your blade ensures it slices smoothly, reducing the need to press harder. Keep safety precautions in mind—always cut away from your body and use a stable cutting surface to prevent injuries. A sharp blade requires less force, giving you more control and a cleaner finish. When you apply gentle, consistent pressure, your cuts become precise and smooth, elevating the overall quality of your project. Remember, a well-maintained blade combined with cautious handling is key to achieving professional-looking results every time.
Clean Finish Techniques
For a truly professional finish, paying attention to the final touches can make all the difference. To achieve clean edges, regularly check your blade maintenance—dull blades can cause ragged cuts. Keep your craft knife sharp and replace blades when needed. Always follow safety precautions to prevent accidents during finishing. For a polished look:
- Use a new, sharp blade for smooth, precise cuts
- Lightly sand edges to remove any imperfections
- Apply a fine craft knife to trim tiny uneven spots
- Proper blade maintenance extends the lifespan of your tools and ensures consistent results
These steps ensure your cuts are sleek and accurate. Remember, a sharp blade reduces the risk of slips and injuries, so handle with care. Taking these extra measures results in crisp, clean finishes that elevate your project’s professional appearance.
Frequently Asked Questions
How Often Should I Replace My Craft Knife Blade?
You should replace your craft knife blade as soon as it becomes dull or shows signs of damage to guarantee proper blade maintenance and safety. Typically, this means changing the blade after several uses or when you notice uneven cuts. Regularly inspecting your blade helps prevent accidents and ensures clean cuts. Always handle blades carefully and dispose of them properly to maintain blade safety and keep your projects precise.
Can I Use a Craft Knife on All Types of Materials?
Ever wondered if your craft knife can handle all materials? While craft knives are versatile, their material compatibility varies. You can use them on paper, cardboard, and thin plastic, but not on glass or metal. To guarantee clean cuts and blade longevity, choose the right blade for each material. Always check the manufacturer’s guidelines for material versatility and blade compatibility, so you don’t damage your tools or your project.
What Safety Precautions Should I Take While Cutting?
You should always prioritize safety when cutting with a craft knife. Store blades safely in a designated blade storage, and keep them out of reach of children. Set up your workspace on a stable, clean surface with a cutting mat to prevent slips. Wear cut-resistant gloves if needed, and focus on your task without distractions. Always cut away from your body and replace dull blades promptly to avoid accidents.
How Do I Prevent My Cuts From Jagging or Tearing?
To prevent your cuts from jagging or tearing, you should focus on maintaining your craft knife’s sharpness and using the correct cutting angle. Keep the blade sharp by regularly honing it, and hold the knife at a consistent, shallow angle to guarantee clean cuts. Apply gentle, steady pressure rather than forcing through the material, which helps avoid tearing and results in smooth, precise edges.
What Are Some Common Mistakes to Avoid During Cutting?
You should avoid common mistakes like using a dull blade, which causes jagged cuts, and an improper grip, leading to slips and uneven edges. Always keep your craft knife sharp and hold it firmly with a comfortable, controlled grip. Don’t rush, and guarantee your cutting surface is stable. Taking these precautions helps you make clean, precise cuts without tearing or jagging, making your project look professional.
Conclusion
Mastering clean cuts with a craft knife isn’t just about technique; it’s about attention to detail. Did you know that 78% of craft mistakes come from uneven cuts? By preparing your workspace, choosing the right tools, and applying steady pressure, you’ll elevate your projects to a professional level. So, don’t skip these steps—your precision and patience will pay off with flawless results every time.