
To open jump rings properly, hold them with two pliers on each side of the gap and gently twist in opposite directions, avoiding pulling apart. When closing, twist the ends back together with the same gentle, opposite motion until flush. This method maintains the ring’s shape and strength. Patience and the right tools help guarantee your jewelry stays secure and professional-looking—keep going to master this essential technique.
Key Takeaways
- Use two pairs of pliers to gently twist the jump ring open, not pull it apart, to preserve its shape.
- Hold the ring firmly on both sides of the opening with the pliers for better control.
- When closing, align the ends precisely and twist them back together using the pliers, avoiding force.
- Twist the jump ring in opposite directions to open and close, mimicking a door’s hinge motion.
- Take your time, double-check alignment, and ensure the ends meet flush for a secure, professional closure.
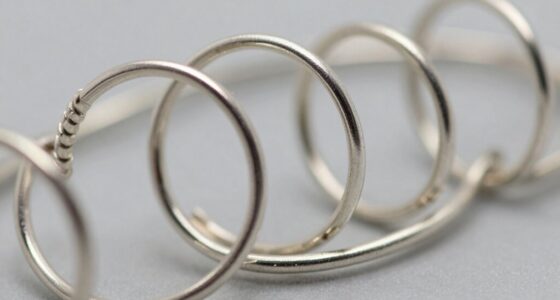
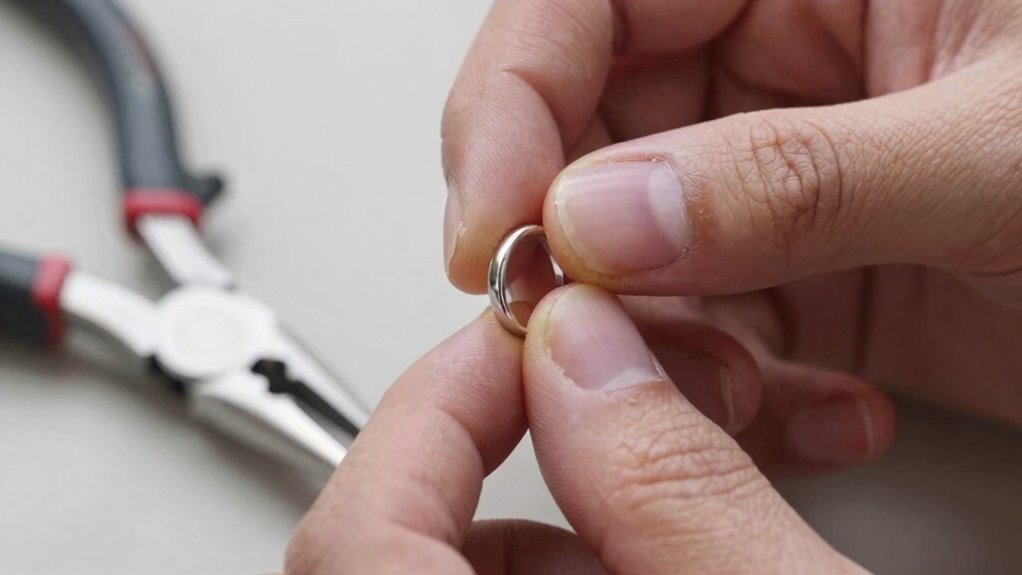
Have you ever wondered how jewelry makers seamlessly connect different components? The secret often lies in how they open and close jump rings. Mastering this skill ensures your jewelry stays durable and professional-looking. To start, you’ll need a few essential tools needed: chain nose pliers, flat nose pliers, or specialized jump ring opening tools. These tools give you better control and help prevent damaging the delicate metal. If you try to open jump rings with your fingers or by twisting them apart, you risk distorting their shape, making it difficult for them to close tightly later. This mistake is common among beginners but easily avoidable with the right techniques and tools.
Master the art of opening and closing jump rings with proper tools for durable, professional jewelry.
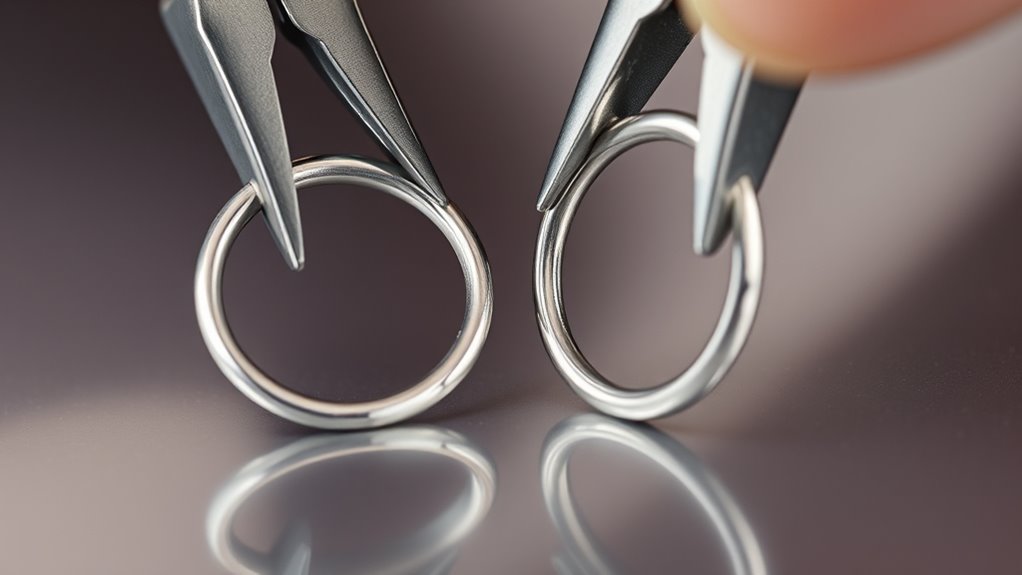
When opening a jump ring, hold the ring with two pairs of pliers—one on each side of the opening. Gently twist the pliers in opposite directions, rather than pulling the ends apart. Think of it like opening a door: you move the two sides away from each other, rather than pulling the door straight out of the hinge. This method preserves the shape and integrity of the jump ring, making it easier to close securely later. If you try to pry the ring open by pulling, you’ll often cause it to become misshapen or weaken the metal, leading to potential breakage or a poor fit once closed.
Closing a jump ring properly is just as important as opening it. After threading your components, align the ends of the jump ring carefully. Using your pliers, hold each side of the ring and gently twist the ends back together. Avoid pulling the ends directly toward each other, as this can deform the shape or leave gaps. Instead, gently twist the ends in opposite directions until they meet flush. If you notice any slight gap or misalignment, don’t force it. Instead, slightly tweak the position by twisting again until the ends are perfectly aligned. A well-closed jump ring looks seamless and provides a secure connection that won’t easily come apart. Proper technique and patience are especially important to ensure the strength and durability of your finished jewelry.
One common mistake is rushing the process—trying to open or close jump rings quickly without paying attention to detail. This often results in misshapen rings, gaps, or weak links that compromise the strength of your jewelry. Take your time with each step, and double-check your work before moving on. Proper technique, the right tools needed, and patience will help you create jewelry that’s not only beautiful but also long-lasting. With practice, opening and closing jump rings will become second nature, making your jewelry projects look professional and polished every time.
jewelry jump ring pliers
As an affiliate, we earn on qualifying purchases.
As an affiliate, we earn on qualifying purchases.
Frequently Asked Questions
Can I Reuse Jump Rings After Closing Them?
Yes, you can reuse jump rings after closing them, but their ring reusability depends on how well they maintain their jump ring durability. Carefully opened and closed jump rings often stay intact, but repeated use can weaken their metal, increasing the risk of breakage. To guarantee longevity, handle them gently and inspect for any signs of damage before reusing. Properly cared for, your jump rings can serve multiple projects.
What Tools Are Best for Opening Tiny Jump Rings?
To open tiny jump rings, you’ll want precision tools like two pair of fine-nose pliers or jeweler’s ring-opening tools. Choose pliers that match the ring size and material considerations, ensuring gentle, controlled movement to avoid deforming the ring. Avoid using your fingers or generic tools, as they may damage delicate rings or cause misalignment, making re-shutting difficult. Proper tools help you open and close tiny jump rings cleanly and securely.
How Do I Prevent Jump Rings From Bending or Distorting?
Imagine your jump ring as a delicate bridge, where material preservation is key. To prevent bending or distorting, use proper alignment by holding the ring steady with jewelry pliers, applying gentle, even pressure. Avoid forcing the ring open or closed. Focus on maintaining its shape and integrity throughout the process, ensuring it stays true and functional, like a perfectly balanced arch that stands strong over time.
Are There Different Techniques for Opening Plated vs. Solid Jump Rings?
Yes, you should use different opening techniques for plated versus solid jump rings. For plated rings, avoid excessive force to prevent scratching or damaging the plating—use gentle prying with two tools. With solid jump rings, you can apply a bit more force without risking damage, but still keep the opening straight to prevent distortion. Always make sure you open and close them carefully to maintain their shape and integrity.
How Much Force Should I Use to Open and Close Jump Rings?
You should use gentle, controlled force when opening and closing jump rings to avoid damaging them. Maintain a proper grip with jewelry pliers, applying steady pressure without forcing too hard. Always follow safety precautions by wearing eye protection and working in a well-lit area. Remember, too much force can distort or weaken the ring, so take your time and handle each jump ring carefully for a secure, long-lasting closure.
jewelry making jump rings
As an affiliate, we earn on qualifying purchases.
As an affiliate, we earn on qualifying purchases.
Conclusion
Now that you know how to open and close jump rings the right way, you’re ready to bring your jewelry designs to life. Think of each jump ring as a tiny gatekeeper, quietly holding your masterpiece together. When you master these skills, your creations will stay secure like a fortress, shining brightly and never falling apart. With patience and care, you’ll craft jewelry that’s as strong and beautiful as a well-tended garden—blooming with confidence.
professional jump ring opener
As an affiliate, we earn on qualifying purchases.
As an affiliate, we earn on qualifying purchases.
jewelry repair tools
As an affiliate, we earn on qualifying purchases.
As an affiliate, we earn on qualifying purchases.