To stop losing mug handles in the bisque stage, start by thoroughly cleaning both the mug and handle to remove dust and grease. Score and slip areas for a strong bond, then carefully attach the handle in a balanced, centered position. Avoid thick glaze applications and make certain your firing schedule ramps up slowly, cools gradually, and maintains consistent temperature. These steps will strengthen your handle’s attachment, and if you want to know more, you’ll find essential tips to improve your process right here.
Key Takeaways
- Thoroughly clean and score both handle and mug surface before attaching to ensure strong mechanical and chemical bonds.
- Attach the handle in a well-centered, balanced position, avoiding crooked placement that causes stress points.
- Use thin, even glaze coats on both handle and mug to prevent uneven shrinkage and reduce stress during firing.
- Gradually ramp up temperature during firing and avoid rapid cooling to prevent handle cracking or detachment.
- Gently blend joints with a damp sponge after attachment to eliminate seams and weak spots before firing.
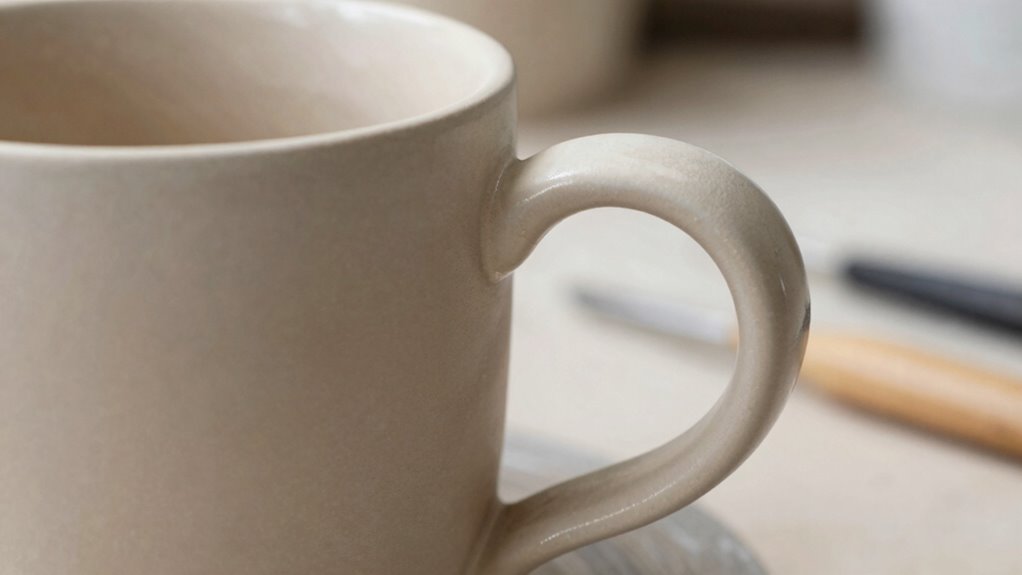
Your handle attachment plays a essential role in how securely and comfortably you grip and control tools or objects. When working with ceramics, especially mugs, the way you attach the handle can make or break the piece’s durability and usability. If you’ve ever experienced losing a handle during the bisque stage or after glazing, you know how frustrating it can be. The secret lies in mastering proper handle attachment techniques that guarantee longevity through glazing and kiln firing.
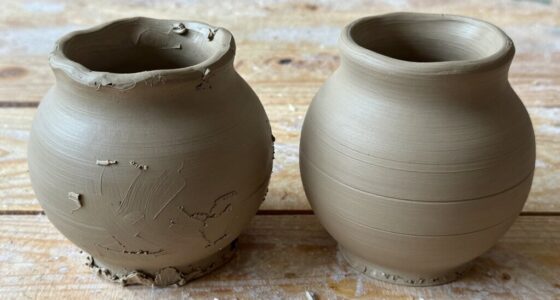
First, it’s imperative to prepare both the mug body and the handle thoroughly. Make sure the surface where the handle attaches is clean, free of dust, grease, or any residual clay that could weaken the bond. When attaching the handle, many artists use scoring and slipping—scratching the surface and applying a slip—creating a mechanical and chemical bond that’s much stronger than simply pressing the pieces together. This step is essential because, during glazing techniques and kiln firing, the handle will be subjected to stress from temperature changes and handling.
As you attach the handle, guarantee it’s well-centered and balanced. A crooked or uneven handle can cause stress points that crack or detach during drying, glazing, or firing. Once the handle is affixed, gently blend the joint with a damp sponge or a soft tool to smooth out any seams, which helps prevent weak spots. Properly blending also reduces the risk of cracks forming during the firing process.
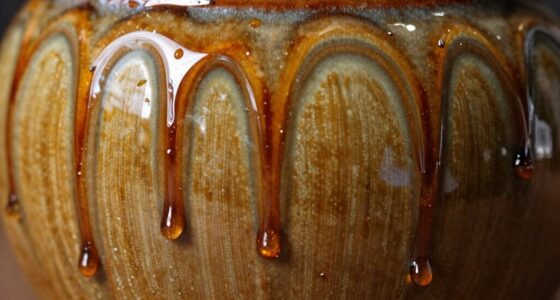
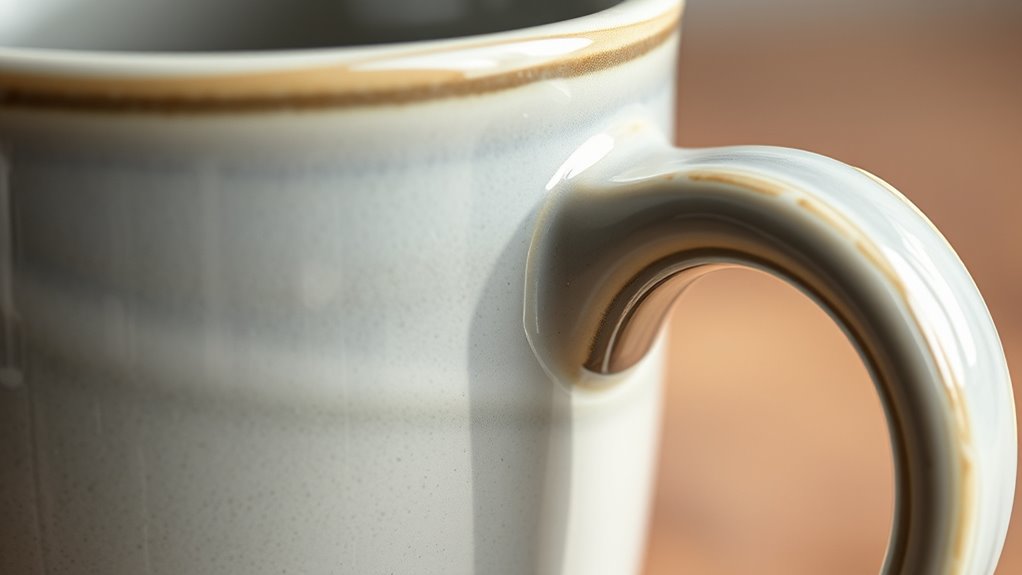
When you’re ready to glaze, consider how your glazing techniques impact the handle’s strength. Thick glazes can create uneven weight distribution and may add stress at the joints, especially if the glaze shrinks unevenly during kiln firing. Applying thin, even coats of glaze on the handle and the mug body helps maintain consistent thermal expansion and contraction. This consistency is critical because during kiln firing, rapid temperature changes or uneven glaze application can cause the handle to pop off or crack.
Additionally, understanding the importance of correct color temperature adjustments can help you achieve the optimal surface quality and strength of your handle. Finally, kiln firing plays a pivotal role in securing the handle. Firing schedules must be carefully controlled—ramp up gradually to avoid thermal shock that could weaken the attachment. Proper kiln firing ensures that the glaze matures uniformly and that the clay’s internal structure stabilizes, locking the handle into place. If you rush the firing process or skip crucial cooling stages, you risk compromising the handle’s bond, leading to breakage or loss after glazing.
Amazon Product B0DGL6N7QC
As an affiliate, we earn on qualifying purchases.
Frequently Asked Questions
What Tools Are Best for Attaching Mug Handles Securely?
You should use a clay sculpting tool or a damp sponge to attach mug handles securely. Guarantee your clay consistency is firm yet pliable, making handle shaping techniques easier. Score both the handle and mug surface thoroughly to create a strong bond. Use slip as glue, pressing the handle firmly into place. These tools and techniques help prevent handles from breaking off during drying or firing.
How Can I Fix a Loose Mug Handle After Firing?
Think of your mug handle as a delicate bridge needing reinforcement. To fix a loose handle after firing, apply handle reinforcement with a strong slip or clay mixture around the joint. For added charm, consider decorative handle attachments that blend seamlessly. Gently score the area, attach the reinforcement, and allow it to dry slowly. Once secure, you can re-fire the mug to guarantee your handle stays firmly in place, ready for use.
What Types of Clay Are Ideal for Durable Handle Attachments?
You should choose stoneware or high-fire clays for durable handle attachments since their consistent clay body enhances strength. Opt for a clay consistency that’s pliable but firm enough to support the handle’s handle design without sagging. This guarantees a secure attachment that withstands regular use. By selecting the right clay and maintaining proper consistency, you reduce the risk of handle breakage or loss, making your mugs more reliable and long-lasting.
How Do Temperature Changes Affect Handle Adhesion?
Temperature changes can weaken handle adhesion because clay experiences shrinkage during cooling and thermal expansion when heated. As the kiln cools, uneven shrinkage may cause cracks or detachments, especially if the handle and mug body shrink differently. To prevent this, make certain your clay has minimal shrinkage and is uniformly heated and cooled. Properly scoring and slipping the joint also helps accommodate these changes, securing the handle during thermal shifts.
Can Handles Be Attached After the Mug Is Bisque Fired?
Yes, you can attach handles after firing, but handle repair requires careful technique. You’ll want to use slip or glue designed for post-firing attachment, matching handle design to your mug’s shape. The key is to guarantee a strong bond and proper drying time to prevent cracks or detachment. While it’s possible, taking your time and following proper methods will help you achieve a seamless, durable handle attachment.
Amazon Product B07H2W5F2Y
As an affiliate, we earn on qualifying purchases.
Conclusion
Next time you pick up that mug, picture the delicate dance of handles and bisque, each connection a secret whisper waiting to be revealed. When you understand the attachment secrets, you hold more than just ceramic—you hold the story behind every crack and curve. No more lost handles slipping away like fleeting shadows. Instead, embrace each mug as a sturdy companion, its handle firmly rooted, ready to warm your hands and your heart with every sip.
Amazon Product B0F5HJMMT9
As an affiliate, we earn on qualifying purchases.
Amazon Product B0FDG38DSW
As an affiliate, we earn on qualifying purchases.