
This checklist is for DIY woodworkers who want dependable ways to measure, lay out, and check work before cutting or assembly. It covers everyday tools as well as a few specialized options, so you can focus on the measuring tasks you actually do. Good layout helps make each step easier to repeat.

Get business pricing on tools and workshop supplies
- Business-only prices and quantity discounts
- Tax-exempt purchasing
- Multiple users, one account, clear invoices
The sections follow common measuring and marking jobs, from checking lengths and squareness to transferring lines and comparing angles. Some slots offer general buying guidance, while others include a named pick. Match each tool to the work it will do in your shop.
Use the look-for lists to compare features, then check the tool’s range, graduations, and fit with your existing setup. For picks with broad or unclear product descriptions, confirm the intended use and dimensions before relying on them for woodworking. Verify compatibility before buying.
Tape Measures
A tape measure is a frequent first step for checking stock length, marking rough cuts, and confirming room or project dimensions. Choose one that feels manageable in your hand and whose markings you can read clearly. Clear graduations matter when you need to transfer a measurement without squinting or guessing.
A common mistake is treating every tape as equally suited to every job. Consider the measurement range you routinely need, the width and stiffness of the blade for the way you work, and whether the markings are easy to read from either direction. Check that the end hook moves as intended and does not snag or feel loose. Check the hook and markings before using the tape for careful layout.
For repeat cuts, pair the tape with a stop or a separate marking tool rather than relying on memory. If you work with metric and imperial plans, make sure the scale matches your drawings. A compact tape may be convenient for small projects, while longer stock or room measurements call for a range that covers the full span. Choose for your projects and confirm the scale you use most.
What to look for:
- A measurement range that covers your usual stock and project dimensions
- Markings with a scale that matches your plans
- High contrast graduations that are easy to read
- A blade and case that feel manageable for your work
- An end hook that moves smoothly and stays secure
Combination Squares
A combination square can help check a board’s edge against a face, mark a line across stock, and set out a right angle. The named pick is a combination winch bar with a square head, listed as a two-pack in carbon steel. Because the product name does not establish its intended woodworking use or the head’s measurement details, verify those before treating it as a conventional combination square.
Common buying mistakes include overlooking the tool’s scale, assuming a head is adjustable, or skipping a check for squareness. Confirm how the head attaches and whether it can be positioned along the bar for the tasks you have in mind. Inspect the contact surfaces for burrs or damage, and check that the bar and head sit firmly against a known straight edge. Test the reference before marking project parts.
Fit depends on the dimensions you need to check and the space available around your workpiece. Confirm the bar length and head geometry against your stock and plans; the product name gives a bar length of 40.5 inches, but further dimensions are not specified there. If you need a traditional adjustable combination square, make sure this pick actually provides that function. Confirm the design and scale before purchase.
What to look for:
- A clearly specified scale and measurement units
- Head geometry suited to checking or marking square edges
- A secure connection between head and bar
- Straight, smooth contact surfaces without burrs
- Dimensions compatible with your stock and available workspace
Combination Winch Bar with Square Head – 2 Pack, 40.5" Carbon Steel, Green
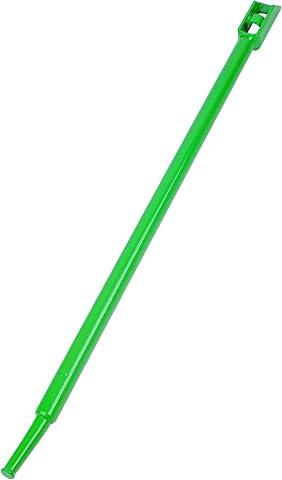
This set of two combination winch bars is designed for use with flatbed trailers, trucks, and winches. Made from durable carbon steel, they feature a non-slip handle and are suitable for tightening and releasing straps and chain load binders.
Pros:
- Durable carbon steel construction for strength
- Non-slip knurled handle for better grip
- Rust and corrosion resistant surface coating
- Multi-functional for various winch and load securing tasks
Cons:
- Limited to standard winches and chain binders
- Long length may be cumbersome in tight spaces
Best for: Shoppers whose work suits the listed bar and square head
Not ideal for: Anyone needing a confirmed traditional adjustable combination square
Bottom line: Check the tool’s scale, head adjustment, and woodworking fit before selecting this pick.
Digital Calipers
Digital calipers are useful when a project calls for comparing small dimensions, such as thickness or the width of a narrow feature. They can make repeated readings easier to see on a display, but only if the jaws contact the work consistently. Repeatable contact is as important as the readout.
A common mistake is choosing by display alone without checking the measurement range, resolution, or jaw shape. Match the range to the parts you expect to measure, and consider whether inside, outside, and depth measurements are relevant to your work. Check that the display can be read in your working position and that the controls are understandable. Match the range to your typical parts.
For woodworking, avoid forcing the jaws against soft surfaces or using calipers where the tool’s contact could mark the material. Compare readings on a known reference and close the jaws gently when checking zero. If your plans use a specific unit system, confirm that the caliper can display it. Check zero and units before taking a series of measurements, and store the tool so its jaws remain protected.
What to look for:
- A range suited to the small parts and thicknesses you measure
- Resolution appropriate to the precision your work requires
- Jaw shapes for the inside, outside, or depth measurements you need
- A display and controls that are easy to read and operate
- A clear method for checking zero and changing units
Marking Gauges
Marking tools help transfer a measurement into a visible line before cutting or fitting parts. The named pick is a woodworking marking knife with a high-carbon steel blade and rosewood handle. A knife can produce a fine scored line, but the product name does not specify a fence or other gauge feature, so confirm whether it matches the marking task you want to perform.
A common mistake is assuming a marking knife and a marking gauge do the same job. A knife may help scribe a line against a guide, while a gauge is generally selected for setting and repeating a distance from an edge. Check the included components, how the blade is held, and whether the tool can be guided consistently. Confirm the function before buying it for repeat edge offsets.
For fit, consider handle comfort, blade access, and whether the tool can reach the areas you need to mark. Check that the blade is suited to the materials and line style in your project, and plan to keep its edge protected when stored. If you need a gauge with an adjustable fence, make sure the listing describes one. Check the fence and adjustment method rather than inferring them from the product name.
What to look for:
- Whether the tool is a knife, a gauge, or includes both functions
- A fence or guide suited to repeatable edge offsets
- A blade that can be secured and accessed as needed
- A handle shape that feels controlled in your hand
- A way to protect the blade during storage
Woodworking Marking Knife with High Carbon Steel Blade and Rosewood Handle

This marking knife scores fine reference lines along rulers, squares, and joinery guides for precise woodworking cuts. Its double-bevel, hand-honed high carbon steel blade works for left- and right-handed users, and the rosewood handle provides a controlled grip.
Pros:
- Scores crisp reference lines for accurate joinery
- Double-bevel blade works from either side
- Rosewood handle supports controlled marking
- Includes a leather blade sheath
Cons:
- Designed for precision marking rather than rough measurement
Best for: Shoppers seeking a woodworking marking knife for guided lines
Not ideal for: Anyone specifically needing a confirmed adjustable marking gauge
Bottom line: Verify whether the knife includes a fence or gauge function before choosing it for repeat offsets.
Bevel Gauges
A bevel gauge helps capture or transfer an angle when a project includes a sloped edge, joint, or matching profile. The key benefit is carrying an angle from one part to another without relying on a fresh visual estimate. Angle transfer is most useful when the same setting must guide several steps.
Common mistakes include overlooking how the blade locks or choosing a tool whose blade length does not suit the workpiece. Check that the blade can move smoothly, hold its position, and sit against the surfaces you need to compare. A larger blade can reach farther across a part, while a compact tool may be easier to handle in a tight area. Check the lock and reach for your typical projects.
A bevel gauge transfers an angle; it does not by itself tell you the angle’s numeric value. If your plan calls for a specific number, consider how you will establish or verify that setting. Check the tool’s materials and contact edges, and compare its fit to your stock thickness and work area. Plan how to set it before starting layout, then use the same reference surfaces when transferring the angle.
What to look for:
- A blade length that reaches across your usual workpieces
- A locking method that holds the selected angle
- Smooth movement without unwanted play
- Contact edges that sit cleanly against the work
- A way to establish a numeric angle when plans specify one
Precision Rulers
A precision ruler gives you a straight reference for short measurements and layout lines. The named pick is a STAEDTLER stainless steel math set that includes a ruler, triangles, and a protractor. That collection may suit users who need several geometry tools, but confirm the ruler’s length, graduations, and construction details for the woodworking tasks you have in mind.
A common mistake is assuming a ruler intended for a math set will have the scale or rigidity needed for shop use. Read the listed units and graduation spacing, and check whether the ruler’s edge is suitable for drawing or marking against. The included triangles and protractor can support layout work, though the product name alone does not specify their dimensions or how they are graduated. Check every scale against your plans.
Fit depends on the size of your parts and whether you need a compact reference or a longer straightedge. Confirm the ruler length and whether it lies flat on your material; avoid using a short ruler to bridge a span where it could shift or leave the line unsupported. If you use a marking knife, verify that the edge and material are appropriate for that contact. Match the length to the parts you lay out most often.
What to look for:
- Ruler length that covers your usual layout spans
- Graduations and units that match your drawings
- A straight edge suited to the marking method you use
- Triangle sizes that fit the angles and parts you check
- A protractor scale that is easy to read
STAEDTLER Stainless Steel Math Set with Ruler, Triangles, and Protractor

This durable stainless steel math set includes a 12-inch ruler, two triangle set squares, and a protractor, all with clear measurements for precise drawing and drafting. Designed for students and professionals, the set offers long-lasting accuracy for technical and artistic work.
Pros:
- Heavy-duty stainless steel construction for durability
- Includes all essential tools for drawing and drafting
- Clear etched measurements for precise work
- Built-in hang holes for easy storage
Cons:
- May be heavier than plastic sets
- Limited to basic drawing tools, not suitable for advanced drafting
Best for: Woodworkers who want a ruler alongside geometry tools
Not ideal for: Anyone needing a specified long shop straightedge
Bottom line: Verify the ruler’s length, units, and edge suitability before relying on this math set for shop layout.
Build your measuring kit in the order your projects demand: start with a readable tape for everyday dimensions, then add a square or straight reference for layout. Choose marking tools and calipers when your work calls for repeated offsets or smaller measurements, and add an angle tool when your plans require transferred slopes. Prioritize frequent tasks and fill gaps as they appear.
You do not need every tool at once to make careful work. Check each pick’s stated dimensions and function, practice on scrap, and use consistent reference edges as you measure and mark. With a small set of tools suited to your projects, each step becomes easier to repeat. Start with the essentials and build from there.
Fall yard work Picks

Halloween Inflatable Haunted House Maze – 20×20 ft with Removable Roof and Blower
As an affiliate, we earn on qualifying purchases.