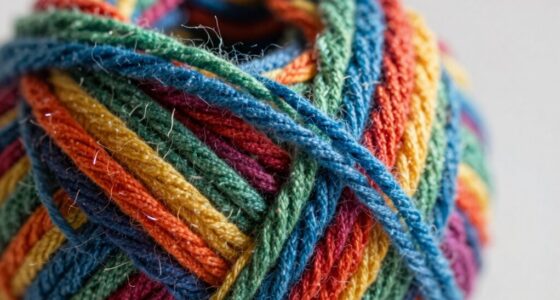
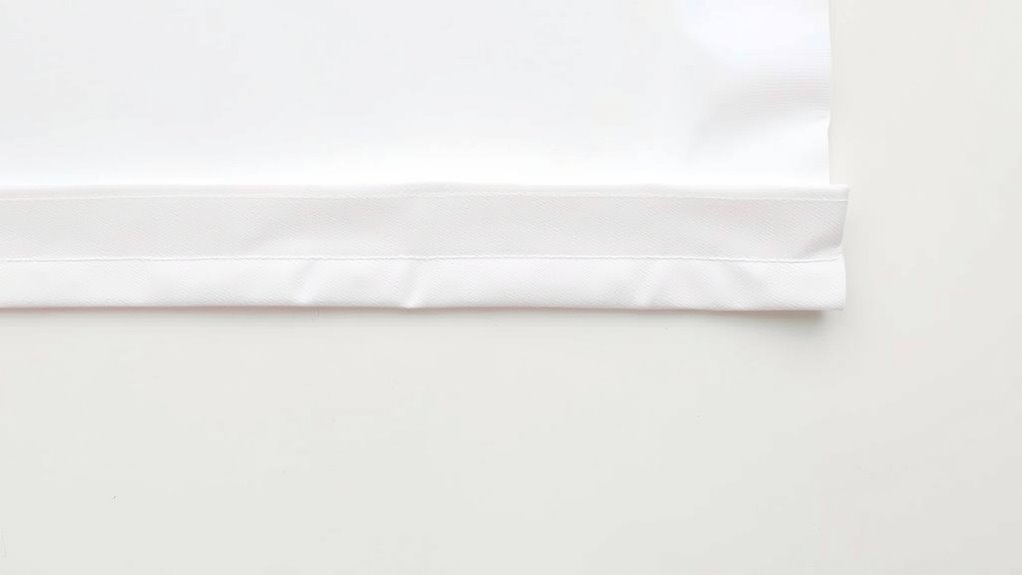
To achieve a neat hem without ironing, focus on precise folding techniques that create a clean edge, such as layering or overlapping folds suited to your fabric. Secure the fold with fabric glue or double-sided tape for a quick, fuss-free finish. No-sew methods like adhesive tapes work great too, especially if you want instant results. When you learn to combine these techniques, you’ll discover simple ways to perfect your hems quickly—keep going to uncover more tips!
Key Takeaways
- Use folding techniques like layering or overlapping folds to create a clean, seamless hem without ironing.
- Secure hems temporarily with fabric glue or double-sided tape for a neat finish without heat.
- Opt for no-sew hemming methods, such as no-sew tape, to avoid the need for pressing or ironing.
- Carefully measure and pin hems in place to ensure even edges before final securing.
- Finish with a gentle hand press or smoothing to eliminate puckers without using an iron.
Amazon Product B094HWZ3NN
As an affiliate, we earn on qualifying purchases.
Gather Your Tools and Prepare Your Fabric

Before you begin hemming, gather all the necessary tools and prepare your fabric. Proper fabric prep sets the foundation for a neat finish, so inspect your material for wrinkles or creases and smooth them out. Choose your tools carefully—scissors, pins, a ruler, and fabric chalk are essentials. If you prefer, a measuring tape or hem gauge can help guarantee accuracy. Selecting the right tools makes the process smoother and more precise, preventing frustration. Lay out your fabric on a flat surface, and take a moment to check that it’s prepped correctly. This initial step ensures your fabric is ready for accurate measurements and clean folding, ultimately helping you achieve a professional-looking hem with less effort. Additionally, understanding fabric types can influence your hemming technique and result in a more polished finish. Proper fabric care can also extend the life of your hem and prevent unnecessary wear. For optimal results, consider ventilation considerations to prevent fabric damage during the process. Being aware of best tools for hemming can further enhance your accuracy and ease. Incorporating sound scientific practices in your preparation can also help in achieving consistent, high-quality hems.
Amazon Product B07X1PKV6Y
As an affiliate, we earn on qualifying purchases.
Use Creative Folding Techniques for a Clean Finish

Using creative folding techniques can considerably enhance the neatness of your hem. By experimenting with different folding patterns, you can create a polished look without extra effort. First, consider the fabric textures; smoother fabrics like cotton respond well to sharp, crisp folds, while softer textiles benefit from gentle, rounded creases. Second, try layering folds to hide raw edges, giving your hem a seamless finish. Third, use overlapping folds to add stability and visual appeal. These techniques help you customize your hem’s appearance, hiding uneven edges and creating a professional look. With a little practice, mastering folding patterns tailored to your fabric textures guarantees your hems look neat, even if you dislike ironing. Additionally, understanding fabric textures can help you choose the most suitable folding method for each material, especially when selecting appropriate folding techniques for different textiles. Recognizing fabric care guidelines can further ensure that your folds maintain their neatness over time. Moreover, paying attention to hem measurements ensures consistency and a clean, uniform appearance. Incorporating these folding strategies and fabric considerations can significantly improve the overall appearance of your hems with minimal effort.
Amazon Product B0FJF7QW9H
As an affiliate, we earn on qualifying purchases.
Secure Your Hem With Fabric Glue or Double-Sided Tape

If you want a quick and secure way to finish your hem, fabric glue or double-sided tape can be effective tools. These adhesive options provide a mess-free, no-sew solution that keeps your hem in place without ironing. These options are especially useful for delicate fabrics where heat from an iron could cause damage. Choose fabric glue for a strong, permanent hold, or double-sided tape for a temporary fix that’s easy to remove if needed. When using these adhesives, prioritize hemming safety by applying them carefully to avoid skin contact or staining your fabric. Make sure your fabric is clean and dry before attaching the hem. Press firmly for a few seconds to guarantee a secure bond. This method is perfect for quick fixes or delicate fabrics where ironing might cause damage. Additionally, understanding the importance of proper adhesive application can help ensure your hem stays intact longer. Being aware of color accuracy can also prevent unwanted color shifts or mismatched hues, especially if you’re working with dyed or patterned fabrics. Recognizing how data integrity in manufacturing processes ensures the durability of your tailored hems can also be beneficial.
Amazon Product B0DWMNPW7D
As an affiliate, we earn on qualifying purchases.
Try No-Sew Hemming Methods for Quick Results
No-sew hemming methods are perfect for quickly finishing your projects without the hassle of sewing. They work well with fabrics compatibility, but be cautious—some materials, like silk or delicate chiffons, may not hold certain adhesives or tapes well, leading to hemming mistakes. To get it right, follow these steps:
- Choose the right no-sew tape or fabric glue suited for your fabric type.
- Press the hem area firmly, ensuring the adhesive bonds securely.
- Use clips or straight pins temporarily to keep the hem in place while the adhesive sets.
- Be aware that fabric compatibility is crucial to prevent damage or poor adhesion, especially with delicate or specialty fabrics.
- Additionally, understanding the fabric properties can help you select the most effective hemming method and avoid mishaps.
- Taking the time to properly prepare the fabric ensures better adhesion and a more professional finish.
- Being aware of material characteristics can help you choose the best no-sew method for your specific fabric, reducing the risk of errors.
- Reading product instructions carefully can prevent common mistakes and improve your results.
Avoid rushing, as improper application can cause uneven hems or damage delicate fabrics. With the right approach, no-sew methods deliver quick, neat results without ironing or sewing.
Final Touches: How to Check and Perfect Your Hem

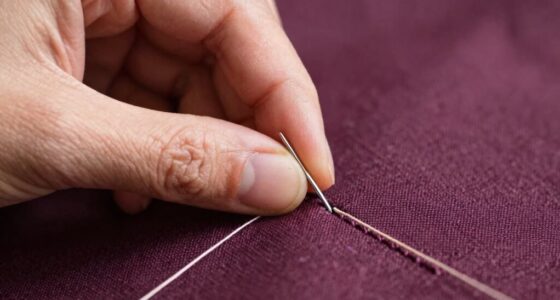
Once you’ve applied your no-sew hemming method, it’s time to check and perfect the finish. Start by examining the hem’s length and straightness, ensuring it hangs evenly. Use a ruler or measuring tape for accuracy. If you have sewing machine basics, set your machine to a straight stitch and carefully sew along the edge for extra security. For hand finishing, hemming needle techniques like small, even stitches help create a clean look. Check for puckering or uneven edges, and make adjustments as needed. Iron the hem gently if you prefer a crisp finish, but if you dislike ironing, pressing with your hands can help smooth out imperfections. A final inspection guarantees your hem looks neat and professional. Incorporating fabric care tips can also help maintain a polished appearance over time. Additionally, understanding basic power tool techniques can make reinforcement or adjustments easier if needed. Being familiar with upfitting fundamentals can provide insights on how to properly secure your hem for different materials and uses. Developing fabric stabilization skills can further ensure your hems stay neat through washing and wear. Using an appropriate sewing machine setting can also help achieve a more durable finish when adding stitches.
Frequently Asked Questions
Can I Hem Stretchy or Delicate Fabrics Without Specialized Tools?
Yes, you can hem stretchy or delicate fabrics without specialized tools by using sewing machine alternatives like hand sewing or fabric glue for hemming for beginners. To keep the stretch, opt for a zigzag stitch or stretch stitch if your machine has one. For delicate fabrics, use a fine needle and lightweight thread, and work slowly to avoid damage. These methods help you achieve neat hems without specialized equipment.
How Do I Prevent Fabric From Fraying After Hemming?
You can prevent fabric from fraying after hemming by using proper stitching techniques like zigzag or overlock stitches for seam reinforcement. These methods strengthen the edge, reducing fraying over time. Additionally, applying a fabric sealant or fray-preventive tape along the raw edge can offer extra protection. Always finish your hems securely, and avoid over-stretching the fabric during sewing, which can weaken seams and cause fraying.
Is It Possible to Remove Fabric Glue or Tape Easily Later?
Yes, you can remove fabric glue or tape easily later. To do fabric glue removal, gently rub with a cloth soaked in warm water or rubbing alcohol to loosen the bond. For tape detachment, peel it slowly at a low angle to prevent fabric damage. If any residue remains, use a mild adhesive remover or a mixture of soap and water. Take your time to avoid tearing or stretching the fabric.
What Are the Best No-Sew Methods for Heavy or Thick Fabrics?
For heavy or thick fabrics, no-sew methods like fabric stiffening sprays work well to hold hems in place. You can use fusible webbing or iron-on bonding tape with hemming patterns, but for thicker materials, fabric glue designed for heavy fabrics offers a stronger hold. Always test a small area first to guarantee the fabric stiffening and adhesive won’t damage your material, ensuring a neat, secure finish without ironing.
How Long Should I Wait Before Wearing or Washing My Hem?
You should wait at least 24 hours before wearing or washing your hem. This allows the fabric softening process to set fully and helps the hemming tools, like fabric glue or no-sew tape, bond properly. Avoid washing immediately to prevent the hem from shifting. Giving it time guarantees your hem stays neat and secure, making your finished look professional and durable.
Conclusion
Remember, a stitch in time saves nine, so take your time to perfect your hem. With the right tools, creative folding, and handy no-sew methods, you can achieve a neat finish without breaking a sweat or ironing. Don’t rush the process—think of it like planting a seed; patience and care will reward you with a polished result. Soon, you’ll see that even the simplest tricks can turn a messy hem into a masterpiece.