
To make bias tape behave without fighting it, start by pressing it well before sewing, using a hot iron with a pressing cloth to avoid shine. Gently press the tape flat and straighten curves as needed to prevent curling. Line up the edges carefully, keeping a consistent seam allowance, and use clips instead of pins to avoid distortion. Proper pressing after sewing helps set the shape, making your project look polished—keep going to discover more helpful techniques.
Key Takeaways
- Gently press bias tape with a hot iron and pressing cloth before sewing to reduce curling and improve pliability.
- Use clips instead of pins to prevent distortion and maintain smoothness while sewing bias tape.
- Line up raw edges carefully, maintaining a consistent seam allowance, and check alignment frequently during sewing.
- Press seams and the finished bias tape from inside outward to shape and set the fabric smoothly.
- Practice patience and proper pressing techniques to achieve a polished, professional finish without fighting the fabric.
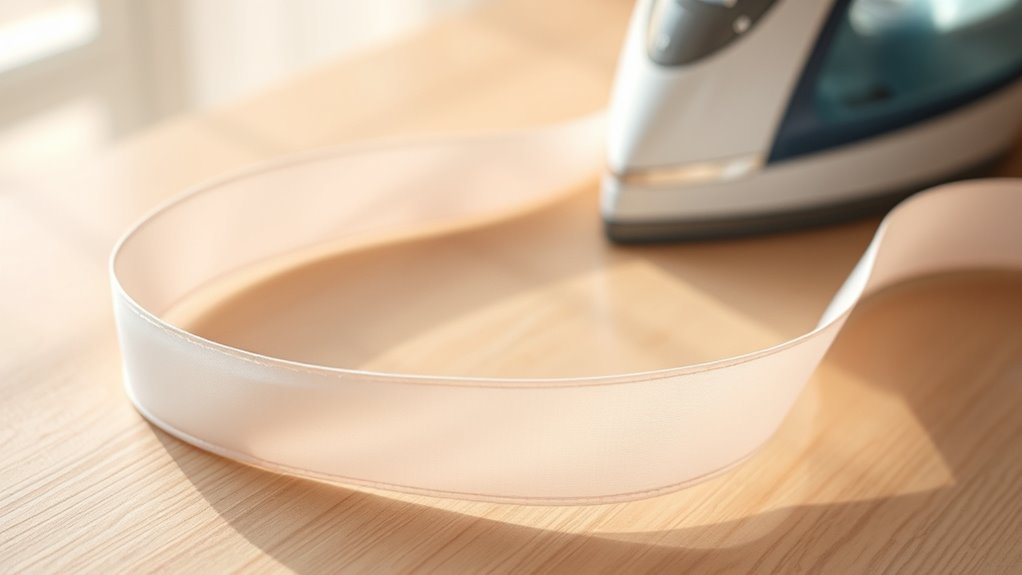
Bias tape can be stubborn and difficult to work with, but with the right techniques, you can make it behave smoothly and accurately. The key lies in mastering pressing techniques and ensuring proper seam alignment. When you’re working with bias tape, it often tends to curl or shift, making it tricky to sew neatly. To combat this, start by gently pressing the tape before you begin sewing. Use a hot iron and a pressing cloth if needed to avoid shiny marks. Pressing helps set the fabric’s fibers, making the tape more pliable and less prone to curling. As you press, carefully straighten out any curves or twists, ensuring the tape is as flat as possible. This initial step makes the subsequent sewing much easier and more precise. Proper preparation can significantly improve sewing accuracy and help achieve a professional look.
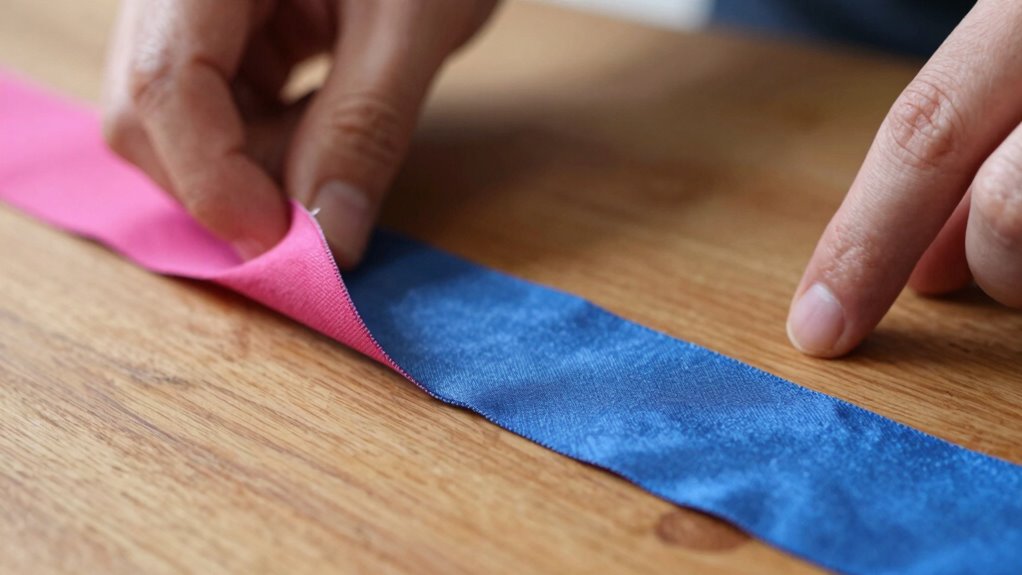
Seam alignment is *vital* when attaching bias tape, especially if you want a clean, professional finish. When you sew it onto your project, line up the raw edges of the bias tape with the edge of your fabric, but don’t forget to check the seam allowance. Keeping a consistent seam allowance—usually around ¼ inch—helps your bias tape sit evenly and prevents puckering. As you sew, continually check that the edges stay aligned. If you notice the tape shifting, pause and adjust it gently with your fingers, then continue sewing. Using clips instead of pins can help keep everything in place without distorting the fabric. Once you’ve sewn the tape in place, press the seam allowances open or to the side, depending on your project, to flatten the seam and improve the overall look.
Another helpful trick is to press the bias tape after sewing, especially along the seam line. This not only secures the seam but also helps the tape lay flat and conform to the curve of your project. When you press, focus on pressing from the inside of the tape outward, shaping it smoothly around edges and corners. Remember, patience is key—pressing in small, deliberate steps yields better results than rushing through. By carefully applying pressing techniques and paying close attention to seam alignment, you’ll find that working with bias tape becomes less of a fight and more of a seamless finishing touch. With practice, these techniques will become second nature, giving your projects a polished, professional look every time.
Frequently Asked Questions
Can I Reuse Bias Tape for Different Projects?
Yes, you can reuse bias tape for different projects. Just make sure to properly maintain it by gently pressing out wrinkles and storing it flat or rolled to prevent warping. Reusing bias tape saves time and fabric, but always check for signs of wear or fraying before reapplying. With good bias tape maintenance, your reusable bias tape stays flexible and easy to work with across multiple projects.
Is It Better to Buy Pre-Made or Homemade Bias Tape?
You should buy pre-made bias tape if you want better durability and a wider range of color options. Pre-made bias tape is convenient, consistently finished, and available in various fabrics and hues, making it easier to match your project. However, making your own offers customization and can be more cost-effective. Consider your project’s needs—if durability and color variety matter most, pre-made bias tape is your best choice.
How Do I Store Bias Tape to Prevent Warping?
To prevent warping, store your bias tape flat or rolled in a cool, dry place. Use storage tips like keeping it in a labeled container or a zip-top bag to avoid humidity and sunlight, which can cause warping. Always make sure the tape is fully flat or neatly rolled, and avoid stacking heavy items on top. Proper storage helps maintain its shape, making it easier to work with whenever you need it.
What Fabrics Work Best for Homemade Bias Tape?
You should choose stable fabrics like cotton or linen for homemade bias tape, as they resist stretch and maintain shape well. Avoid fabrics with significant stretch, which can make bias tape difficult to handle. Also, pick fabrics with colorfast dyes to prevent fading over time. This guarantees your bias tape remains easy to work with and keeps its vibrant color, making your projects look professional and lasting longer.
Can Bias Tape Be Used for Curved Edges?
Yes, bias tape works well for curved edges. To achieve smooth curves, use curved edge techniques like sewing slowly and easing the tape around the curve. When applying bias tape, pin or clip it carefully, and take your time to follow the shape. Stretch or manipulate the tape gently as you sew, ensuring it conforms smoothly without puckering. Proper bias tape application makes curved edges look neat and professional.
Conclusion
By giving your bias tape a little patience and gentle guidance, you can make it cooperate beautifully. Instead of battling with stubborn edges, approach it with a calm hand and a willing heart. With a touch of finesse, your bias tape will smoothly follow your sewing lines, adding that perfect finishing touch. Remember, sometimes the most harmonious results come from a gentle approach—trust your instincts, and your project will turn out just right.