
TL;DR
A DIY guide describes turning eight matching milk crates into a two-by-four bookshelf using cable ties and plywood inserts. The design can be adjusted or decorated, but the guide advises anchoring the finished unit to a wall to reduce tip-over risk.
A DIY guide outlines how to turn eight matching milk crates into a multi-level bookshelf using cable ties and plywood inserts, offering a simple alternative to buying a premade unit. The project can be arranged as a two-by-four grid, customized for storage or display, and should be anchored to a wall to help prevent tip-over accidents.

Get business pricing on tools and workshop supplies
- Business-only prices and quantity discounts
- Tax-exempt purchasing
- Multiple users, one account, clear invoices
The guide’s suggested build uses eight crates of the same color and design, multiple cable ties and eight thin plywood pieces. It recommends measuring the inside dimensions of one crate to size the plywood. The guide suggests looking for crates through online marketplaces or asking local businesses, while noting that availability is not guaranteed.
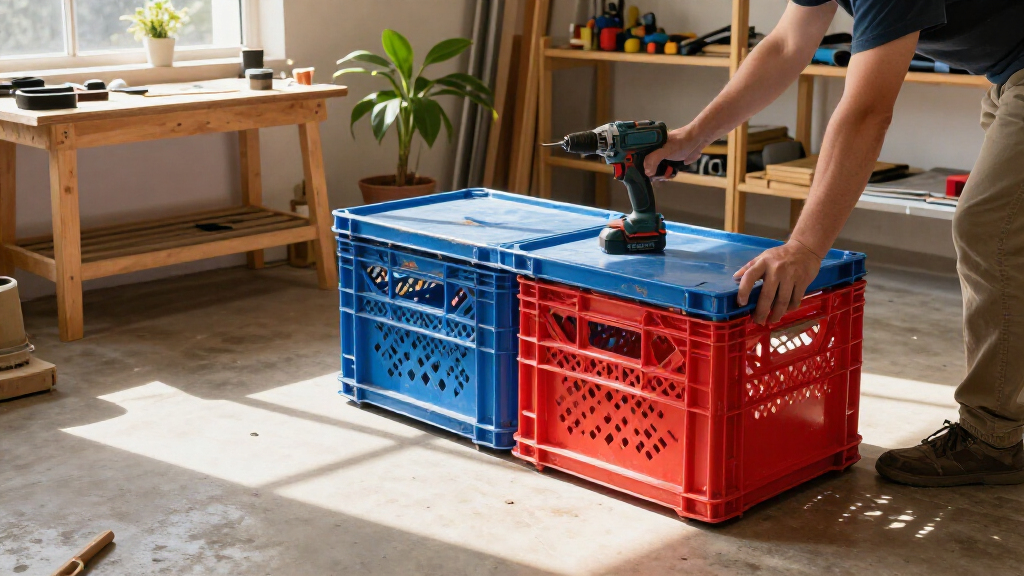
Before assembly, the guide says to wash the crates if needed. It recommends stacking them with their openings facing forward in a two-wide, four-high arrangement, or turning the layout sideways for a horizontal unit. Once the crates are aligned, connect neighboring sides with multiple cable ties, then trim the extra ends. Put one plywood piece into each cubby to create a bottom surface. The guide also suggests attaching a thin plywood panel across the top for a smoother finish.
The guide advises moving the assembled unit carefully into place and considering a furniture anchor kit. It suggests using the cubbies for books, plants, picture frames, fabric bins, clothing, linens or records. The plywood inserts can be covered with contact paper, or replaced with suitable trays, shallow baskets, tiles or large books. Painting the crates is another option; the guide says plastic surfaces usually need light sanding before spray paint is applied.
Build a bookshelf from repurposed milk crates
This guide turns matching crates into modular storage with cable ties and plywood inserts. Check materials and secure the finished unit to a wall.
Gather and prepare
Measure the inside of a crate before sizing the plywood.
Matching crates
Choose eight clean crates in usable condition; availability is not guaranteed.
Cable ties
Use multiple ties where neighboring sides meet, then trim the extra ends.
Plywood inserts
Fit one thin piece inside each crate to create a cubby bottom.
Assemble the unit
Keep crate openings facing forward and check that the stack is even.
Stack them two wide and four high, or turn the layout sideways.
Align neighboring crates and connect their touching sides with multiple cable ties.
Place a measured plywood piece in each cubby; a thin top panel is optional.
Make it fit your space
The modular layout and cubbies can serve storage or display needs.
- Use fewer crates for a smaller unit.
- Choose a vertical or horizontal arrangement.
- Cover inserts with contact paper or use suitable trays or shallow baskets.
- Store books, plants, frames, linens or records.
- Paint the crates; plastic usually needs light sanding before spray paint.
- Move the assembled unit carefully into place.
A Low-Cost Alternative to Store-Bought Shelving
The project offers readers a way to reuse crates as modular household storage rather than purchase a conventional bookcase. Because the crates form separate cubbies, the same basic structure can hold books alongside display items or belongings placed in containers. The layout can also be adjusted: fewer crates can make a smaller unit, while a horizontal arrangement changes the shape without changing the core assembly method.
Its appeal depends on access to suitable crates and materials, as well as the finished unit’s stability. The guide does not provide a price estimate, weight limit or tested load capacity, so readers should not assume the bookshelf can safely hold any quantity or type of item. Wall anchoring is a practical safety step, particularly where a unit could be bumped or accessed by children.
Popular right now

KitchenAid Artisan Series 5-Quart Tilt-Head Stand Mixer, Juniper (KSM150PS)

Ninja Foodi 10-Qt DualZone 6-in-1 Air Fryer, Black (DZ302)

Philips 2300 Series Fully Automatic Espresso Machine with LatteGo
As an affiliate, we earn on qualifying purchases.
How the Crate Bookcase Is Assembled
The design described in the guide relies on crates as the frame rather than requiring a conventional timber structure. Cable ties join the adjoining sides, and the plywood pieces provide surfaces at the base of each crate opening. The guide says the measurements are not fixed: each insert should match the internal dimensions of the crate being used.
The guide presents the build as accessible to people with limited furniture-making experience, but it does not offer independent testing or engineering specifications. It also mentions finding crates through OfferUp or Facebook Marketplace, or asking local establishments, without confirming that those options will produce crates in usable condition. Inspecting each crate before assembly and checking that the stack is even are sensible steps before securing the pieces.
Load Limits and Stability Are Unspecified
The guide does not state how much weight the completed bookshelf can support, how strong the crates or cable ties need to be, or whether the design has been tested under load. It also does not specify crate dimensions, plywood thickness, a particular tie rating or a tested anchoring method. Those details can vary with the materials and the surface where the unit is placed, so the suggested design should not be treated as a rated piece of furniture.
It is also unclear how readily readers can obtain eight matching crates or what the project would cost in their area. The article names marketplaces and local businesses as possible sources, but reports no confirmed supplier, price or availability. Readers will need to check the condition and dimensions of their own materials before starting.
Check Materials Before Building
Anyone planning the project should first gather crates that are matching, clean and in usable condition, then measure their interiors before cutting or buying plywood. The guide recommends using multiple cable ties at each adjoining side and trimming loose tie ends. Before loading the shelves, place the unit where it will be used and secure it to the wall with an appropriate furniture anchor.
The guide does not announce a follow-up or additional testing. The next steps depend on the builder: choose a vertical or horizontal layout, decide how to finish the inserts, and distribute items with the unprovided load limits in mind. If the crates feel unstable or the wall anchoring is unsuitable for the location, the design may need changes before it is used.
Key Questions
What materials does the milk-crate bookshelf require?
The guide’s suggested build calls for eight matching milk crates, cable ties and eight thin plywood pieces sized to fit inside the crates. An optional plywood top and wall-anchor hardware can also be used.
How are the crates connected?
According to the guide, stack the crates with their openings facing forward, align the sides, and use multiple cable ties along each touching side. Trim the extra tie ends after securing the stack.
Can the bookshelf be made in a different size?
The guide says the crates can be arranged horizontally or used in a smaller number. The example uses a two-by-four layout, but it does not provide tested specifications for other arrangements.
Is the finished bookshelf safe from tipping?
The guide advises considering a wall anchor to help prevent tip-over accidents. It gives no load rating or stability testing, so the finished unit should be checked carefully and not assumed to support a particular weight.
How can the bookshelf be decorated?
The guide mentions covering the plywood with contact paper, using trays or shallow baskets, and painting the crates. It says plastic usually needs light sanding before spray paint to help it adhere.
Source: hunker.com