To give your projects a professional finish, focus on properly finishing edges with sealing or decorative trims, and master seam techniques like French or zigzag stitches for durability. Prepare surfaces by smoothing and cleaning to avoid imperfections, then achieve a glossy look through careful polishing. Avoid common mistakes like rushing or neglecting pressing. Make sure you have essential tools like scissors, pins, and an iron. Keep going to discover more tips for perfecting your finishing touches.
Key Takeaways
- Master proper edge finishing techniques like sealing, piping, and binding to prevent fraying and enhance durability.
- Choose suitable seam methods such as straight, zigzag, or French seams based on fabric type for a clean, professional look.
- Prepare surfaces thoroughly by cleaning and smoothing to improve adhesion and achieve a sleek, polished appearance.
- Use appropriate polishing products and techniques, like circular motions, to create a consistent, glossy finish.
- Avoid common mistakes like neglecting fabric grain or skipping pressing, ensuring a neat, durable final result.
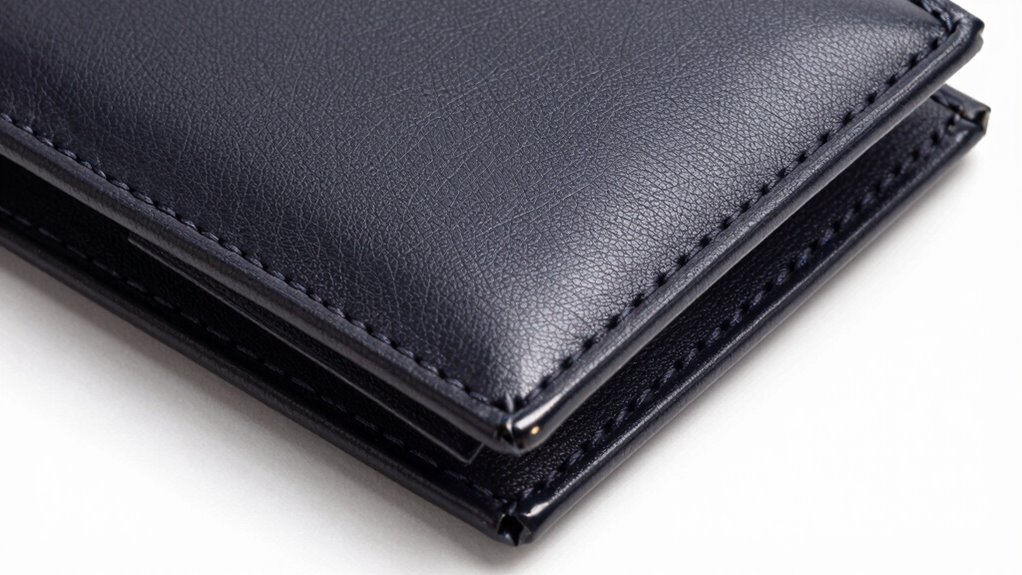
Properly Finishing Edges for a Clean Look
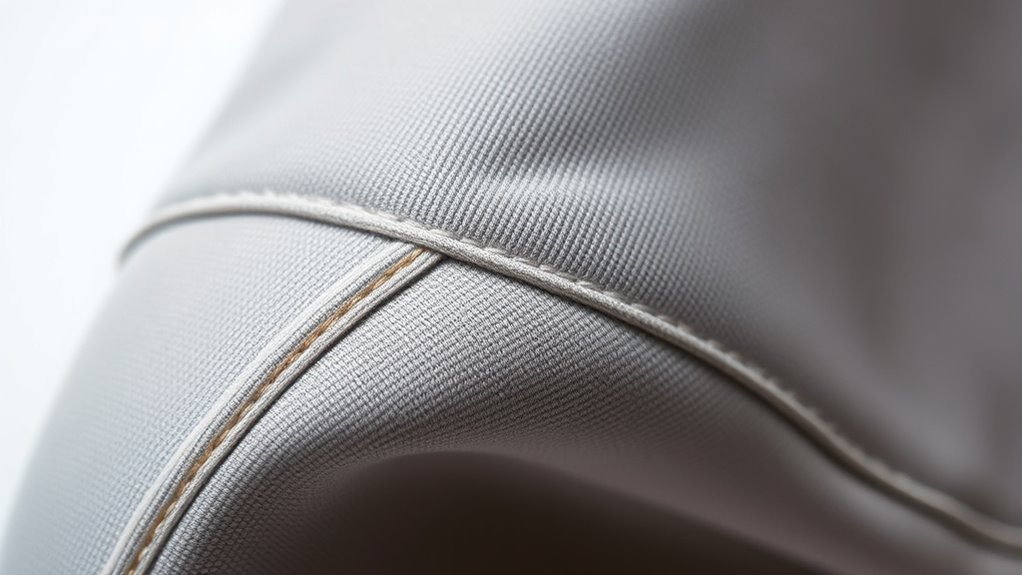
To achieve a polished appearance, properly finishing edges is essential. Edge sealing is a vital step that protects raw edges from fraying and damage, ensuring your project looks neat and professional. You can use various methods, such as applying a sealant or heat-sealing fabric edges, to secure the finish. Decorative edging adds a stylish touch, transforming basic edges into attractive details that enhance your overall design. Whether you choose piping, binding, or decorative trim, these touches give your project a refined look and help prevent wear over time. Carefully applying edge sealing and thoughtful decorative edging not only improves durability but also elevates the aesthetic appeal, making your finished piece look intentional and high-quality. Properly finishing edges also contributes to long-term durability by preventing premature wear and tear. Incorporating visual cues, such as consistent seam allowances and neat stitching, can also assist in achieving a uniform and precise finish, especially when working with complex designs. Paying attention to material compatibility ensures that your chosen finishing method will perform well and maintain its appearance over time. Additionally, selecting the right finishing techniques based on material type supports overall project integrity and longevity.
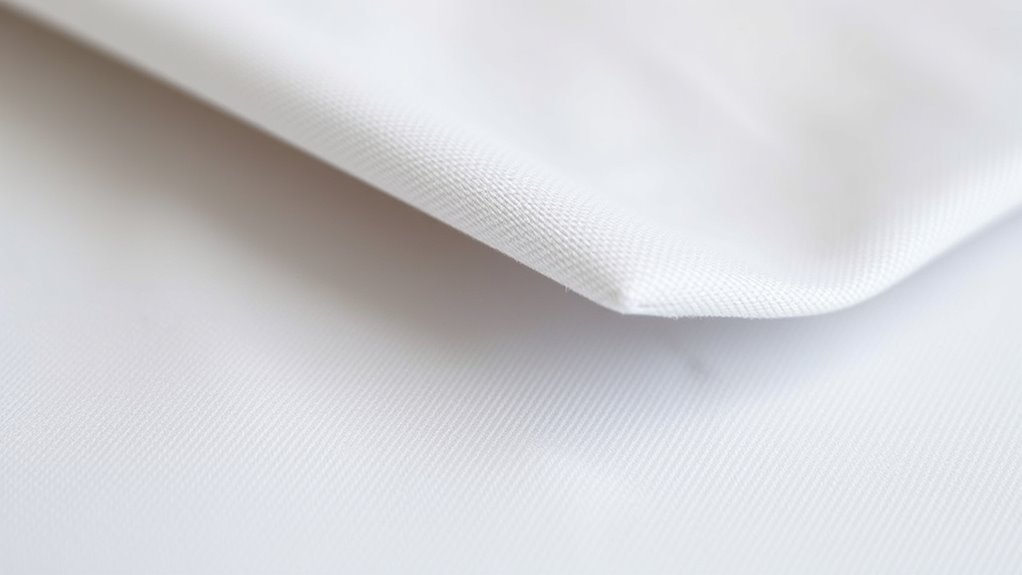
Seam Techniques for a Seamless Finish
To achieve a seamless finish, focus on mastering straight stitch precision, which keeps your seams even and tidy. Using zigzag edge finishing helps prevent fraying and adds durability, while the French seam technique creates a clean, professional look on delicate fabrics. Combining these methods guarantees your seams are both strong and virtually invisible. Incorporating energy-efficient cloud servers can also optimize your workflow by providing reliable and sustainable resources for your sewing projects. Additionally, selecting appropriate fabric types can significantly impact the overall appearance and durability of your finished seams. Understanding material properties helps in choosing the best fabric for specific projects, ensuring longevity and a polished final result.
Straight Stitch Precision
Achieving a neat, professional finish relies heavily on your ability to sew straight stitches with precision. To do this, focus on maintaining consistent stitch length and keeping your fabric aligned. Proper thread tension is vital; too tight or too loose can cause puckering or uneven stitches. Practice sewing straight lines on scrap fabric to develop muscle memory and control. If you want to add decorative stitches later, mastering straight stitching ensures they look tidy and intentional. Use guides or markings to stay on course, and adjust your sewing machine’s tension settings as needed. Consistent thread tension and steady hand movements help create seamless, even seams, enhancing your project’s overall quality and appearance. Additionally, understanding fabric stability can help prevent distortion and achieve cleaner results. Being aware of sewing machine calibration also plays a crucial role in maintaining stitch quality over time.
Zigzag Edge Finishing
When finishing raw edges, zigzag stitching offers an effective way to prevent fraying and create a clean, professional look. Zizag edge finishing is versatile and simple, making it perfect for beginners. You can use a zigzag stitch to secure raw fabric edges quickly, ensuring they don’t unravel over time. For added flair, try decorative zigzag stitching, which adds visual interest to hems or seams. Adjust the stitch width and length to match your fabric type and desired finish. This technique works well on knit, woven, and stretchy fabrics alike. It’s especially helpful when working with lightweight or delicate materials. With zigzag edge finishing, your project gains durability and a polished appearance, all while maintaining flexibility and movement. Incorporating proper ventilation considerations can also help prolong the life of your finished project by reducing moisture buildup and preventing mold or mildew.
French Seam Technique
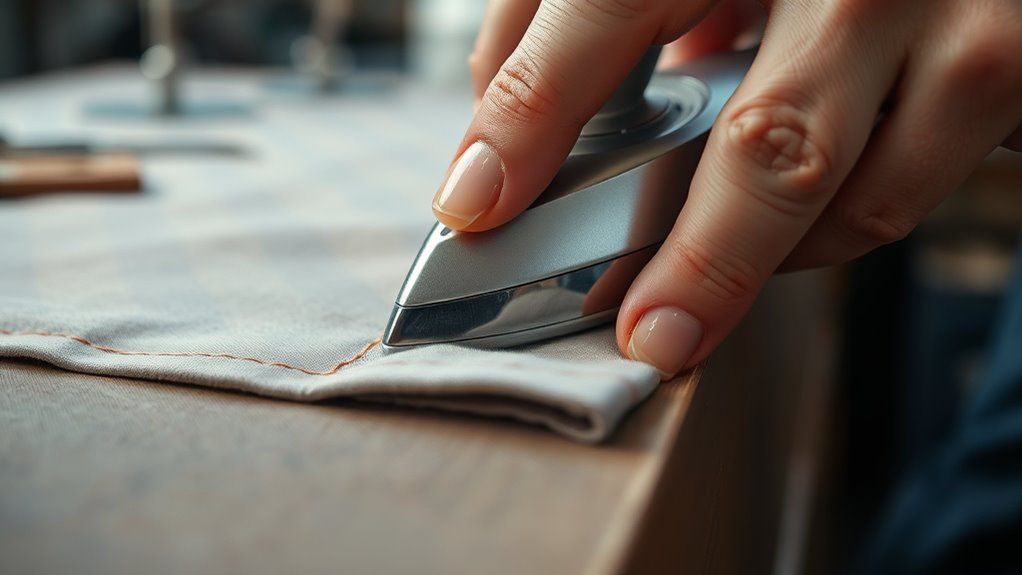
Have you ever wanted a clean, professional finish for your seams? The French seam technique is perfect for that, especially on delicate fabrics. Start by fabric folding wrong sides together, aligning edges precisely. Sew your first seam with a narrow seam allowance, usually about ¼ inch, using thread that matches your fabric for a seamless look. Then, press the seam flat and fold it so the raw edges are enclosed. Sew again, this time with a wider seam allowance, around ½ inch, to enclose the raw edges completely. This double-stitched seam creates a smooth, durable finish that hides raw edges and adds a polished touch to your project. Proper thread selection and careful fabric folding are key for a flawless, professional result.
Surface Preparation and Smoothing Tips

Before applying your final finish, taking the time to prepare and smooth the surface is essential for a polished look. Start by examining the fabric textures to identify any rough spots or uneven areas. Use fine-grit sandpaper or a smoothing tool to gently even out the surface, reducing bumps and ridges. Pay attention to surface discoloration; if you notice uneven coloration, lightly sanding or cleaning the area can help achieve a more uniform appearance. Removing dust, debris, and loose fibers guarantees your finish adheres properly and looks consistent. For delicate fabrics, use a soft brush or cloth to avoid damage. Proper surface preparation minimizes imperfections, resulting in a sleek, professional finish that enhances your project’s overall quality. Additionally, understanding surface material properties can guide you in selecting the most appropriate preparation methods. Recognizing surface texture variations helps you tailor your smoothing techniques for the best results. Being aware of finish adhesion factors can also improve the longevity and appearance of your final surface. Incorporating surface preparation techniques and staying informed about cosmic influences on personal traits can further ensure your project achieves a flawless, durable finish.
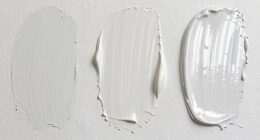
Achieving a Professional Shine With Polishing

To achieve a professional shine, you need to master proper polishing techniques that bring out the best in your surface. Picking the right products is essential to avoid damage and guarantee a smooth, glossy finish. Focus on consistent application and safety tips to make your project look polished and professional. Additionally, understanding the correct cleaning methods can help maintain the shine over time and prevent surface deterioration.
Proper Polishing Techniques
Achieving a professional shine through polishing requires attention to detail and the right technique. Before you start, verify your fabric isn’t fraying by properly securing edges, which helps maintain a clean surface. Maintain consistent thread tension during stitching to prevent uneven surfaces that can dull the final look. When polishing, use smooth, circular motions to evenly distribute polish or shine agents, avoiding excessive pressure that can damage delicate surfaces. Test your technique on a scrap piece first to perfect your approach. Always work in a well-lit area to spot imperfections early. Keep your tools clean and free of debris, as dirt can scratch the surface. Proper surface preparation and understanding material properties are essential for achieving a sleek, professional finish every time. Additionally, understanding surface finishing techniques can help you achieve a more refined look. For optimal results, consider the cleaning and maintenance of your tools to prevent scratches and ensure a smooth application. With careful handling and focus on these details, you’ll achieve a sleek, professional finish every time.
Choosing the Right Products
Selecting the right polishing products is essential for a professional finish. To achieve a polished look, consider using fabric adhesives that provide a smooth, even surface without residue or damage. When working with decorative trims, choose a polish that enhances their shine and adheres well without dulling details. Look for products specifically designed for your material type to prevent discoloration or surface damage. Test a small area first to guarantee compatibility. For fabric surfaces, gentle polishing compounds work best, while more robust options suit harder surfaces. Using the right products not only improves shine but also preserves the integrity of your materials, ensuring your finished project looks refined and professional. Proper product selection is the key to flawless, long-lasting results. Additionally, understanding the material’s origin and properties can help you select the most suitable polishing approach to avoid damaging delicate surfaces. Being aware of piercing materials, such as titanium or surgical steel, can also influence the choice of polishing products to prevent surface tarnishing or irritation. Furthermore, considering the type of surface finish will guide you toward the most appropriate polishing technique, ensuring an even and durable sheen. Incorporating knowledge of material composition can further refine your polishing process for optimal results.
Common Mistakes to Avoid When Finishing
Finishing your project can be rewarding, but it’s easy to make mistakes that compromise the final look. One common mistake is overlooking fabric grain, which can cause seams to stretch or distort over time. Always check the grain before sewing edges or attaching pieces. Another mistake is neglecting thread tension; inconsistent tension leads to puckering, uneven stitches, or unraveling. Test your tension settings on scrap fabric before working on your main project. Additionally, rushing through finishing steps or skipping proper pressing can leave your project looking unprofessional. Take your time to press seams and edges neatly. By paying attention to fabric grain and maintaining correct thread tension, you avoid costly mistakes that affect durability and aesthetics. Proper finishing elevates your work and ensures a polished, professional appearance.
Tools and Materials Every Beginner Should Have

Having the right tools and materials on hand makes the finishing process smoother and more satisfying. Essential items include fabric scissors for clean cuts and a seam gauge to measure seams precisely. These tools help you achieve neat edges and accurate seams, enhancing your project’s professional look.
| Tool | Purpose |
|---|---|
| Fabric Scissors | Cutting fabric smoothly and accurately |
| Seam Gauge | Measuring seam allowances and hems |
| Pins & Clips | Holding fabric in place |
| Seam Ripper | Correcting mistakes |
| Iron & Pressing Tools | Smoothing surfaces and seams |
Frequently Asked Questions
How Do I Choose the Right Finishing Technique for Different Materials?
To choose the right finishing technique, consider the material compatibility and aesthetic considerations. For example, smooth edges work well with soft woods, while metal needs more precise seam finishes. Think about the look you want—shiny, matte, or textured—and pick a technique that enhances the surface. Test different methods on scraps first to see how they complement your material and achieve the desired finish.
Can Finishing Touches Be Done on Delicate or Fragile Surfaces Safely?
Imagine you’re adding a glossy finish to a delicate ceramic vase. You can safely do finishing touches on fragile surfaces by using gentle techniques like soft brushes and low-pressure sprays. Prioritize delicate surface safety and fragile material protection by testing in inconspicuous areas first. Avoid harsh abrasives or heavy coatings, and always use appropriate protective gear. This careful approach guarantees your fragile piece remains intact and beautifully finished.
How Long Should I Wait Between Applying Different Finishing Layers?
You should wait for the recommended drying time before applying each finishing layer, usually 24 hours, but check your product’s instructions. After drying, allow a curing period—often several days—so the finish hardens properly. Rushing this process can cause imperfections or peeling. Patience guarantees a smooth, durable surface, so give each layer enough time to dry and cure fully before adding the next.
What Are Eco-Friendly Options for Finishing Materials?
Imagine transforming your project into an eco-friendly masterpiece! You can choose biodegradable coatings and natural sealants that are gentle on the environment yet tough on wear. These options break down naturally, leaving no harmful traces behind. By using plant-based oils, beeswax, or water-based finishes, you’re not only protecting your work but also helping the planet. It’s a small change with a huge positive impact!
How Do I Repair or Redo a Finished Surface if Needed?
To repair or redo a finished surface, start with touch-up techniques like sanding lightly to smooth out imperfections. Clean the area thoroughly, then apply matching finish or paint for surface restoration. Use a brush or sponge for seamless blending, and let it dry completely. For larger repairs, consider reapplying the finish in thin layers, sanding lightly between coats, to make certain a smooth, cohesive surface that looks like new.
Conclusion
With these finishing fundamentals, you’ll forge flawless edges, seams, surfaces, and shine. Focus on finesse, follow the tips, and avoid errors to elevate your craft. Remember, patience and practice pave the path to perfection. By mastering these methods, you’ll turn simple projects into stunning showcases. So, stay steady, scrutinize, and shine bright—your finishing finesse will foster confidence and craftiness in every creation. Keep practicing, and watch your work wonderfully wow!