TL;DR

Get business pricing on tools and workshop supplies
- Business-only prices and quantity discounts
- Tax-exempt purchasing
- Multiple users, one account, clear invoices
Cordless power drills for woodworking should give you steady speed, a clutch you can adjust, and enough battery capacity for your projects. A compact 12-volt drill suits many furniture and cabinet jobs, while a 18- or 20-volt model offers more reserve for larger holes and longer sessions. Match the bit to the wood, practice on scrap, and let the tool do the work.
A screw driven a fraction too deep can leave a crater in a cabinet door that took an afternoon to build. A well-chosen cordless drill gives you control over that final turn, along with the freedom to work far from an outlet.
This guide explains what matters in a woodworking drill, how to match voltage and features to your projects, and how to get cleaner holes and more consistent screws. You’ll also find a simple way to choose a drill without paying for power you rarely use.
Prioritize a variable-speed trigger, adjustable clutch, and comfortable grip for everyday woodworking.
Choose 12 volts for lighter assembly and 18 or 20 volts when you often drill wide holes or work in dense wood.
Match the bit to the hole, clamp the work, and use scrap to limit tear-out.
Drill pilot holes and test the clutch setting before driving screws into a finished piece.
Keep batteries and chuck jaws clear of sawdust, and check for hidden hardware before drilling.
Choose control and comfort before chasing maximum power
Cordless power drills for woodworking work best when you can control their speed and torque, hold them comfortably, and reach the work without wrestling the tool. For furniture, shelves, and cabinet repairs, smooth starts and a useful clutch often matter more than the biggest motor rating. Your drill should feel like a steady hand, not a small engine trying to pull away.
In a workshop, torque means turning force; it helps drive screws and bore holes, but more force can also split a narrow rail or bury a screw head. An adjustable clutch cuts power when resistance reaches a setting you choose. That makes it a practical guardrail when you’re driving a dozen screws into a pine bookcase.
Look for a variable-speed trigger, a two-speed gearbox, and a clutch with clear settings. A low gear gives you more control for screws; a higher gear suits drilling smaller holes. If you can, hold the drill in a shop before buying: a bulky handle may tire your wrist during a long afternoon of assembling drawer boxes.
Pick a voltage that fits the work on your bench
Cordless power drills for woodworking come in several battery sizes, and the right one depends on the holes you drill and how long you work. A compact 12-volt model can handle pilot holes, hinge screws, and everyday furniture assembly with less weight in your hand. An 18- or 20-volt drill gives you more reserve for wide bits, dense hardwood, and repeated heavy work.
Voltage alone does not tell you how long a battery will last. Battery capacity, usually listed in amp-hours, affects runtime; a higher amp-hour pack typically runs longer but adds weight. For example, a small battery keeps a drill nimble while you install hardware overhead, while a larger pack can save repeated trips to the charger during a built-in shelving project.
Battery platform matters too. If you already own tools from a brand, a compatible drill may let you share batteries and chargers. That can make a modest drill a smarter buy than a more powerful kit that starts an entirely new battery collection.
Use this quick checklist to compare drills
A useful woodworking drill balances control, weight, battery cost, and the size of holes you expect to make. Compare those practical traits before you focus on advertised power figures. A drill that feels manageable for a full project often beats a heavier model that spends most of its life on a shelf.
| Feature | What it gives you | Good fit |
|---|---|---|
| 12-volt platform | Lower weight and easy handling | Furniture, cabinets, hardware |
| 18- or 20-volt platform | More reserve for demanding cuts | Large holes, dense wood, long sessions |
| Adjustable clutch | More consistent screw depth | Assembly and repeat fastening |
| Two-speed gearbox | Slow screw driving or faster drilling | Mixed shop tasks |
Imagine building a pine shoe bench with a dozen screws and a few pilot holes. A light 12-volt drill with a clutch may make the work pleasant and accurate; if your next job is boring wide holes through oak, the heavier 18- or 20-volt option may feel worth it.
Drill cleaner holes with the right bit and a steady setup
Clean woodworking holes come from a sharp bit, a supported workpiece, and steady pressure, not brute force. Choose a bit made for the hole you need: a brad-point bit helps locate small holes, while a twist bit handles many general-purpose jobs. For a wide, flat-bottomed hole, a Forstner bit can leave a neat rim when the drill has enough power and you work at a sensible speed.
For example, if you’re adding a shelf pin to a cabinet side, mark the center carefully, clamp a scrap board beneath or behind the panel, and start slowly. The scrap supports the fibers as the bit exits, limiting the ragged tear-out that can spoil a finished face. A drill guide can help keep the hole square when accuracy matters.
Let the bit cut at its own pace. If it stalls, smokes, or packs with chips, ease off the trigger and clear the cut. A clean, sharp bit and a pause to remove shavings will often outperform a bigger drill pushed hard through the wood.
Drive screws to a clean, repeatable depth
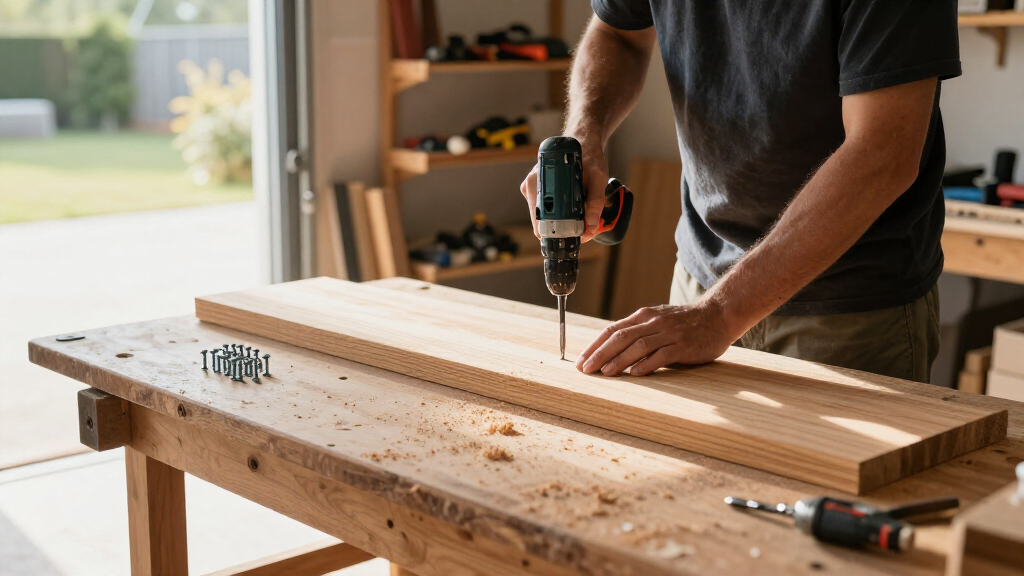
You can get consistent screw depth by drilling a pilot hole, setting the clutch on scrap, and driving each screw at a controlled speed. A pilot hole gives the screw a path and can reduce splitting, especially near the end of a board or in hardwood. The right diameter depends on the screw and wood, so test on an offcut before working on a visible part.
- Mark and clamp. Lay out the screw position and hold the boards firmly so they cannot shift.
- Drill a pilot hole. Use a bit suited to the screw and material; keep the drill square to the surface.
- Set the clutch on scrap. Start low, then raise the setting until the screw sits flush without crushing the wood.
- Drive slowly near the surface. Ease off as the head meets the material, then check the result before moving to the next screw.
When assembling a small oak frame, this routine helps every screw sit at a similar depth. If you’re using a drill bit as a driver, match it carefully to the screw head; a slipping bit can chew up the recess before you notice.
Keep batteries and the drill ready for your next project
A few simple habits help your drill stay ready and make workshop work smoother. Charge batteries with the supplied charger, keep contacts free of sawdust, and store packs according to the maker’s instructions. If your project involves many holes, a second battery can keep you working while the first charges.
Wood dust gathers in chuck jaws and vents like fine flour on a dark countertop. Brush it away with a dry brush or cloth, and keep the tool out of piles of shavings. Check that the chuck grips the bit securely before you start; a loose bit can wobble, mark the work, or slip under load.
Before drilling into an assembled piece, check what lies behind the surface. A screw aimed into a hidden bracket or an existing fastener can damage the bit and the workpiece. For ordinary shop furniture, a quick look and a test on scrap can prevent the frustrating sound of metal meeting metal.
Frequently Asked Questions
Is a 12-volt drill strong enough for woodworking?
Yes, a good 12-volt drill can handle many common jobs, including pilot holes, cabinet hardware, and furniture assembly. Choose a stronger 18- or 20-volt model if you regularly bore wide holes, work in dense hardwood, or need longer runtime.
Should I use a drill or an impact driver for woodworking screws?
A drill gives you a clutch and more control over screw depth, so it’s a strong choice for careful assembly and finish work. An impact driver can help with long or large screws, but its rapid impacts can make delicate work harder to control.
Do I need a pilot hole before driving a wood screw?
A pilot hole is especially helpful near board ends, in hardwood, and when a screw could split a narrow piece. Test the bit size on scrap; the pilot should guide the screw without removing so much material that the threads lose their grip.
How can I stop a drill bit from tearing out the back of a board?
Clamp a scrap board tightly behind the workpiece so it supports the fibers as the bit exits. Start at a controlled speed and ease off as the bit breaks through; sharp bits also help leave a cleaner edge.
Conclusion
Choose a drill that feels steady in your hand and gives you control over speed and screw depth. Then pair it with sharp bits, a clamped workpiece, and a quick test on scrap. A clean hole and a flush screw are small details, but they’re the details that make a handmade piece feel finished.
Fall Picks
fall essentials
As an affiliate, we earn on qualifying purchases.